1800 parts
90 unique
Preliminary Design Review Slide Deck
Critical Design Review Slide Deck
Design Process Hilights


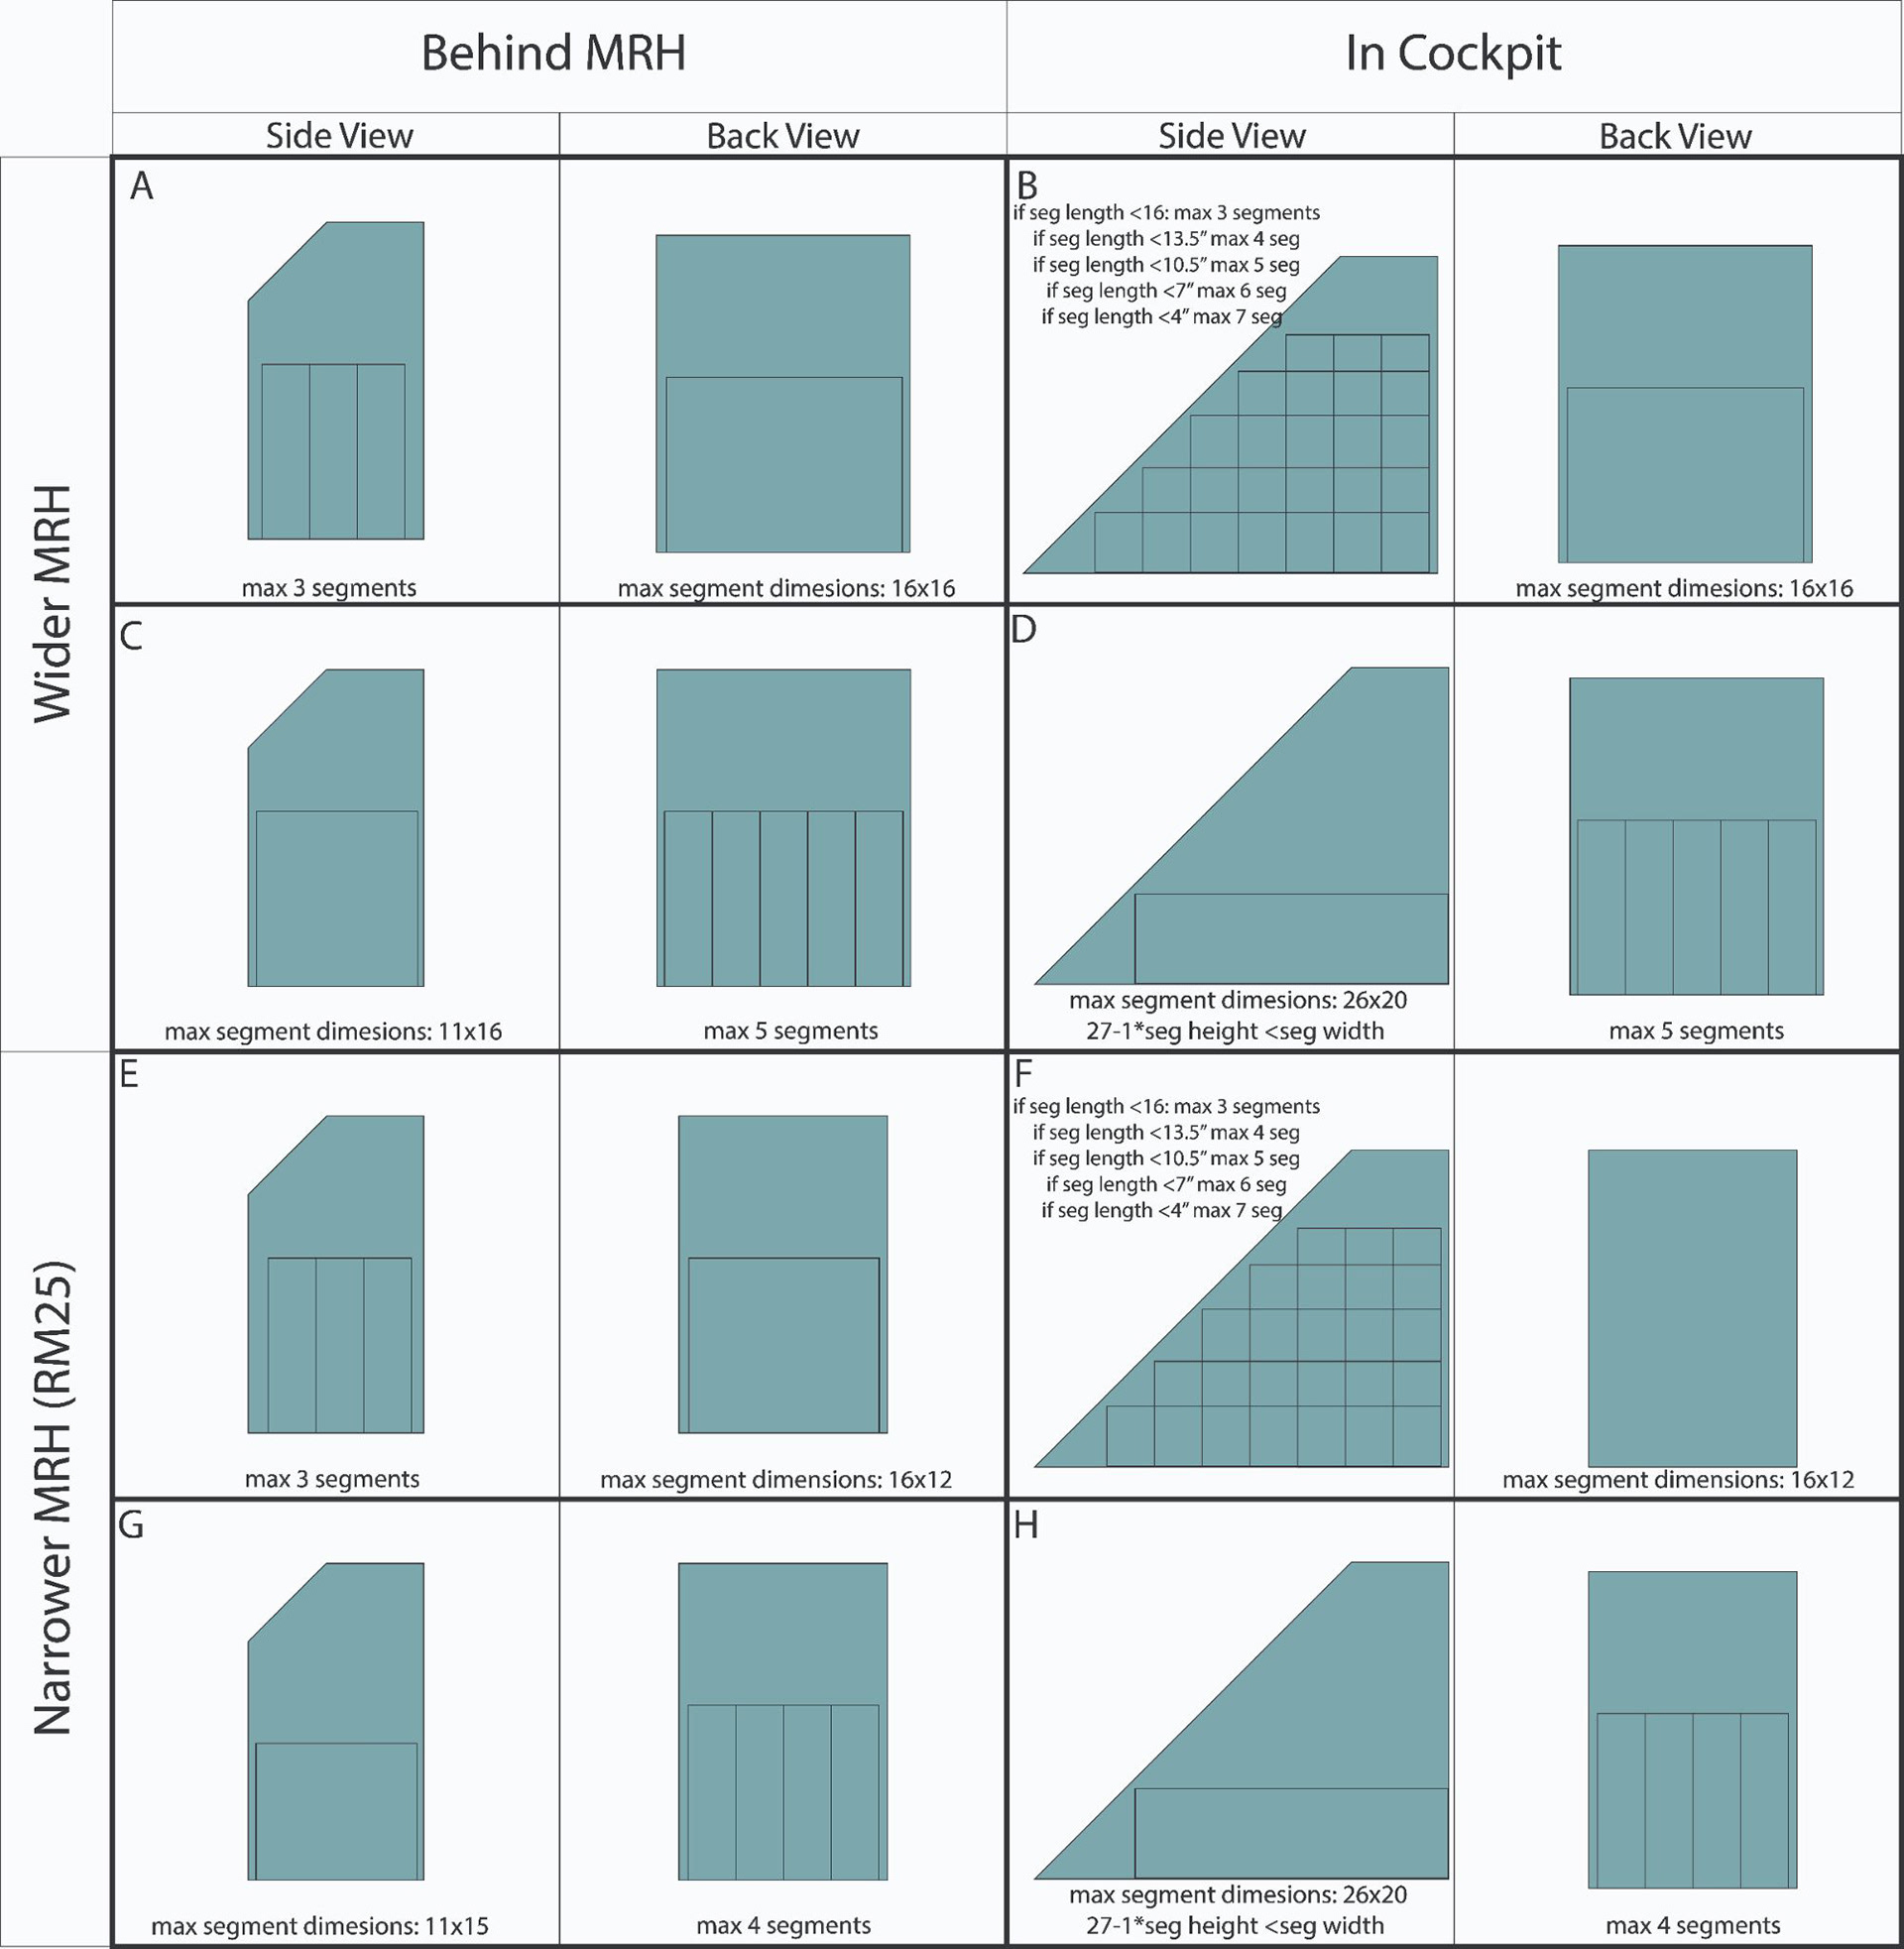
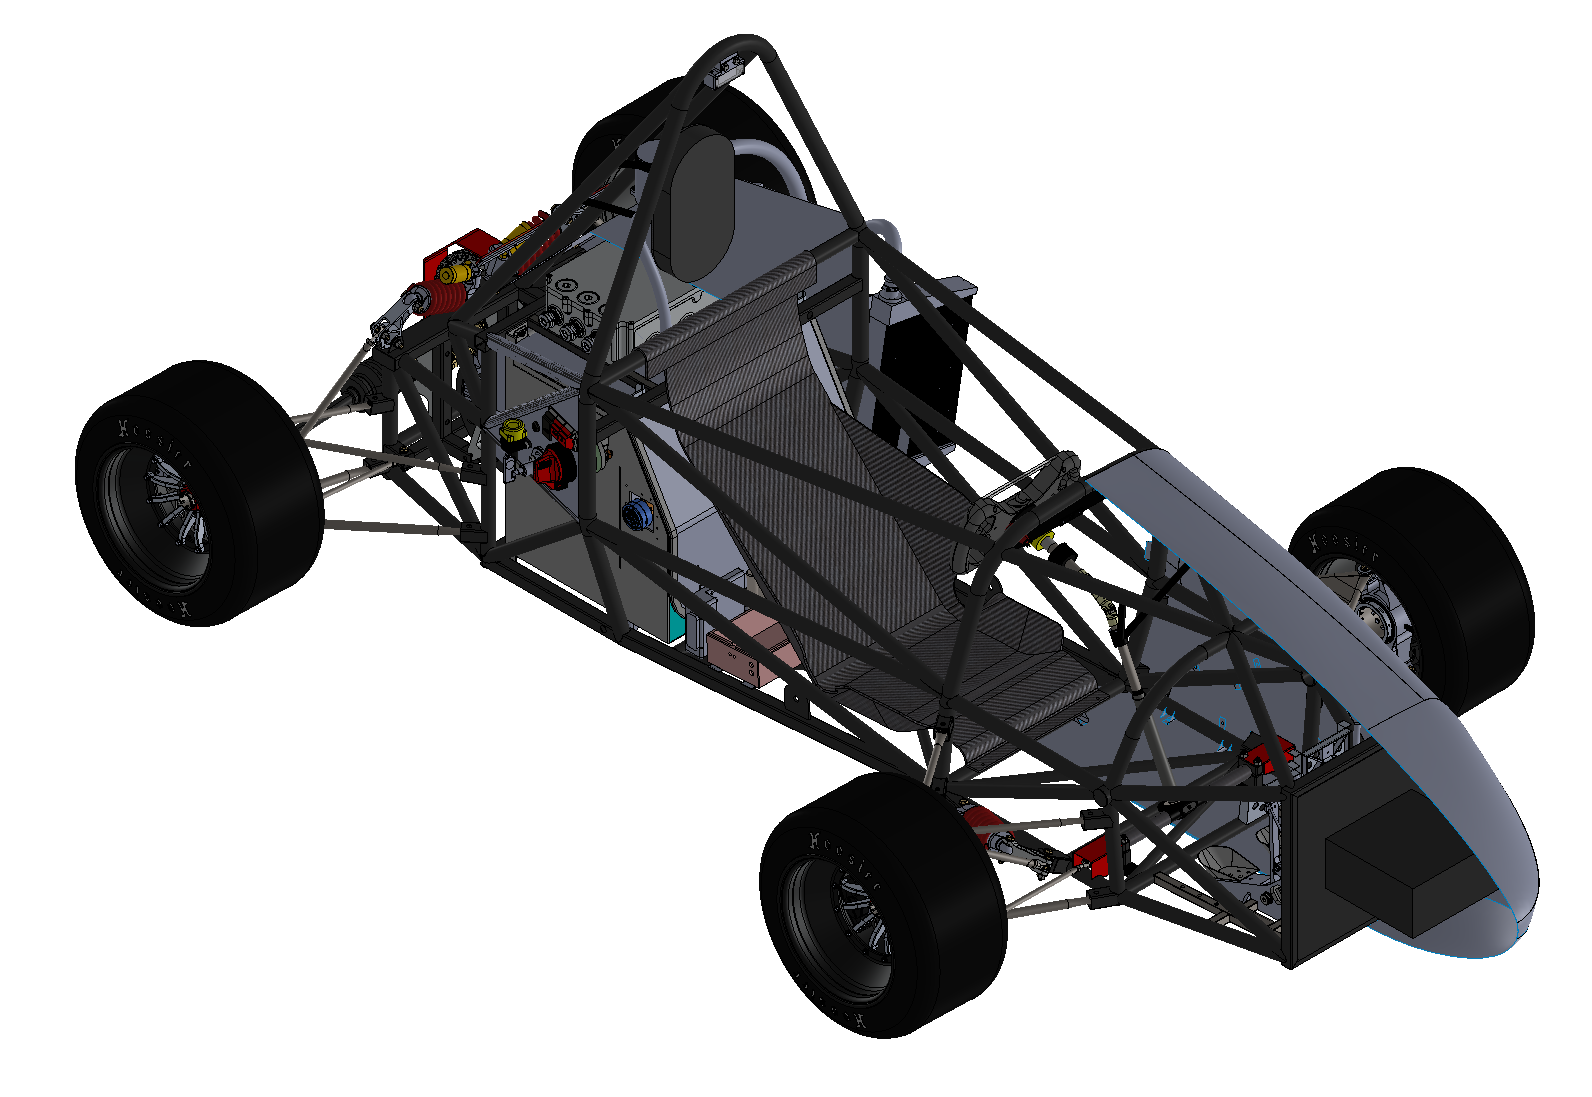
Final Design
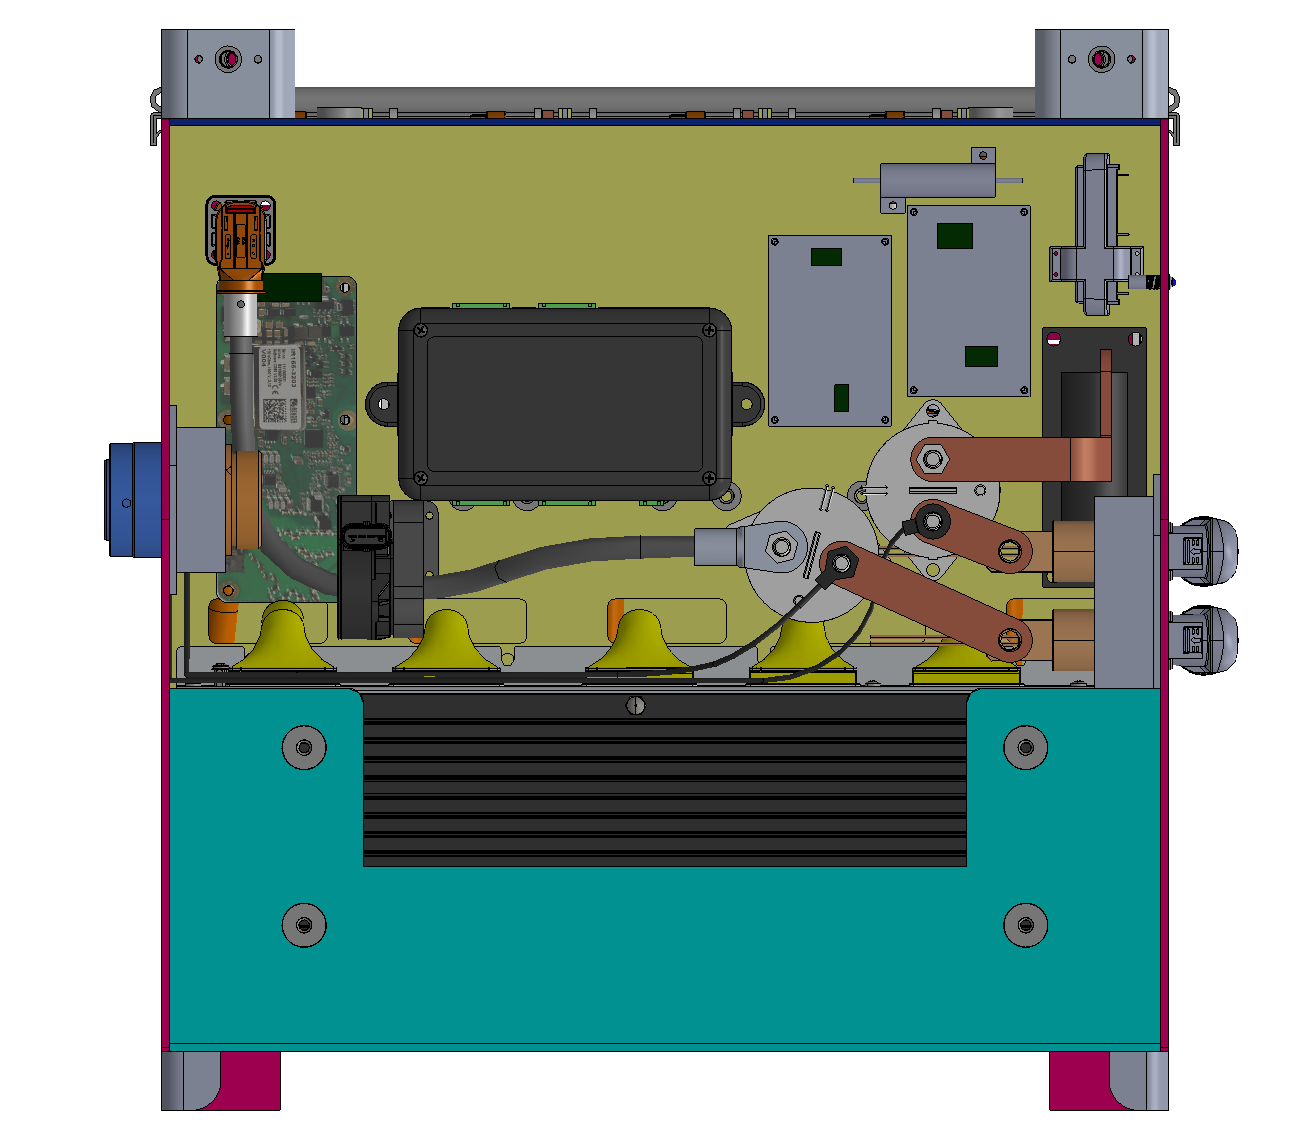
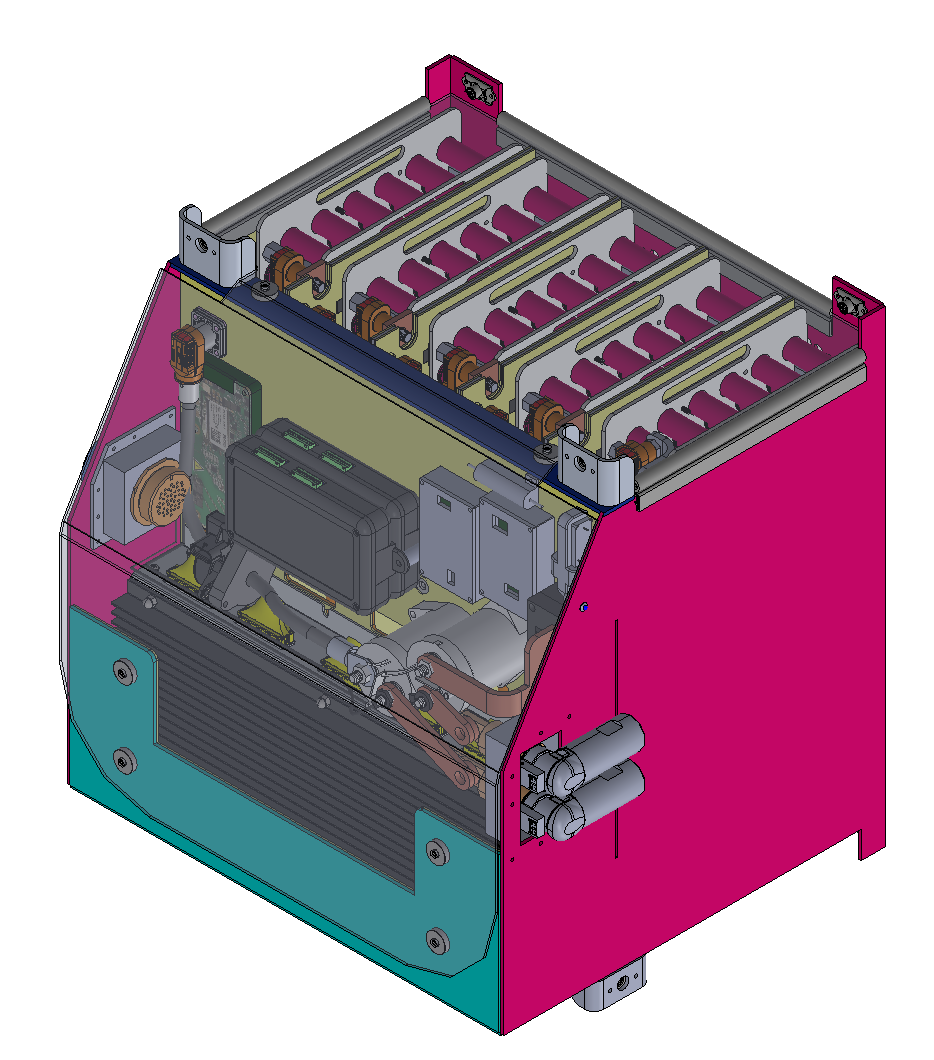
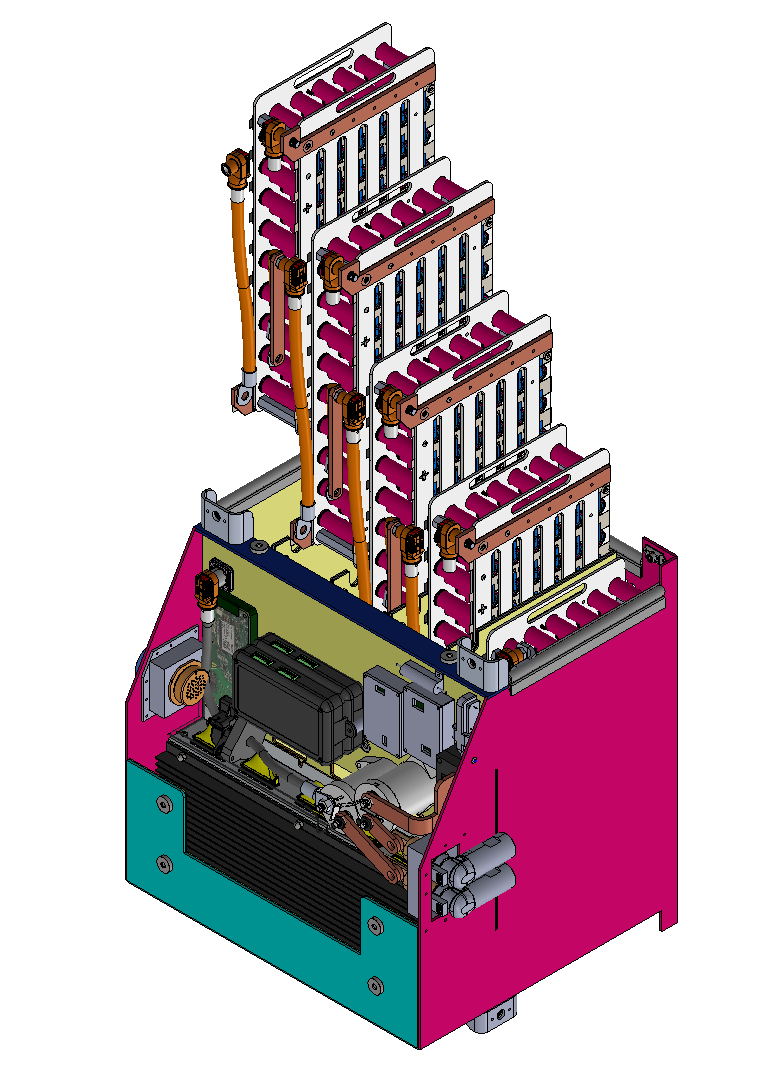
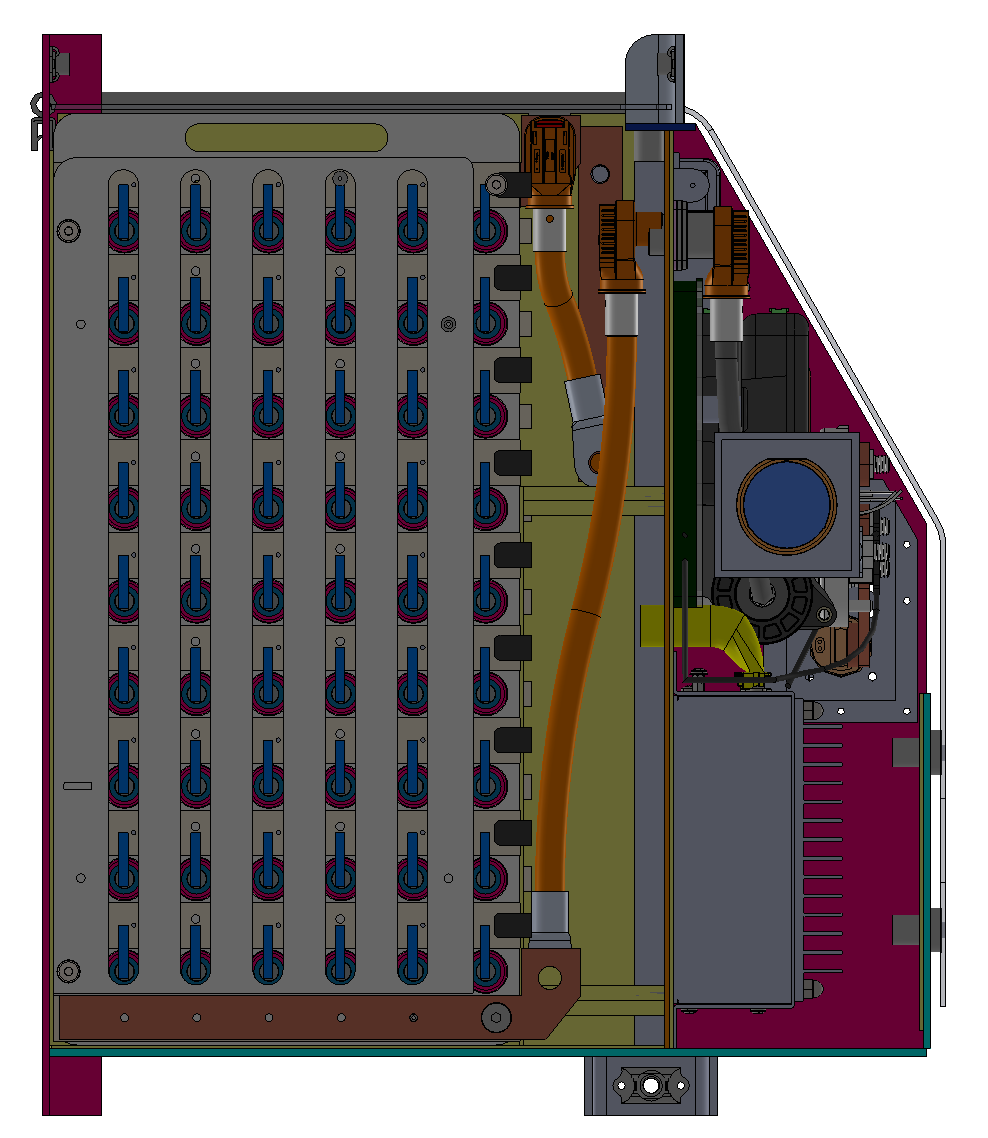
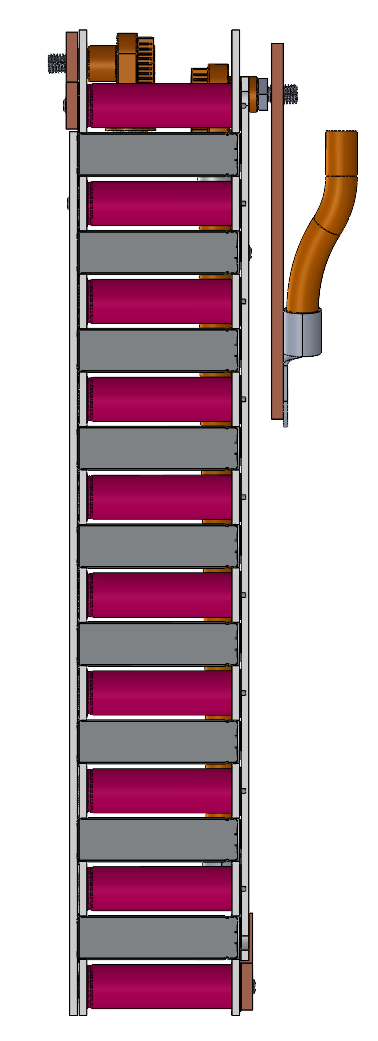
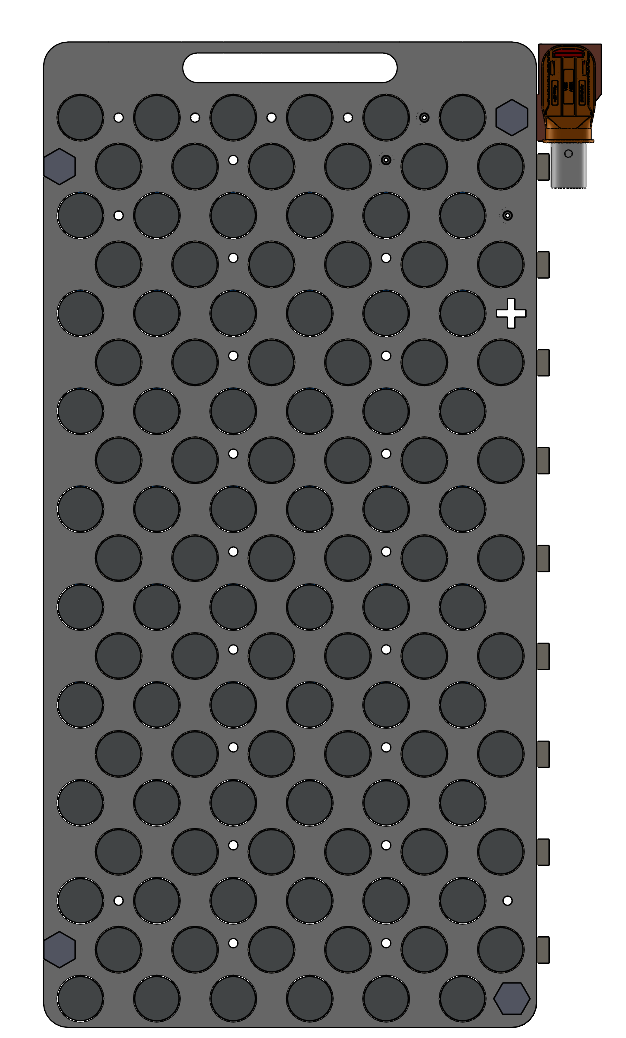
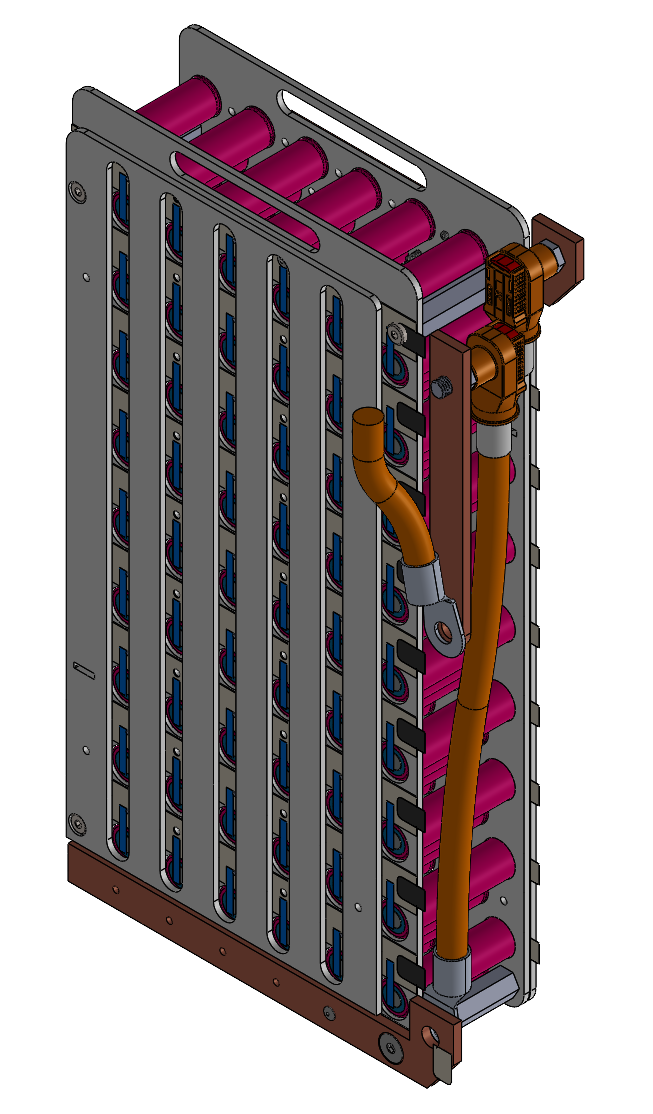
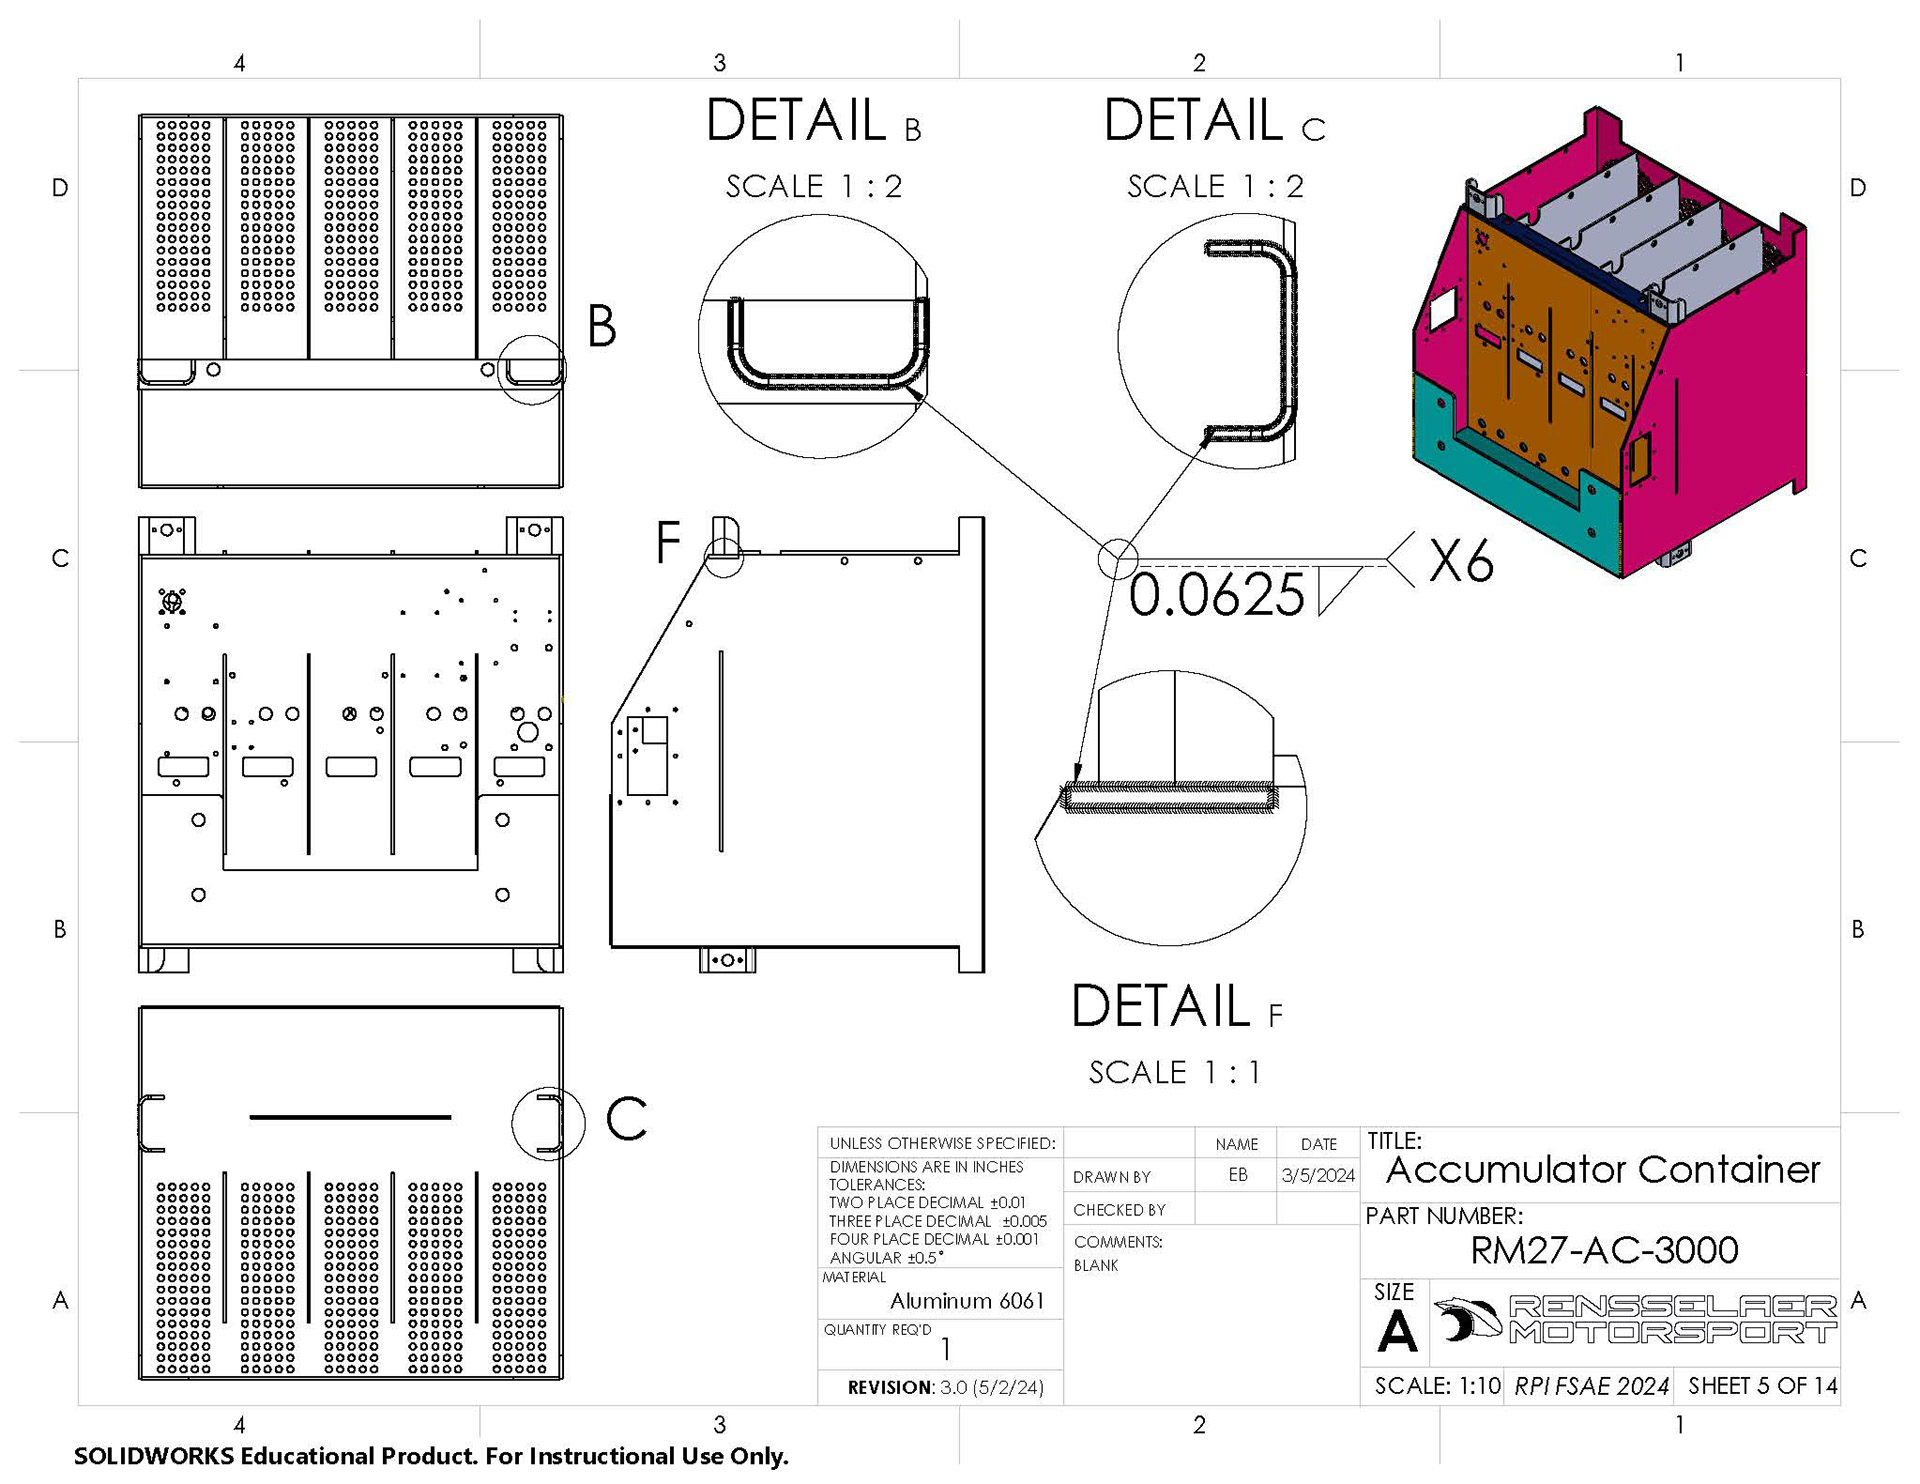
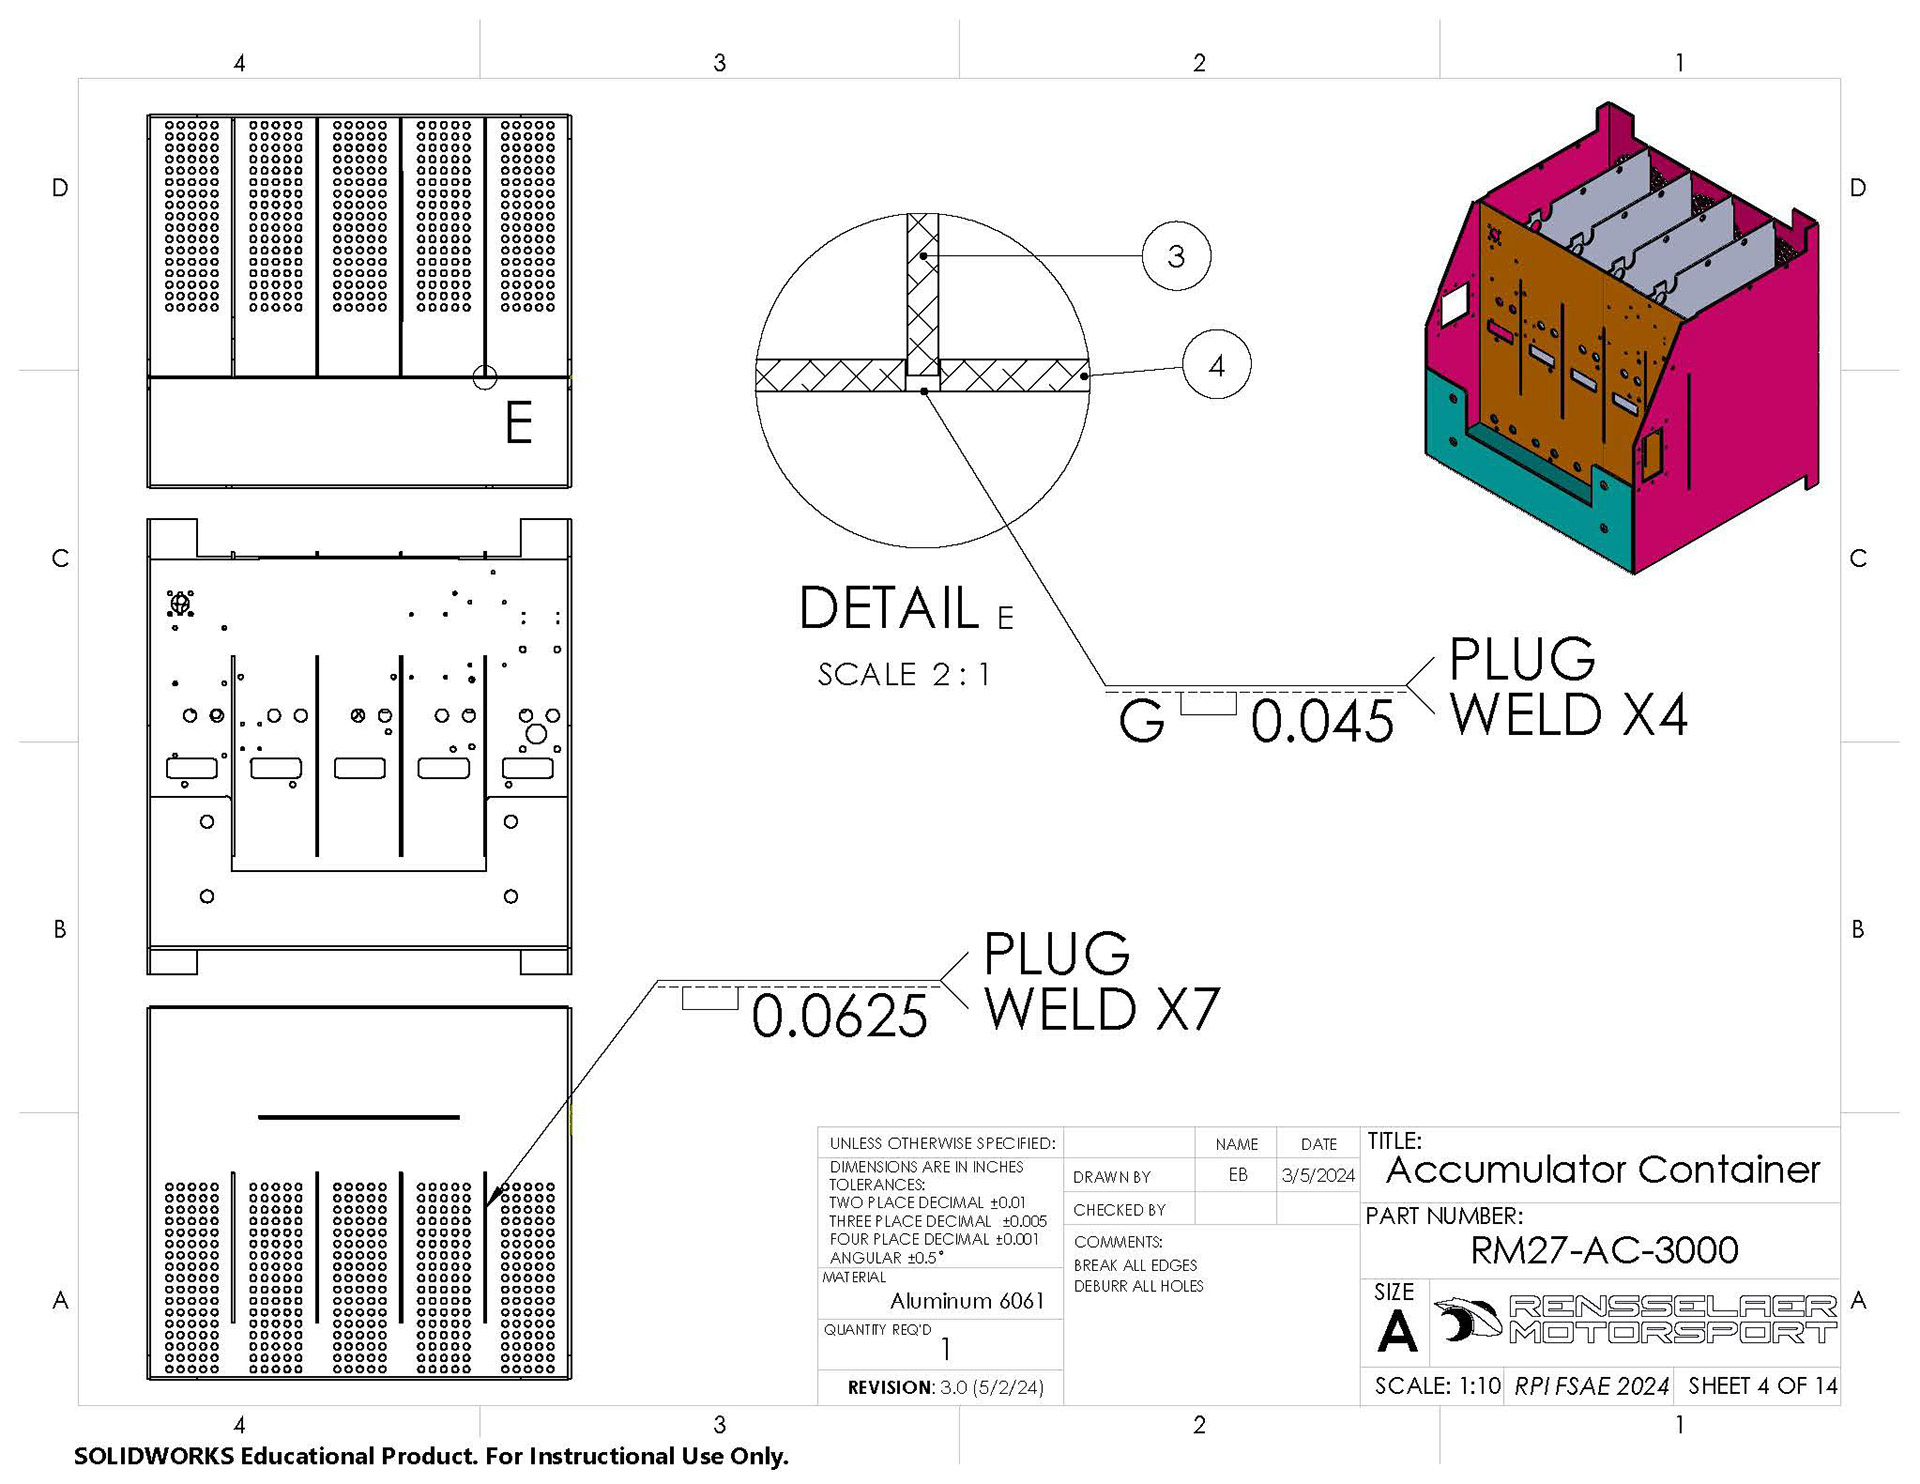
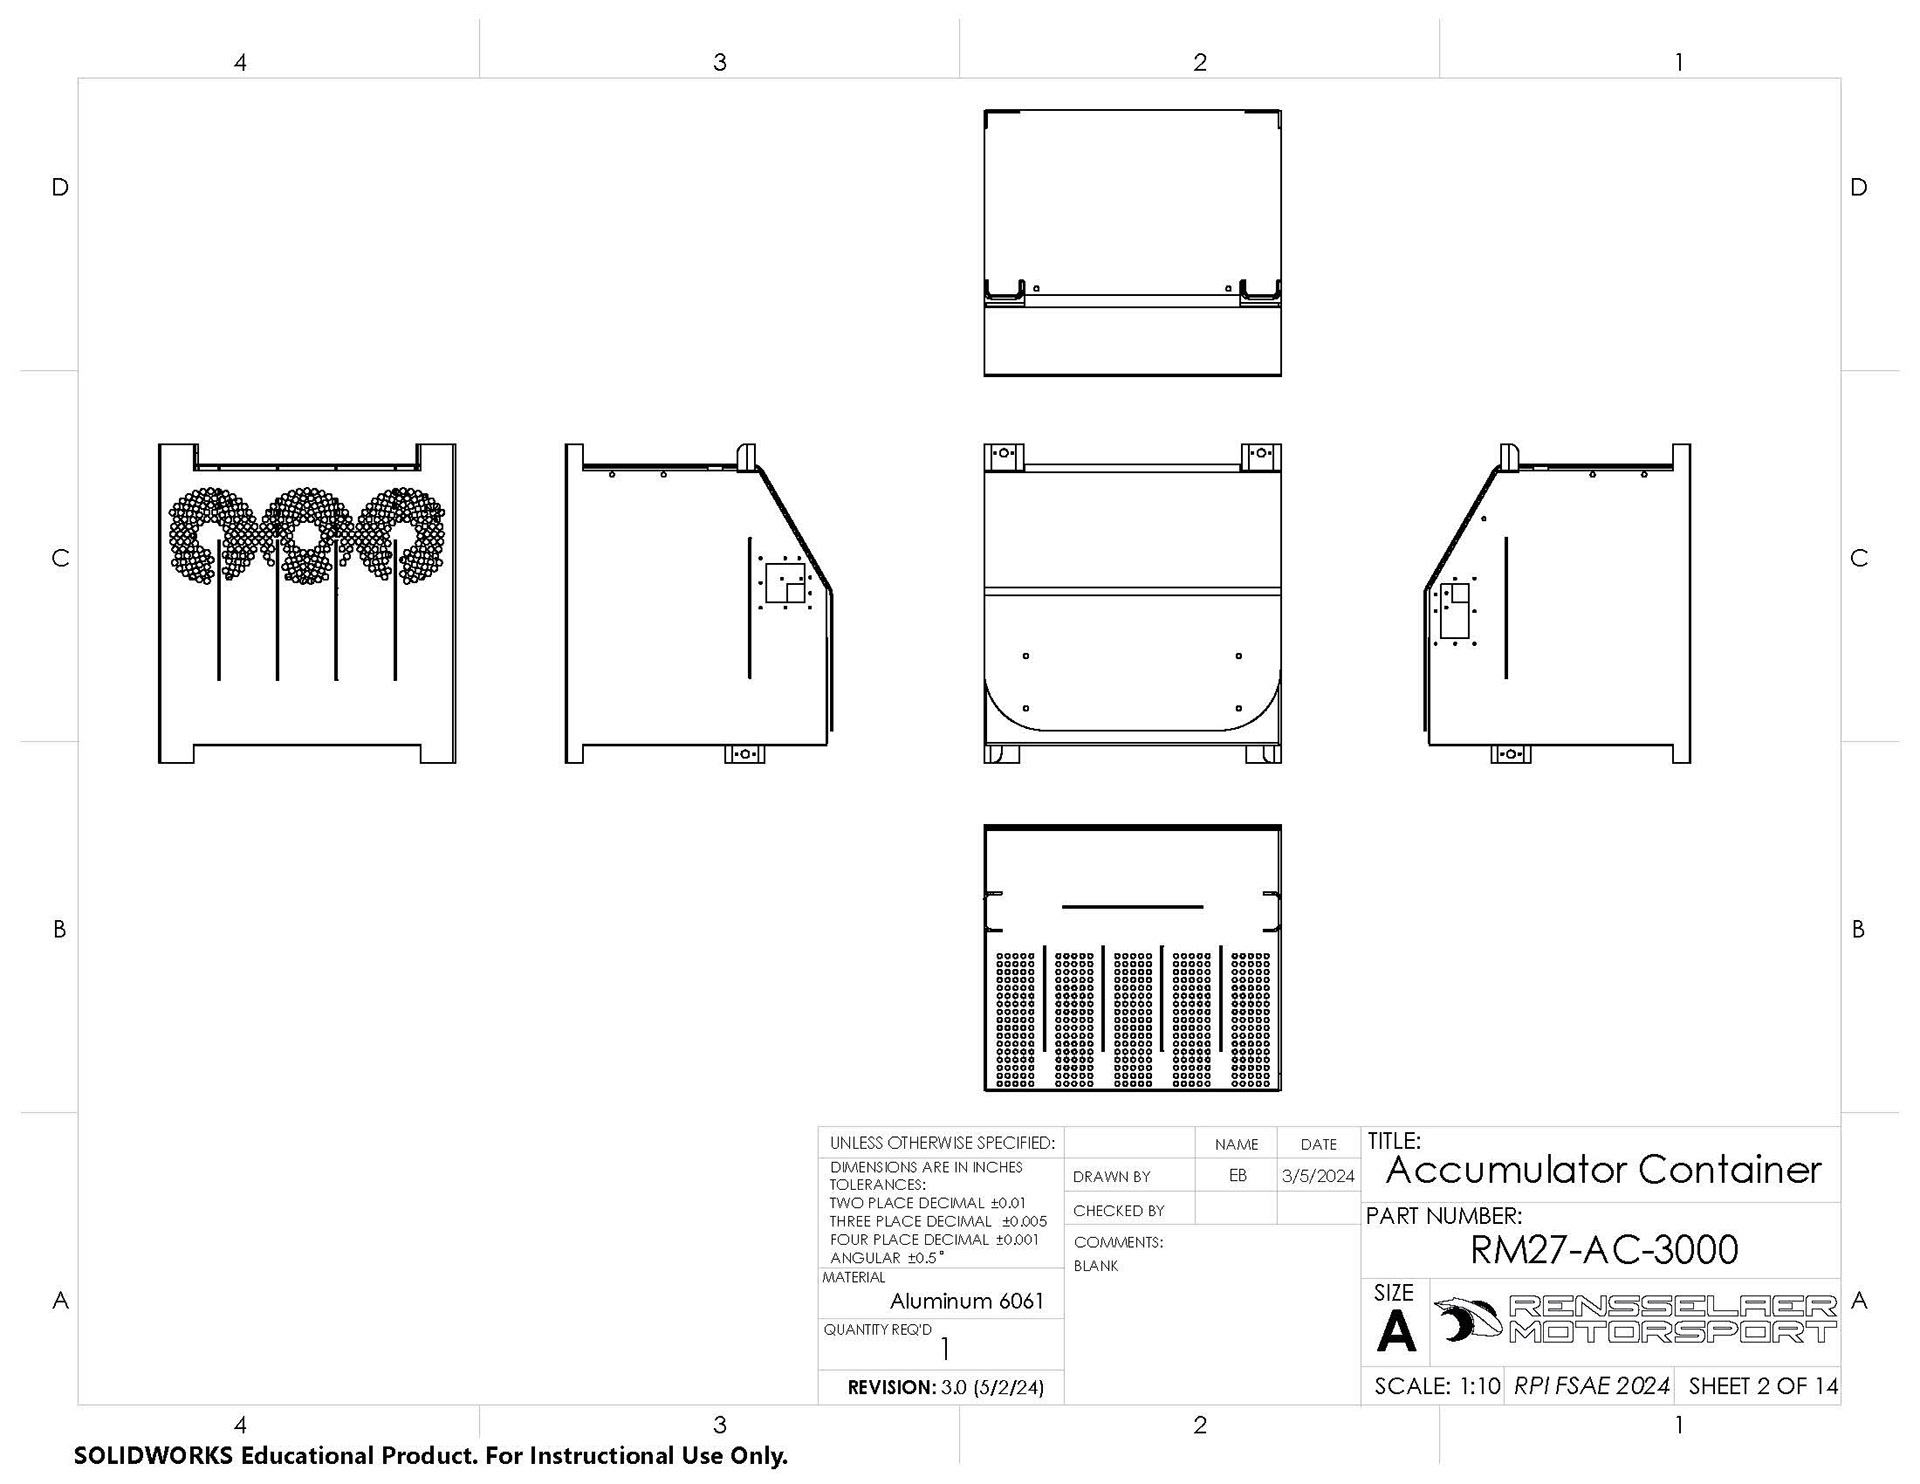
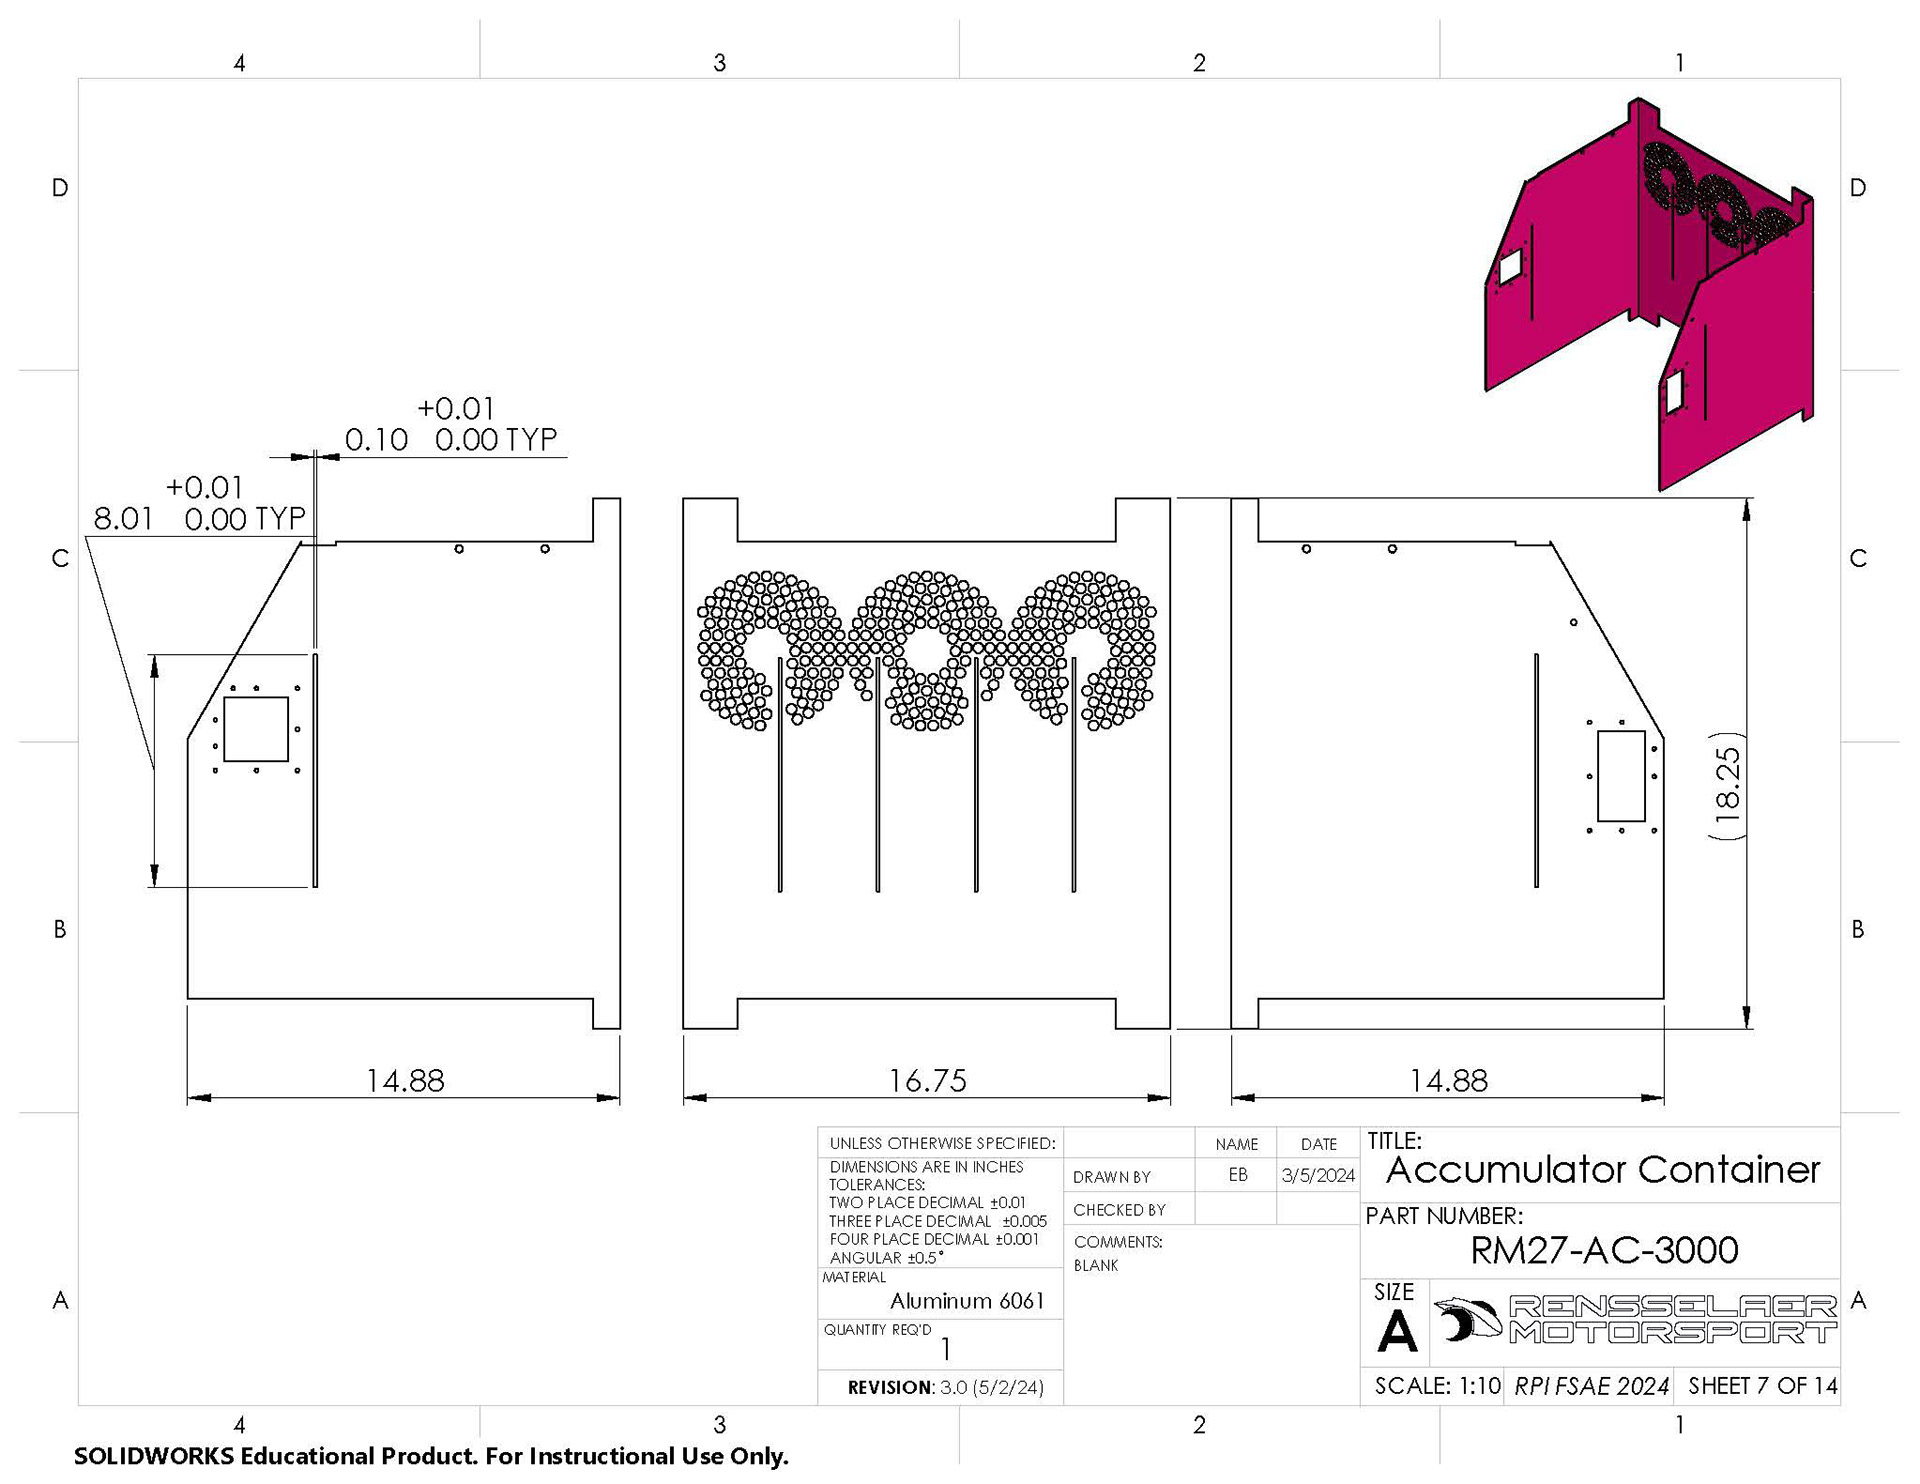
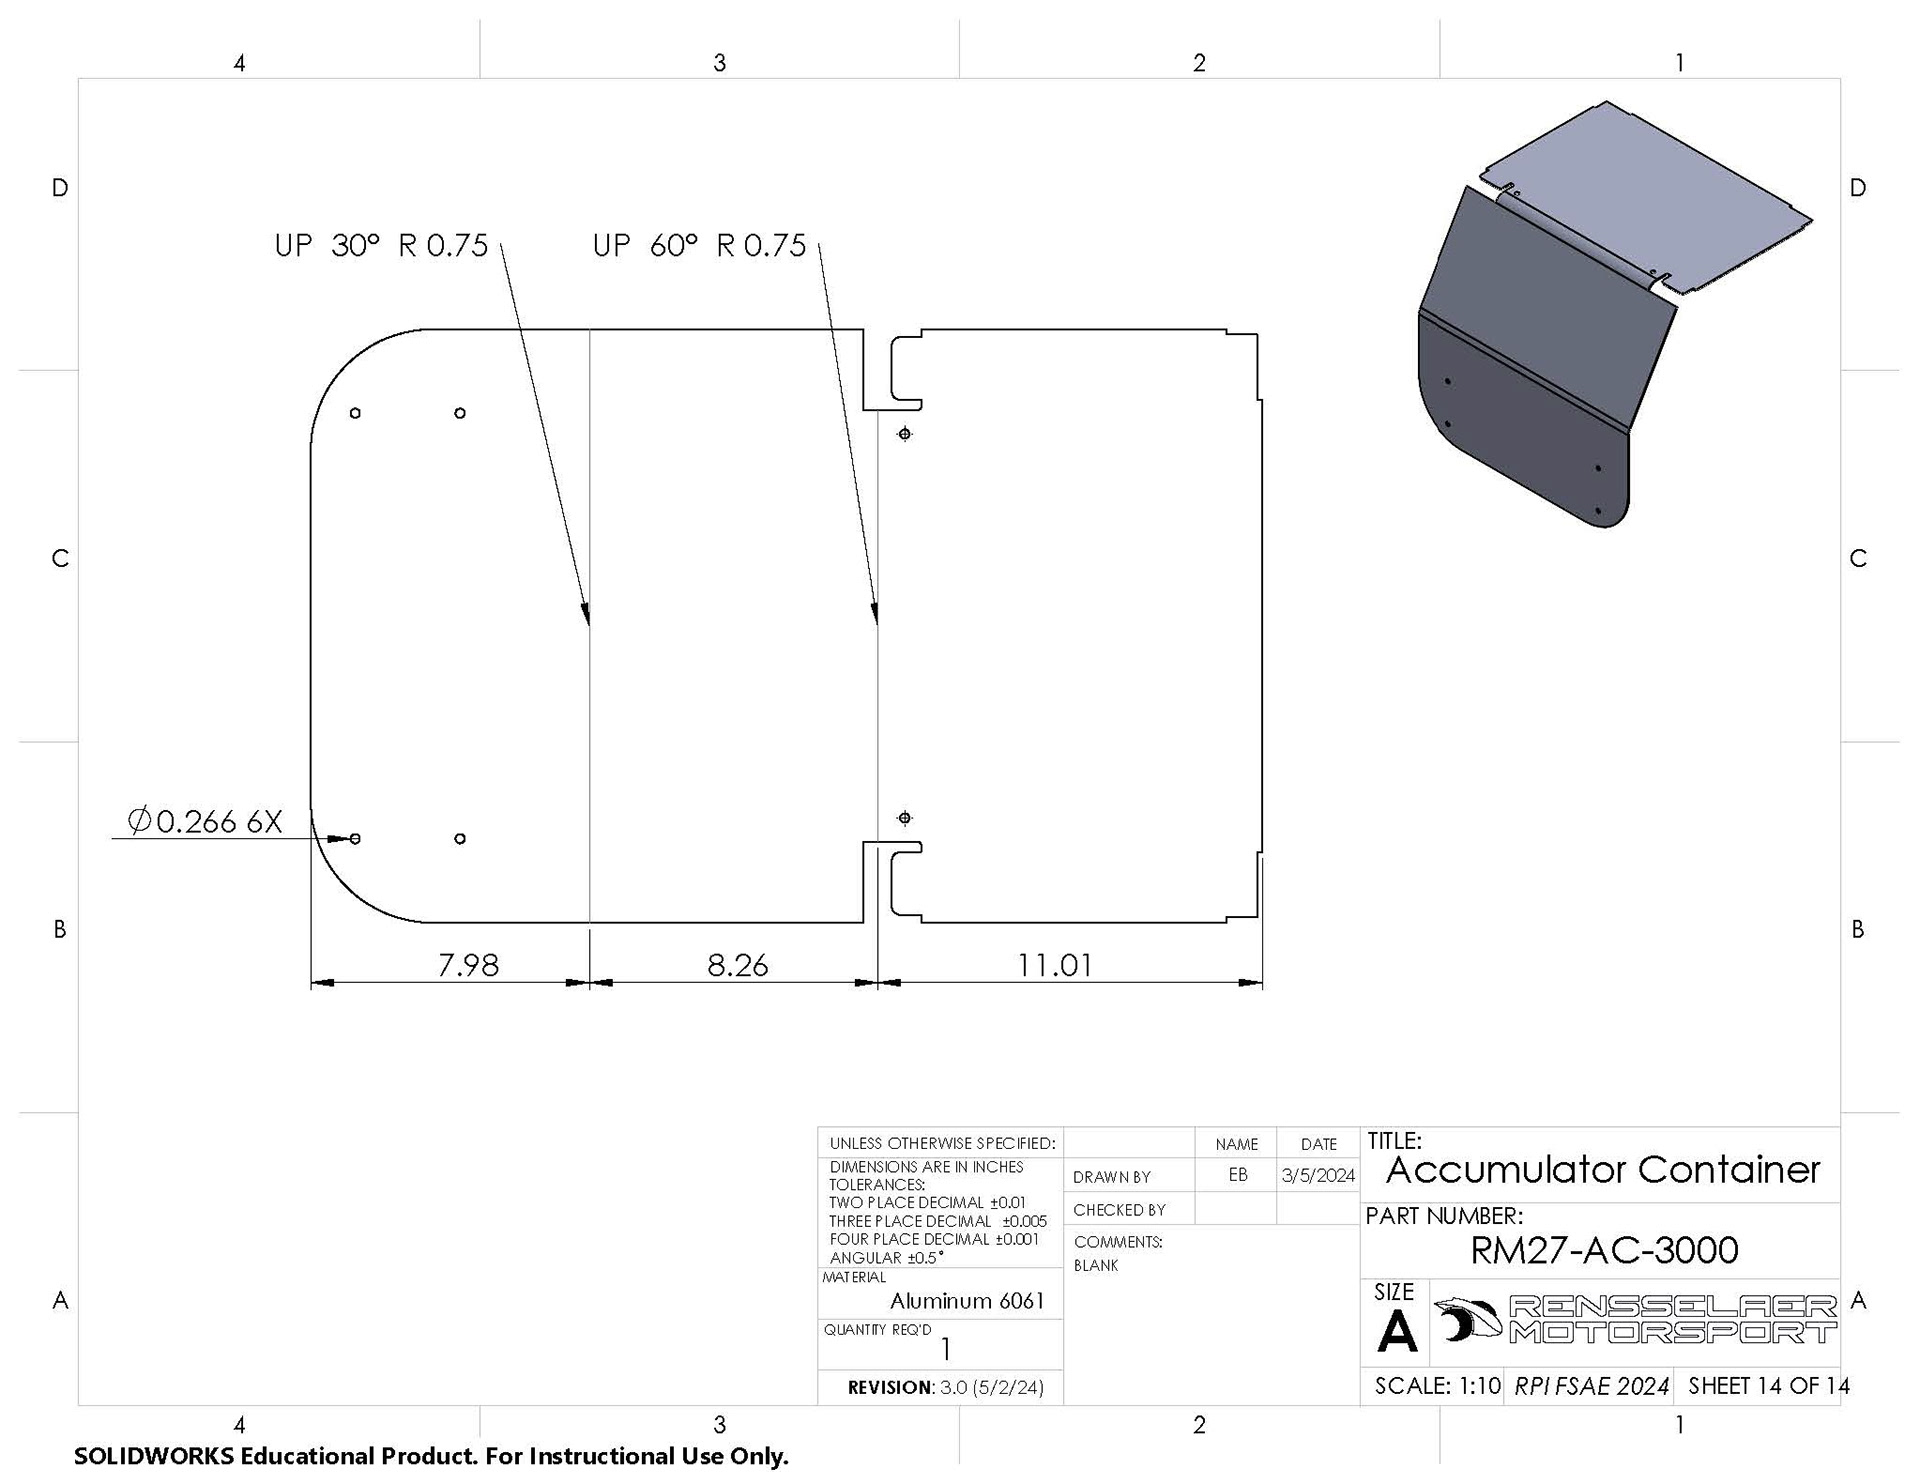
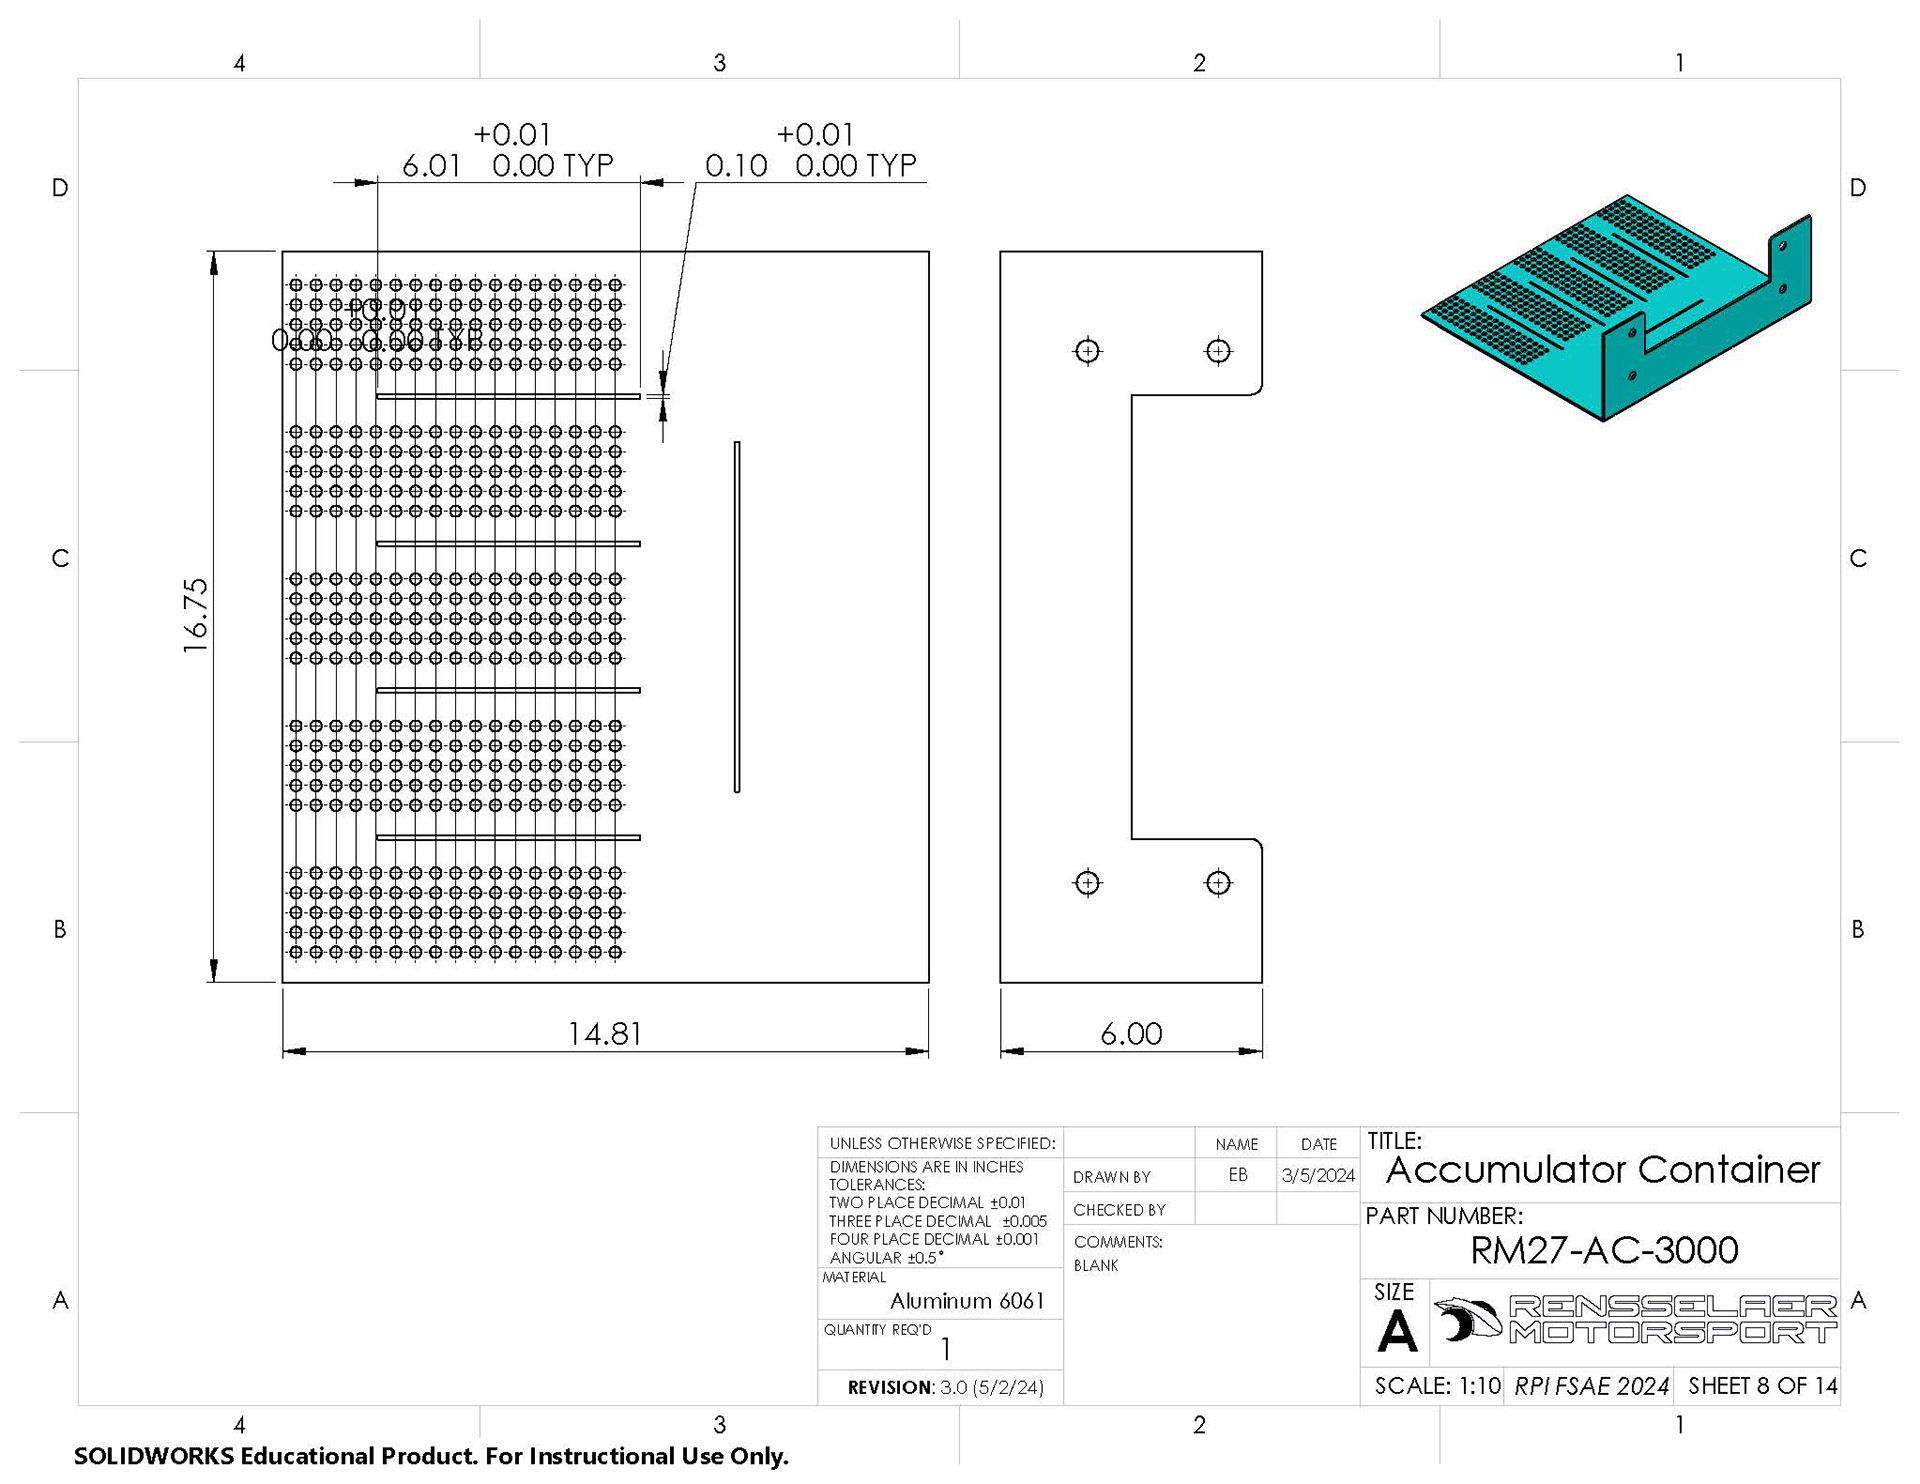
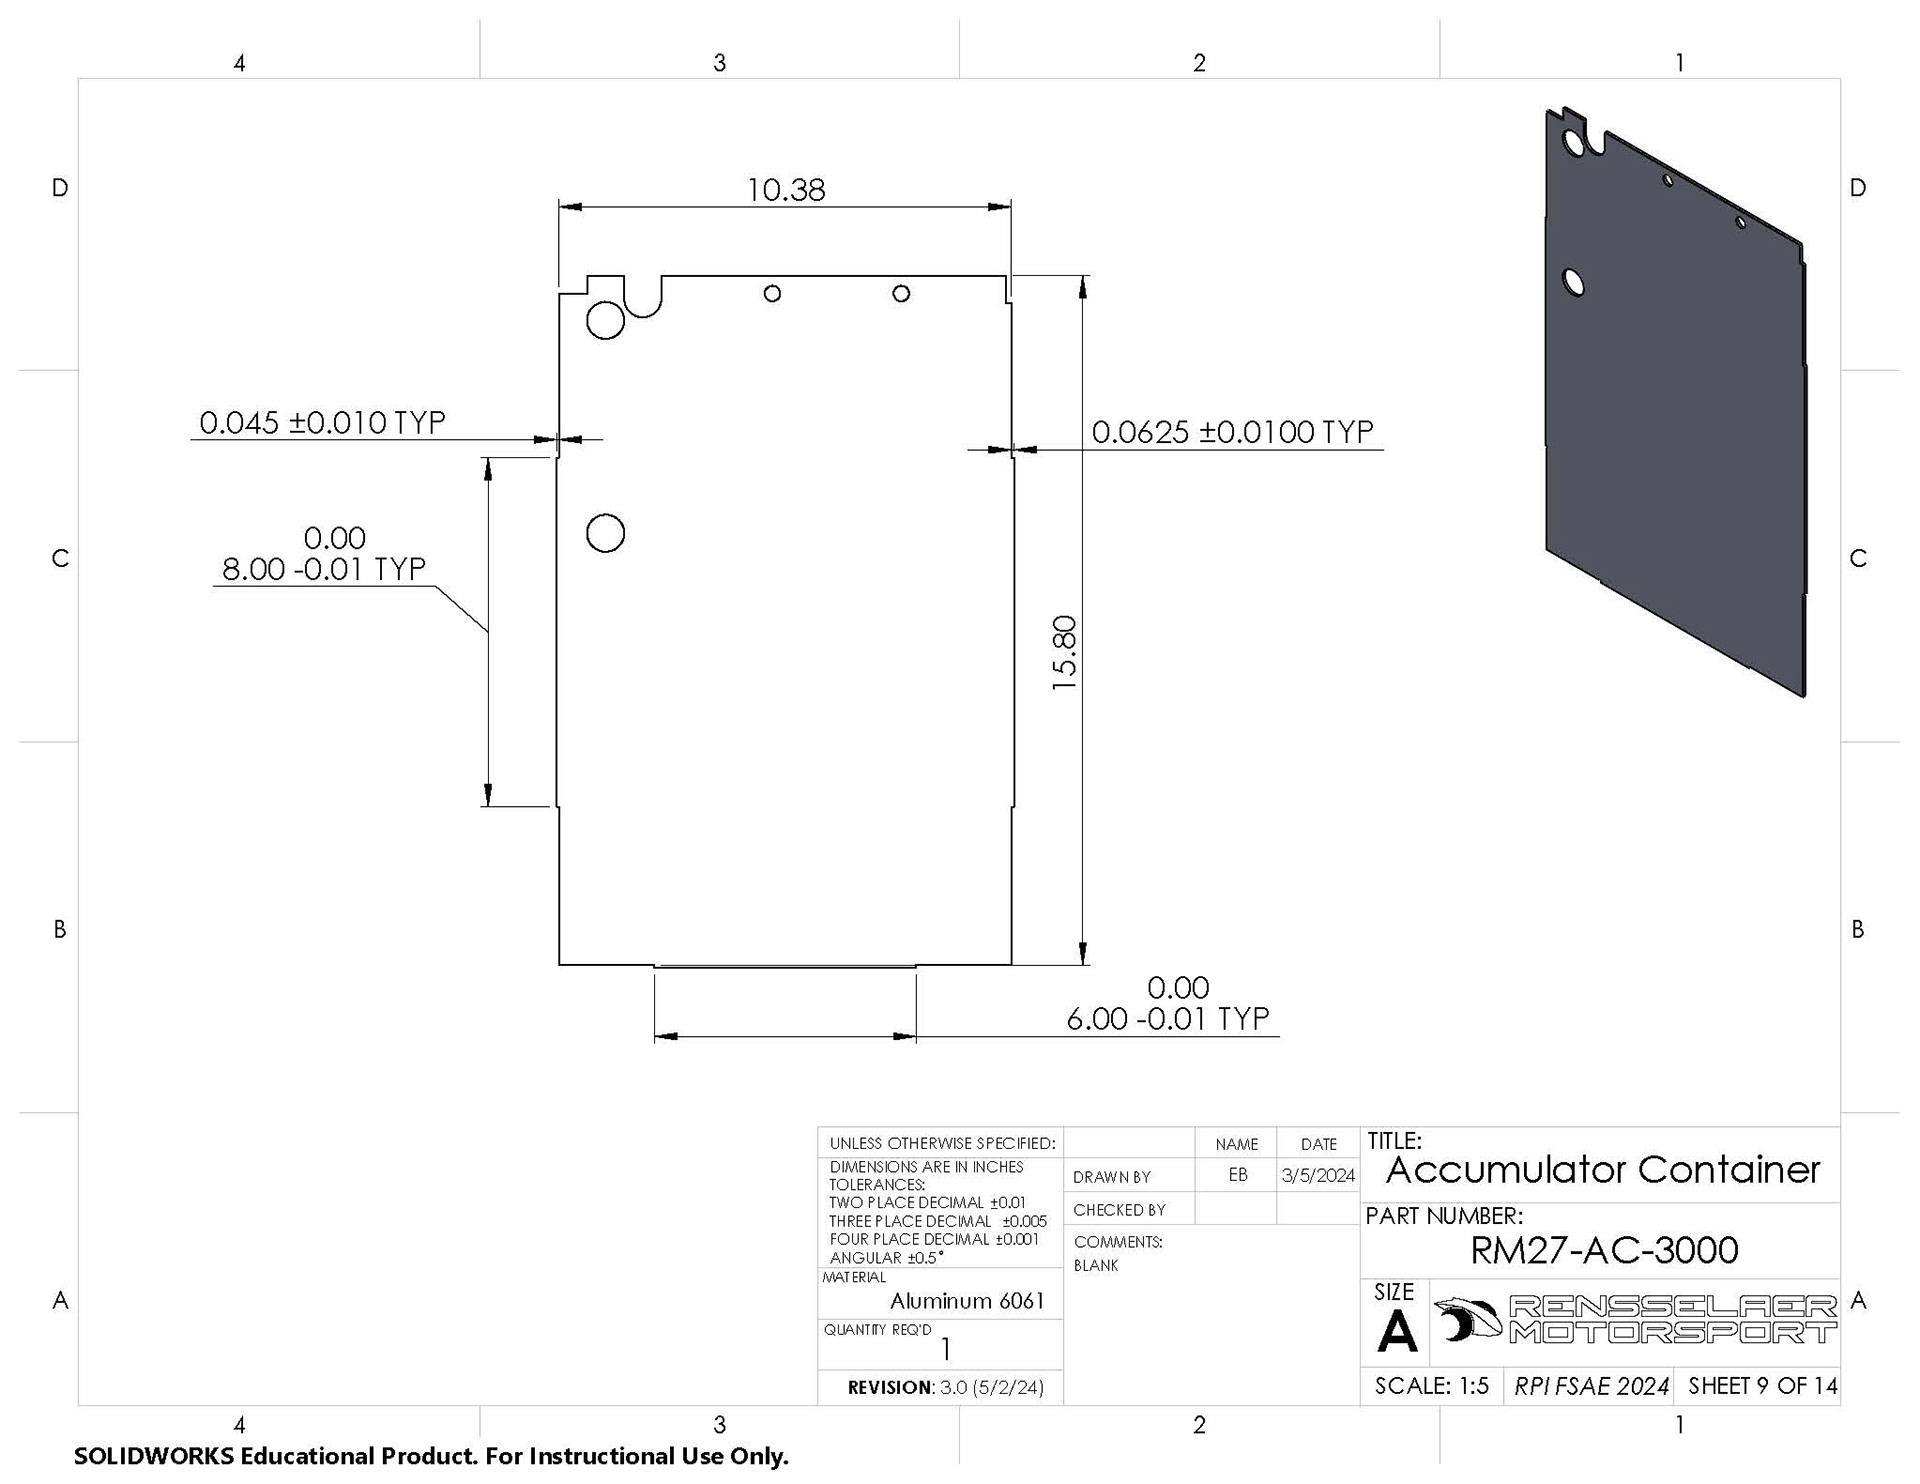
Final Drawings (Highlights)
as sent to the manufacturer, drawings by Erich Bahm
full drawings available here


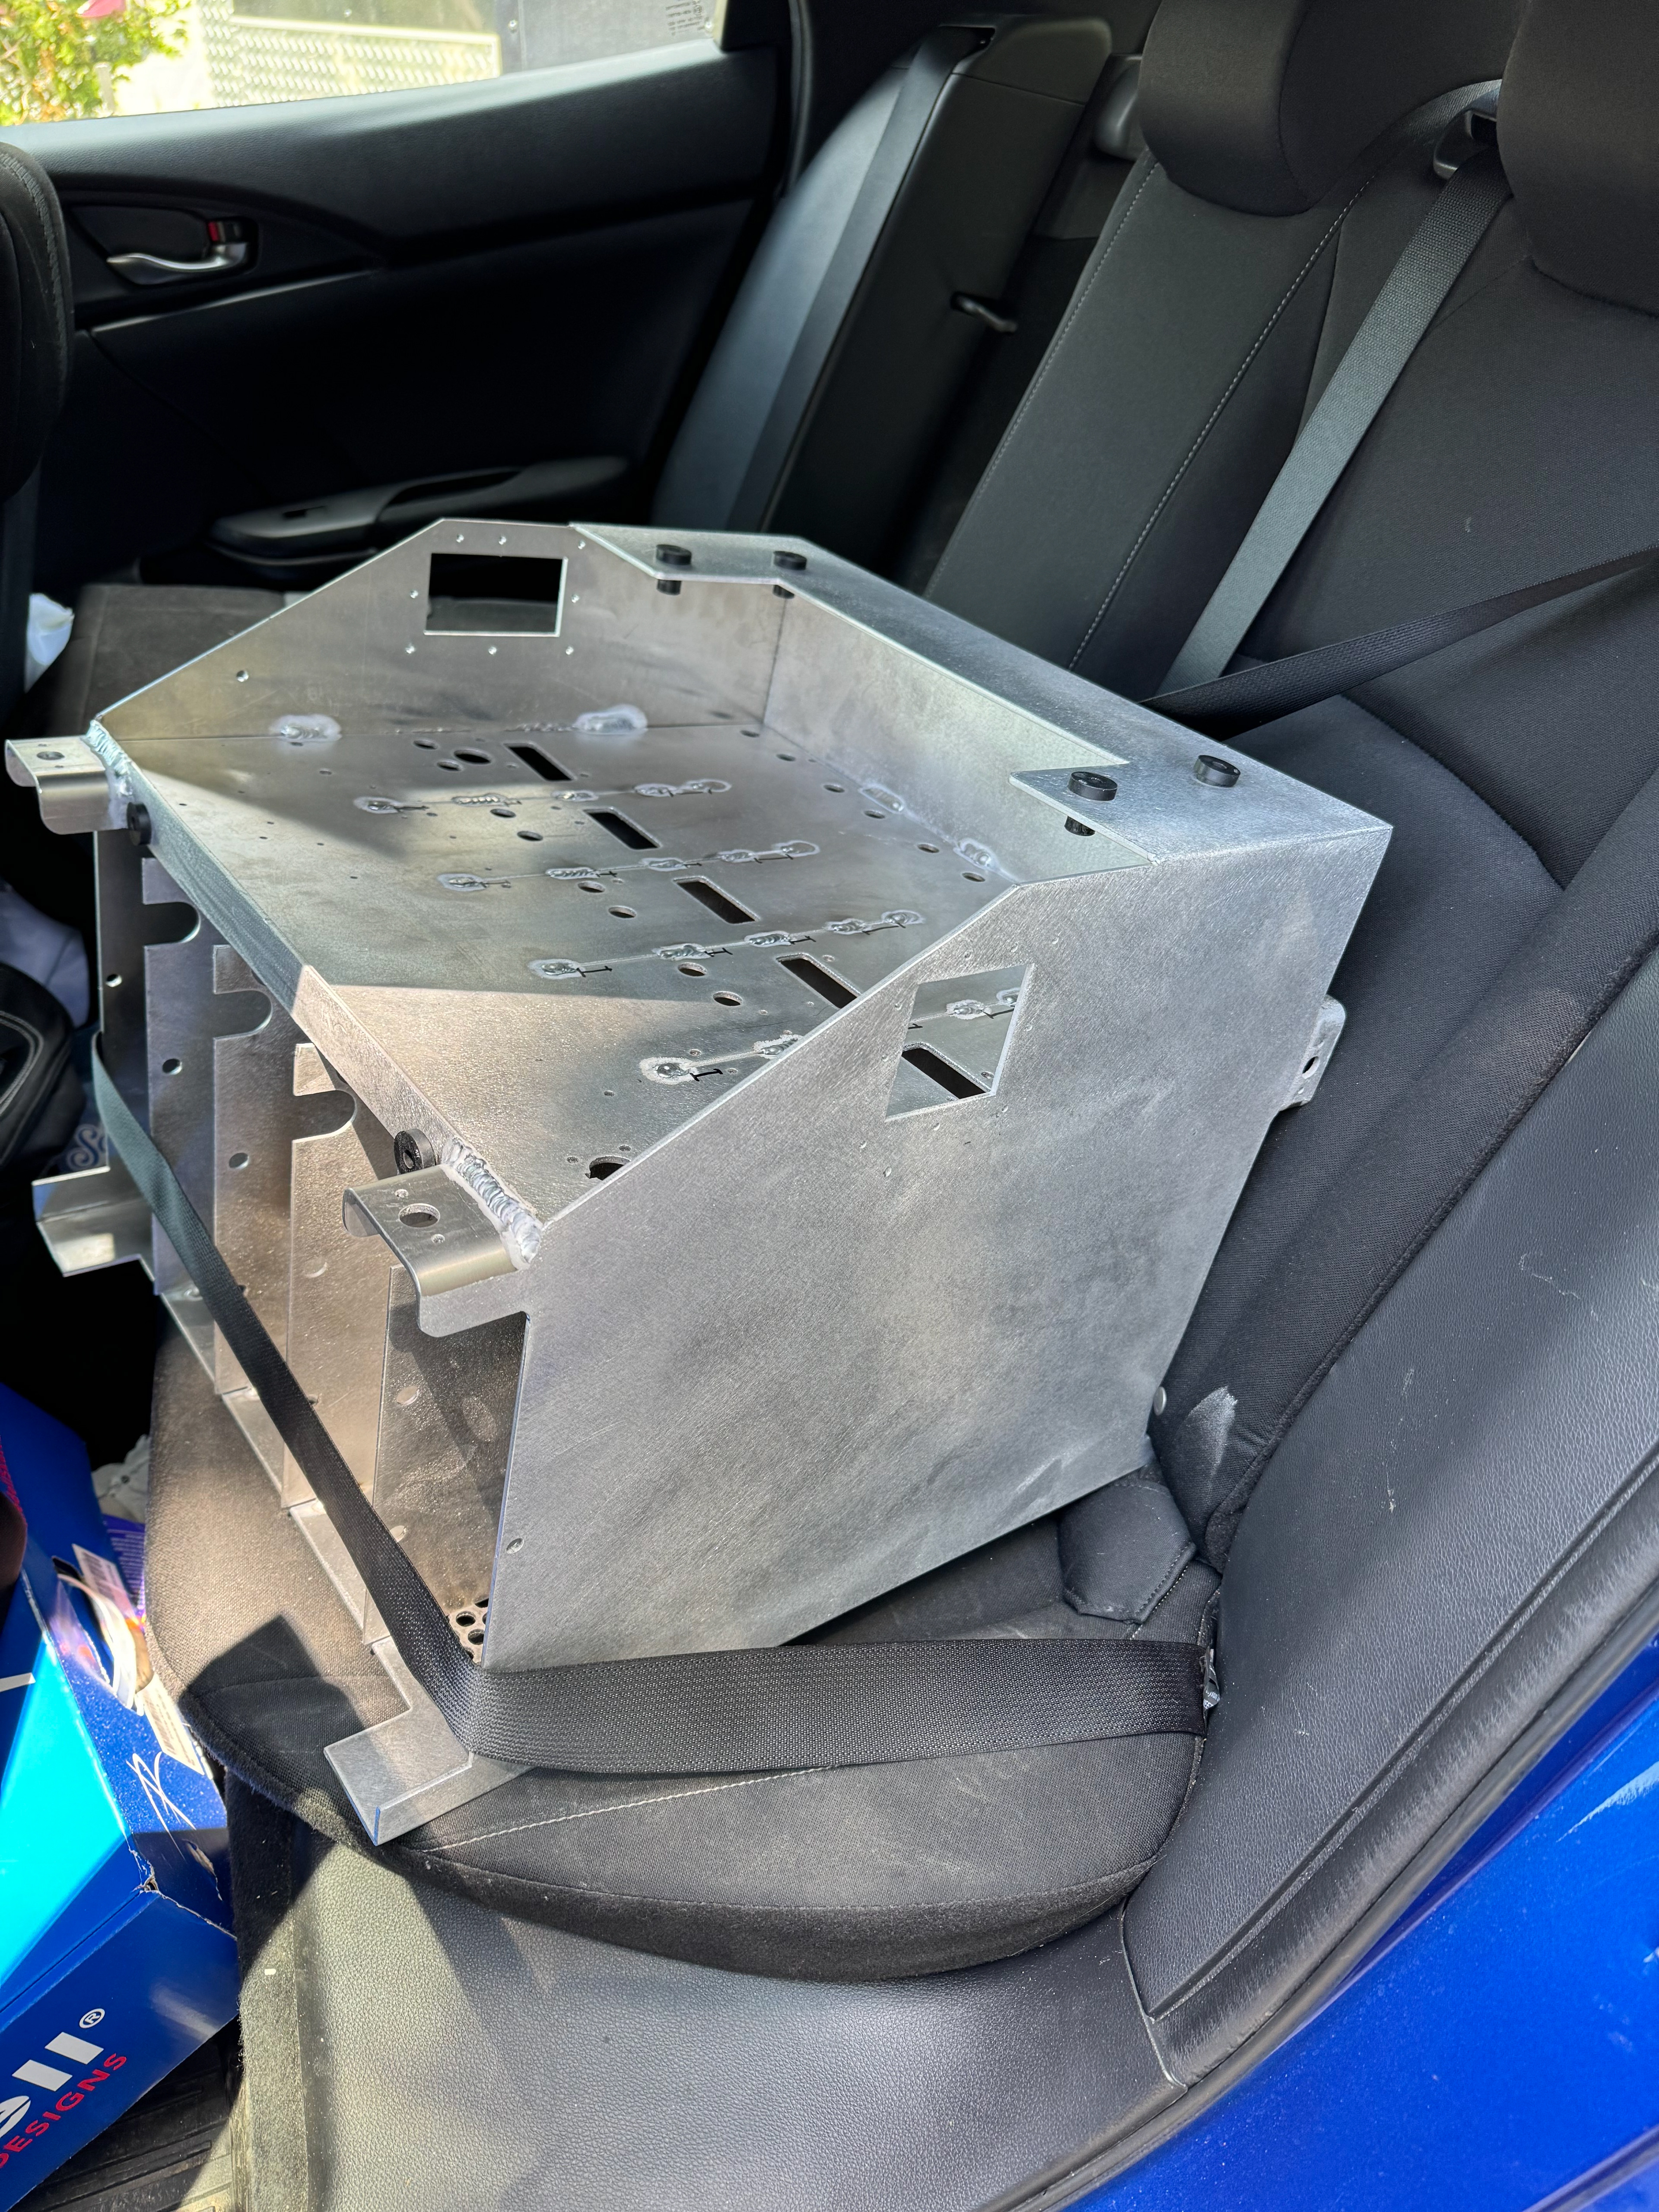
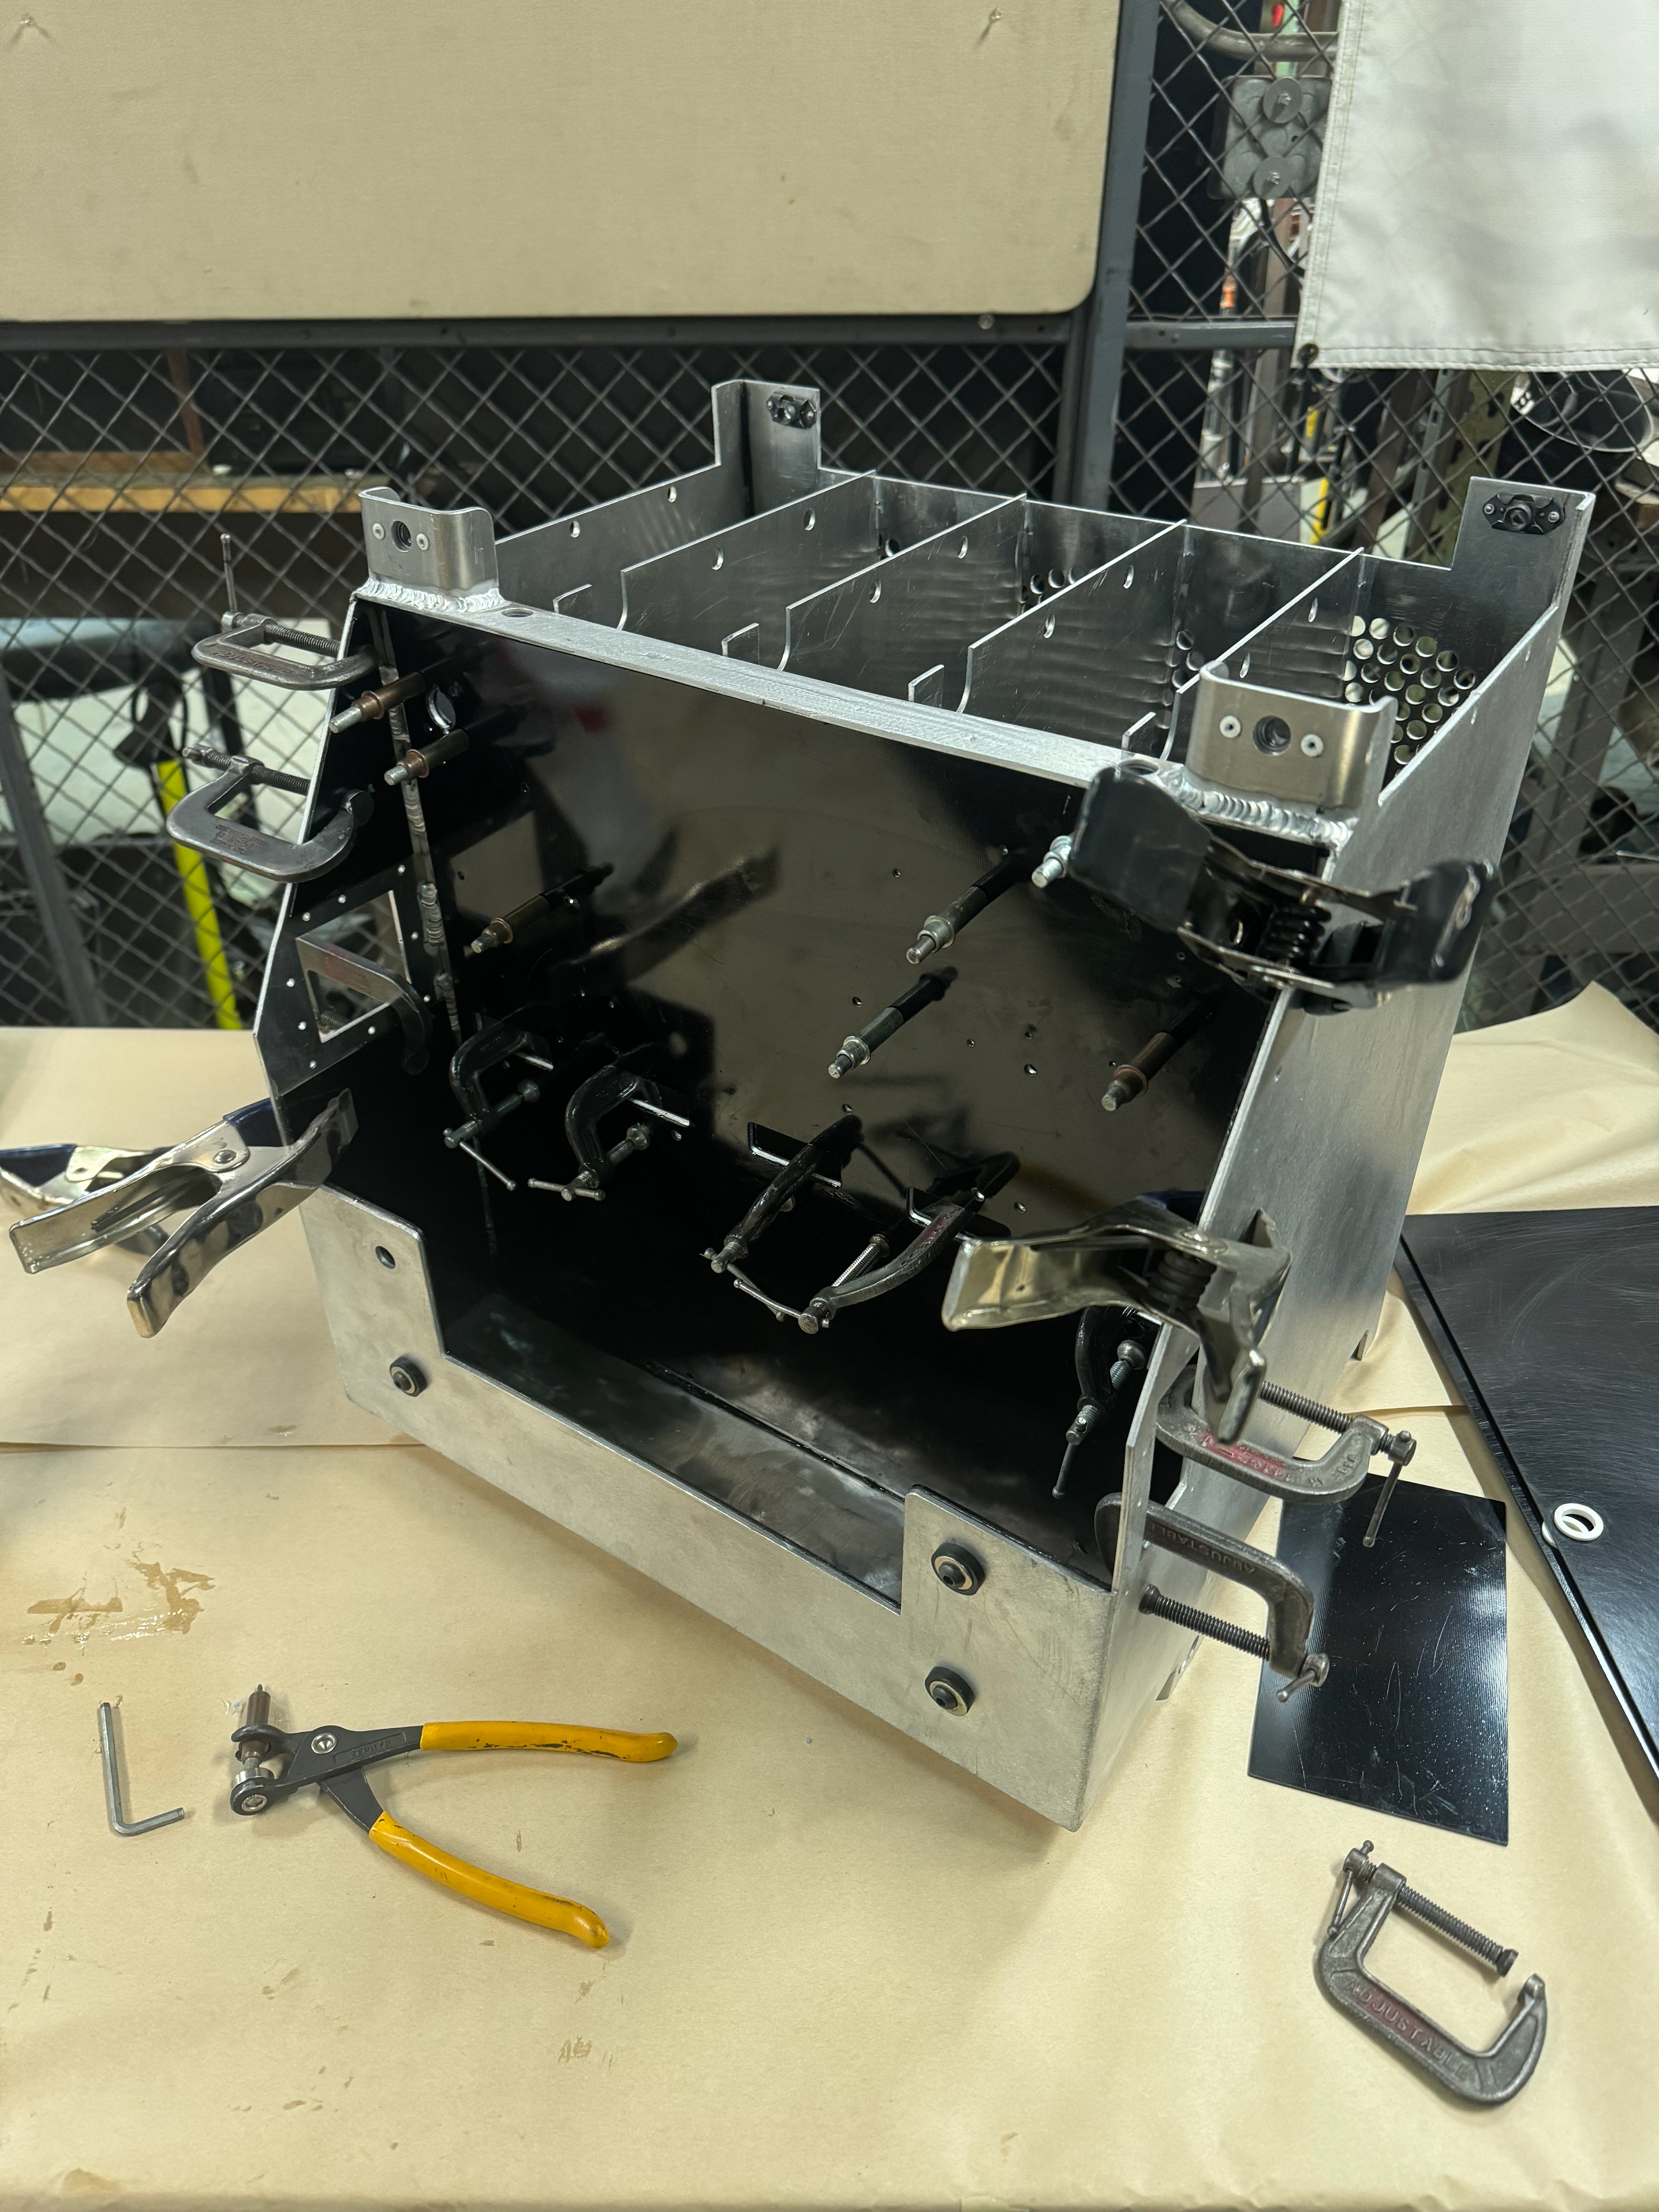
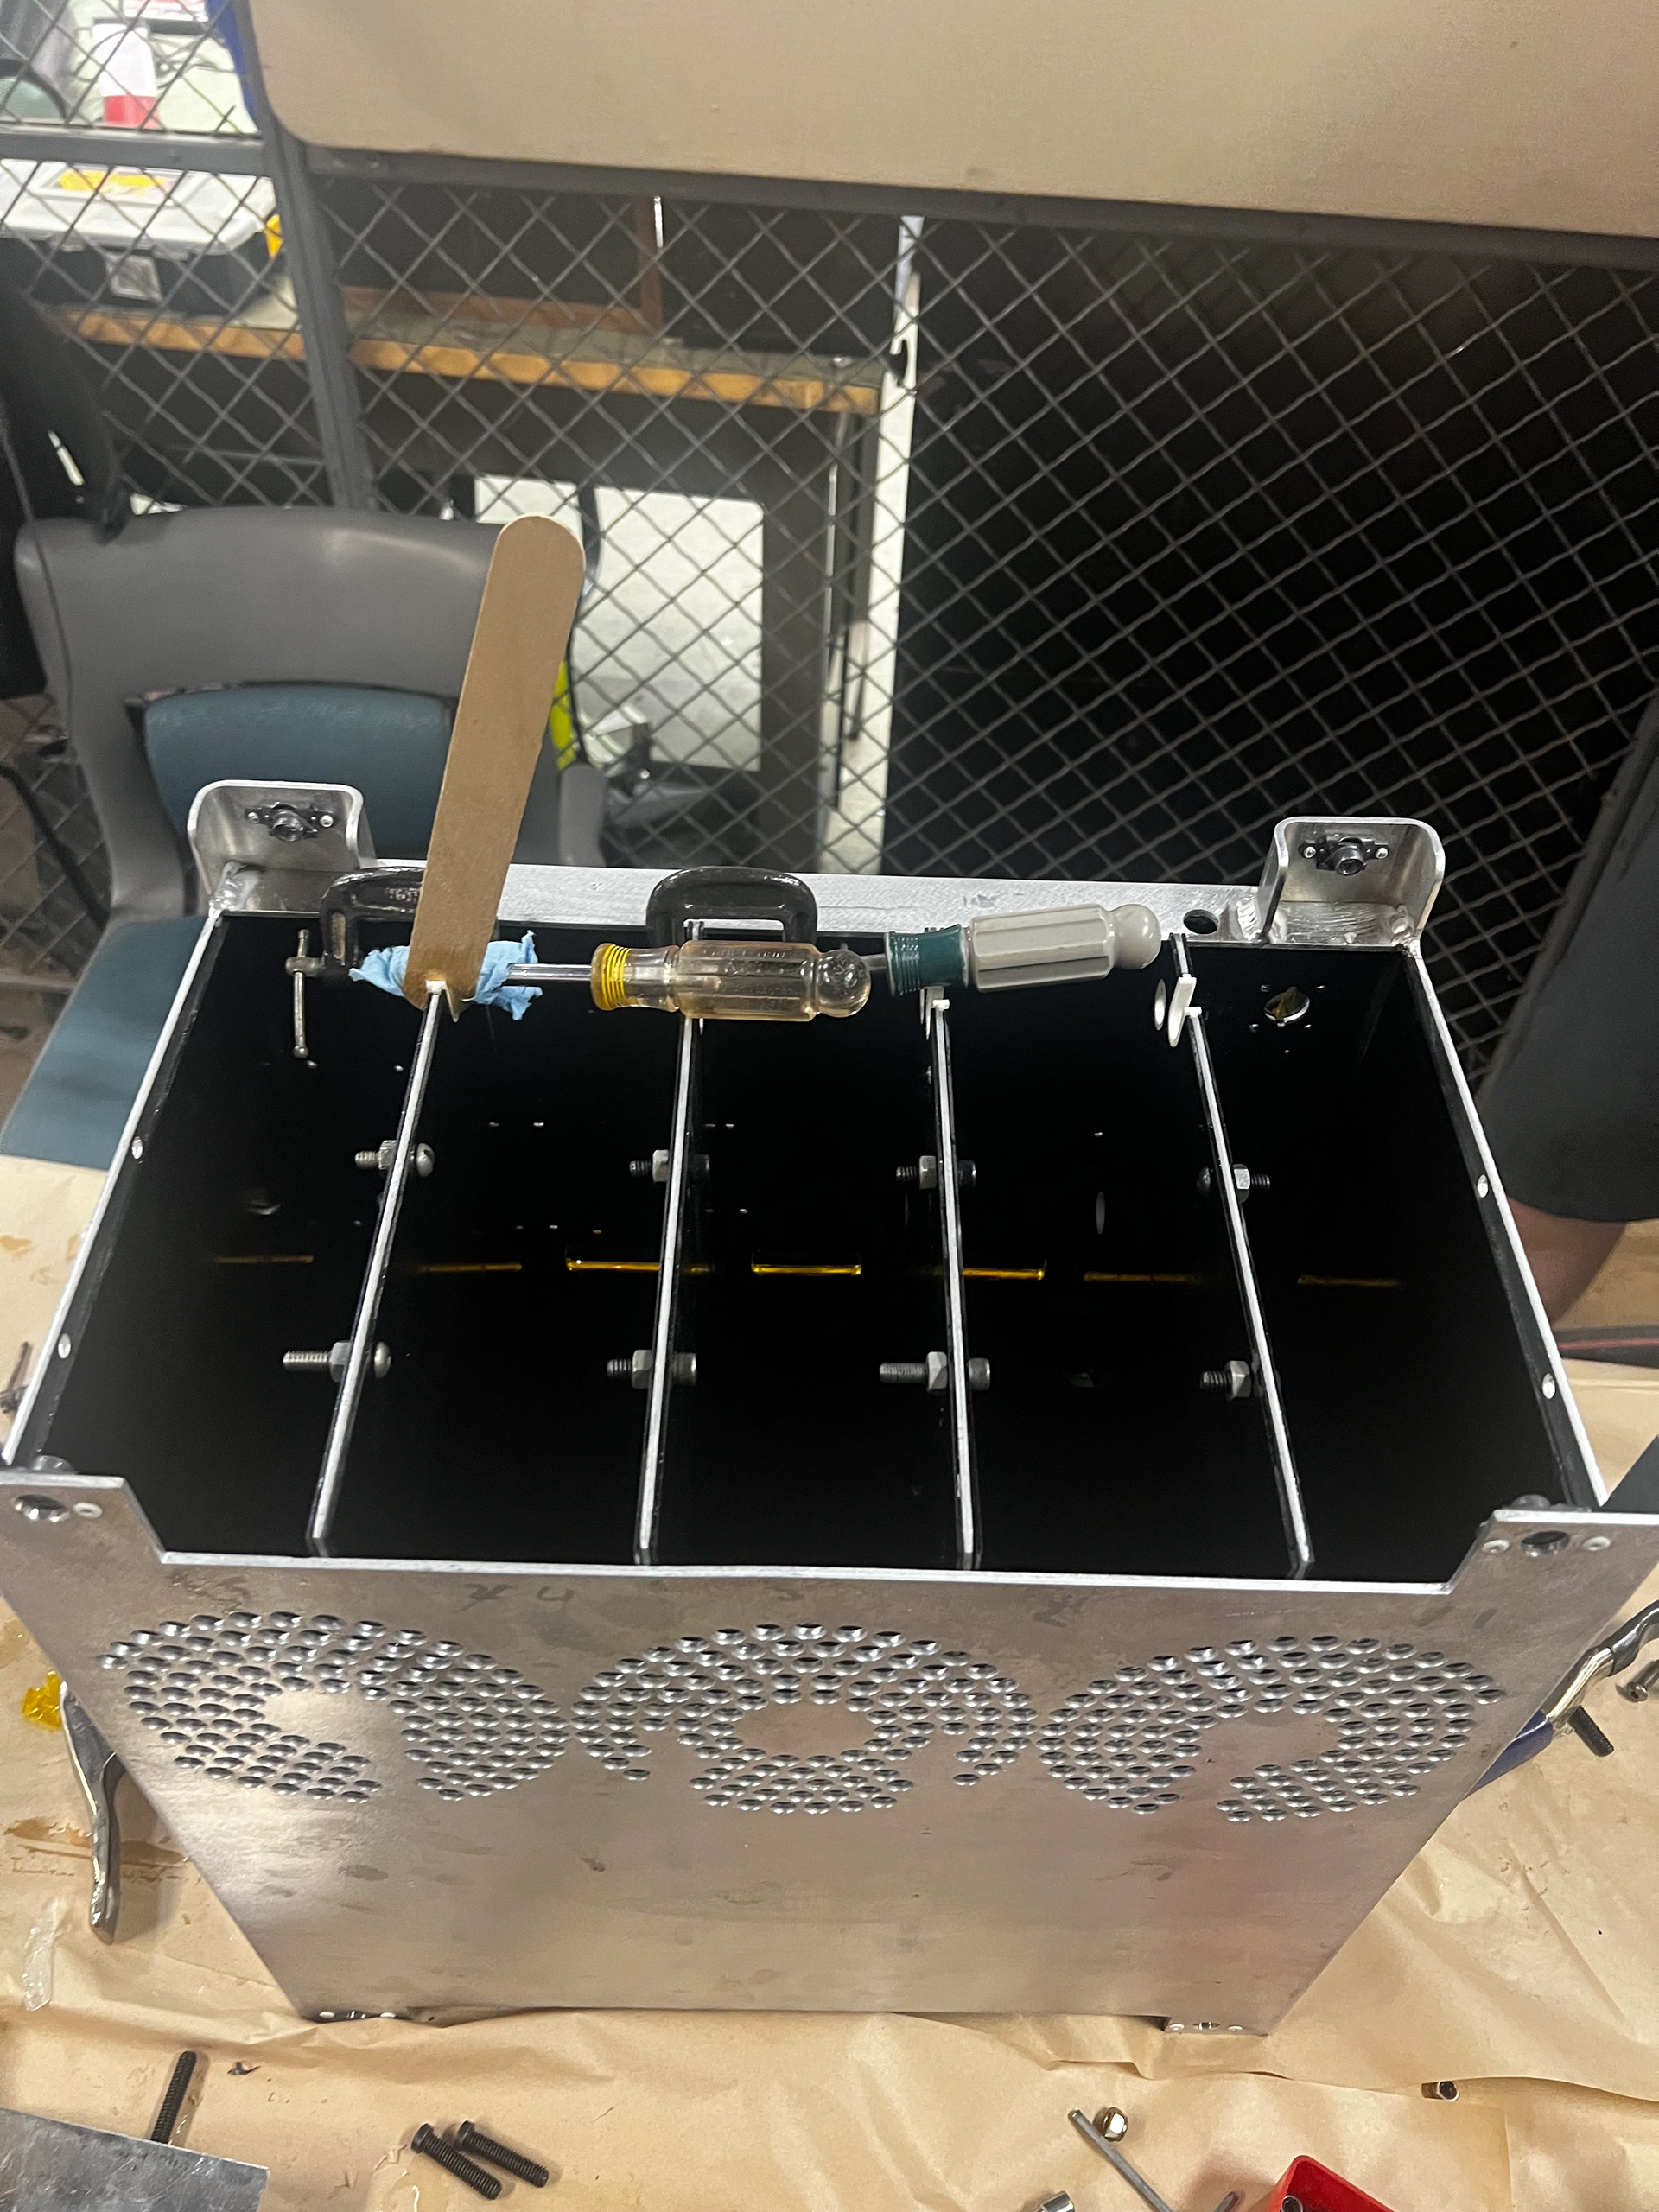
Container Manufacturing Pictures
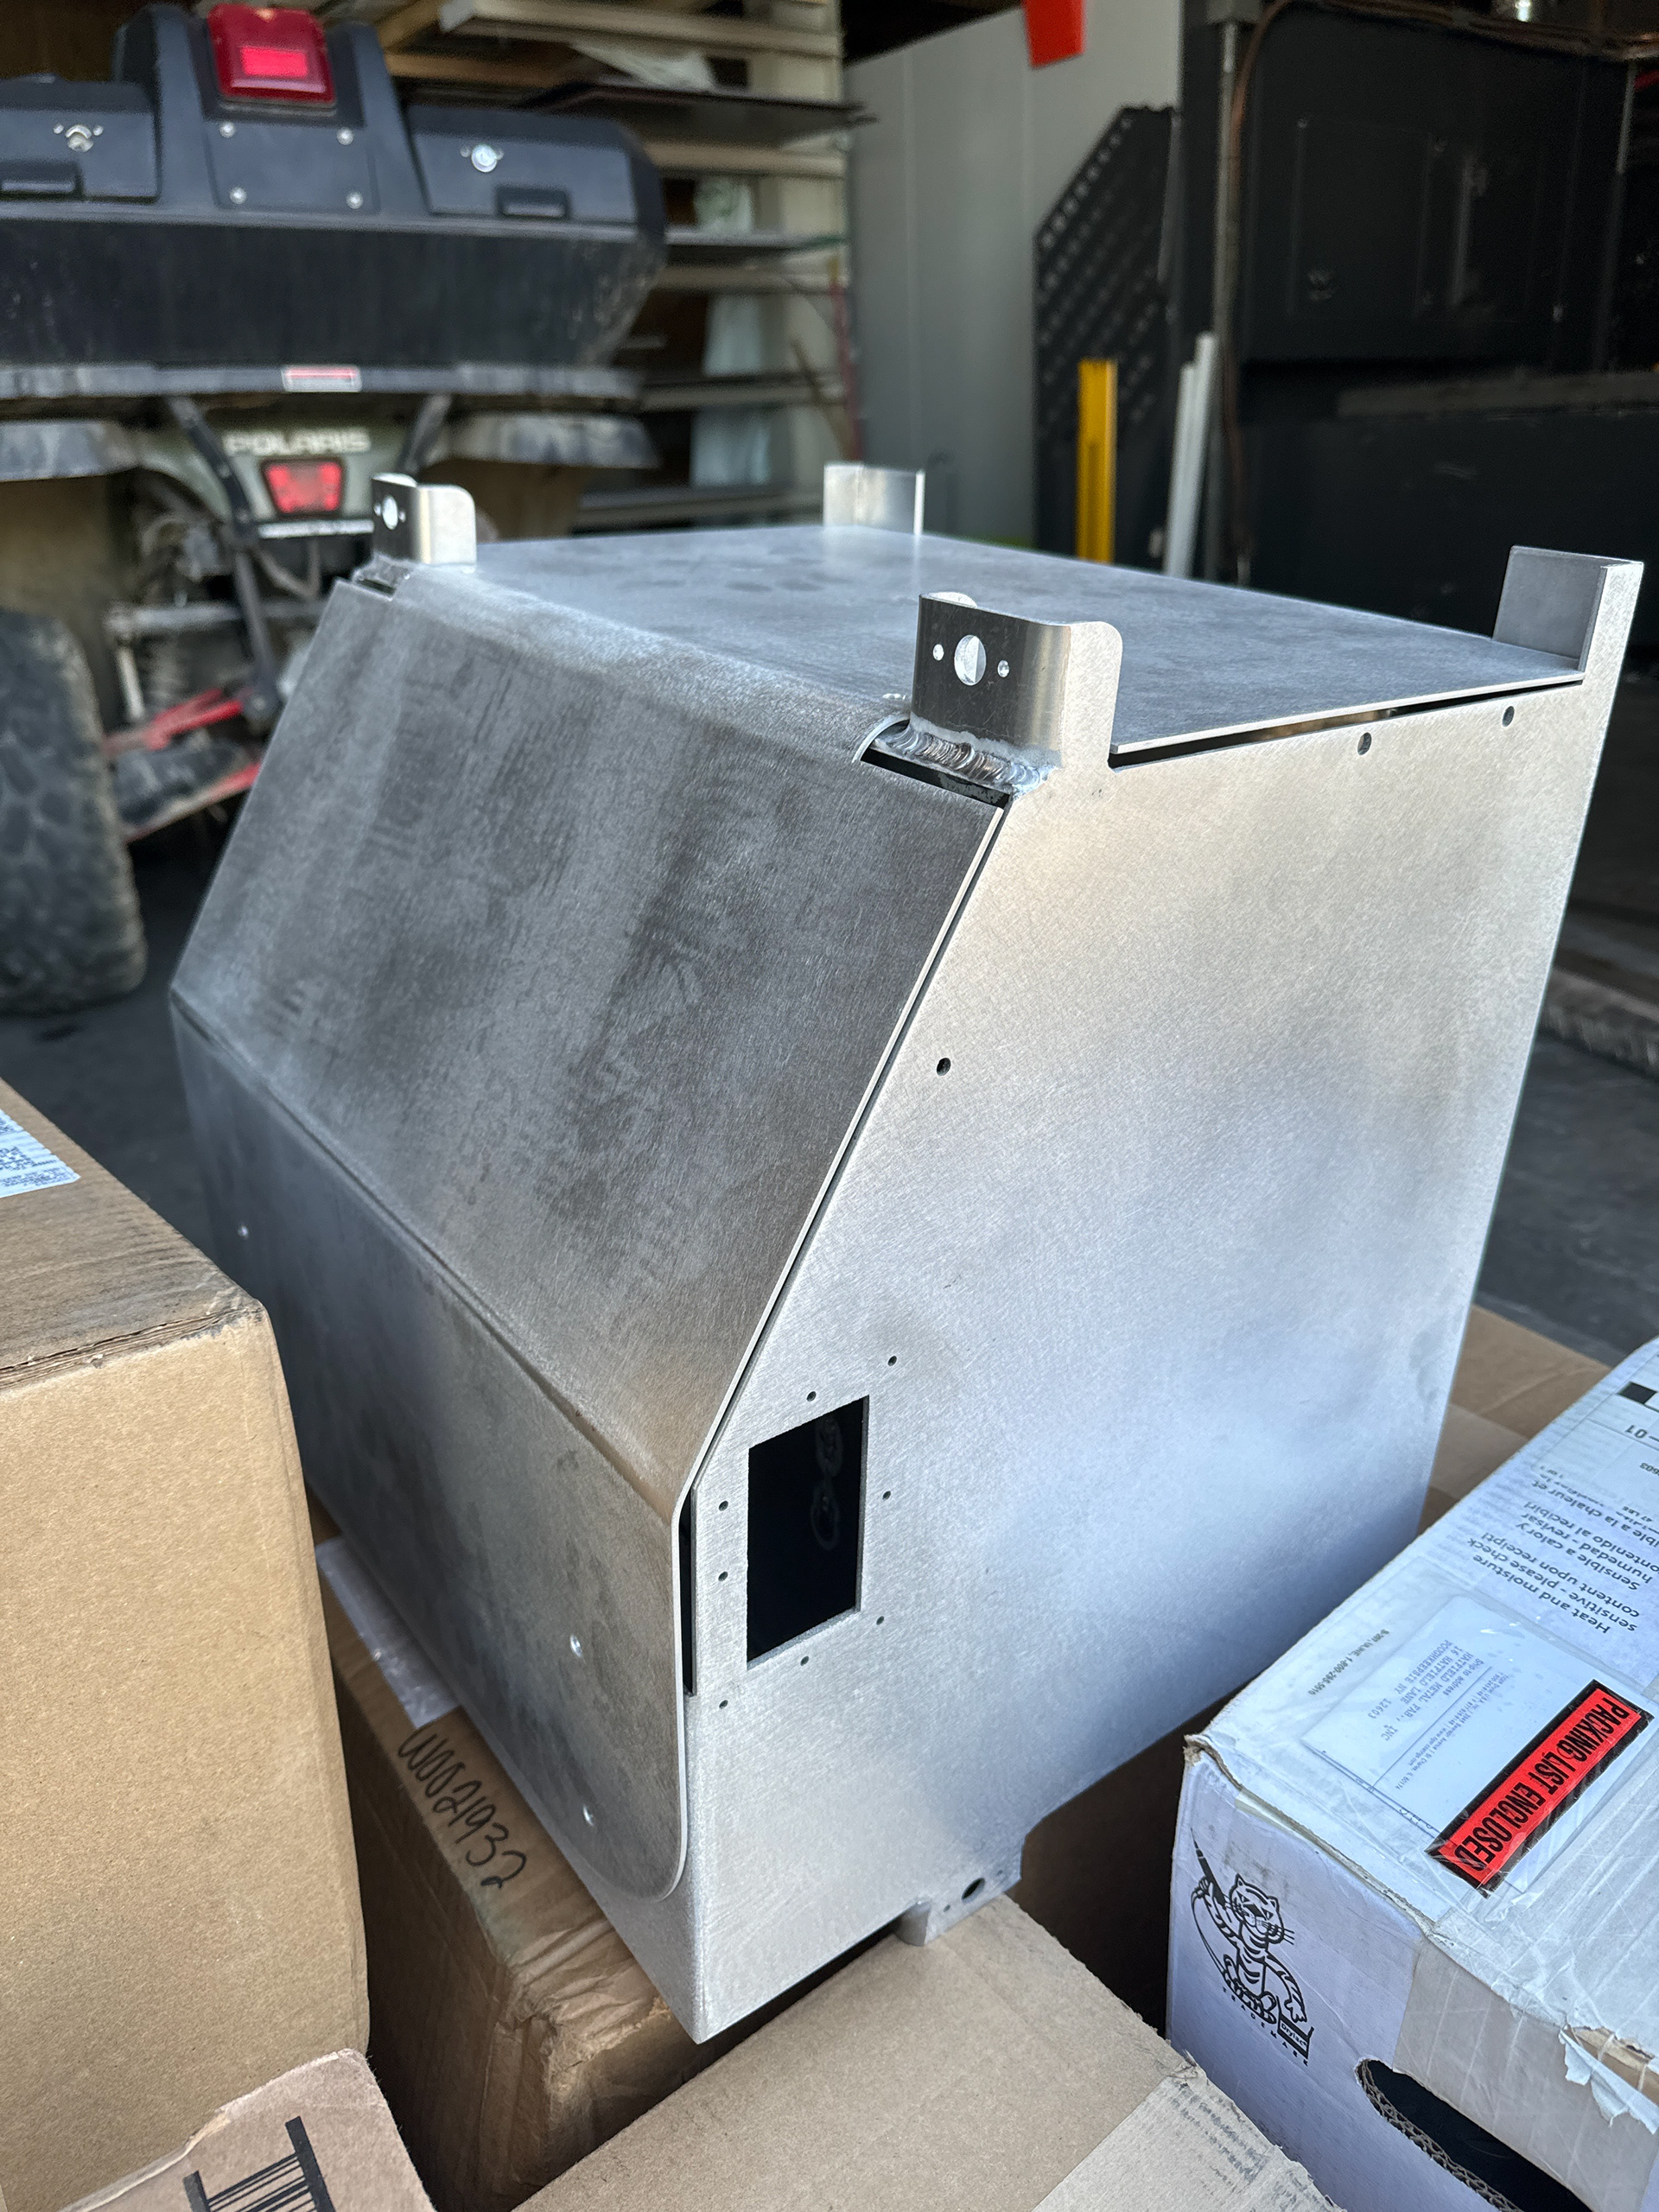
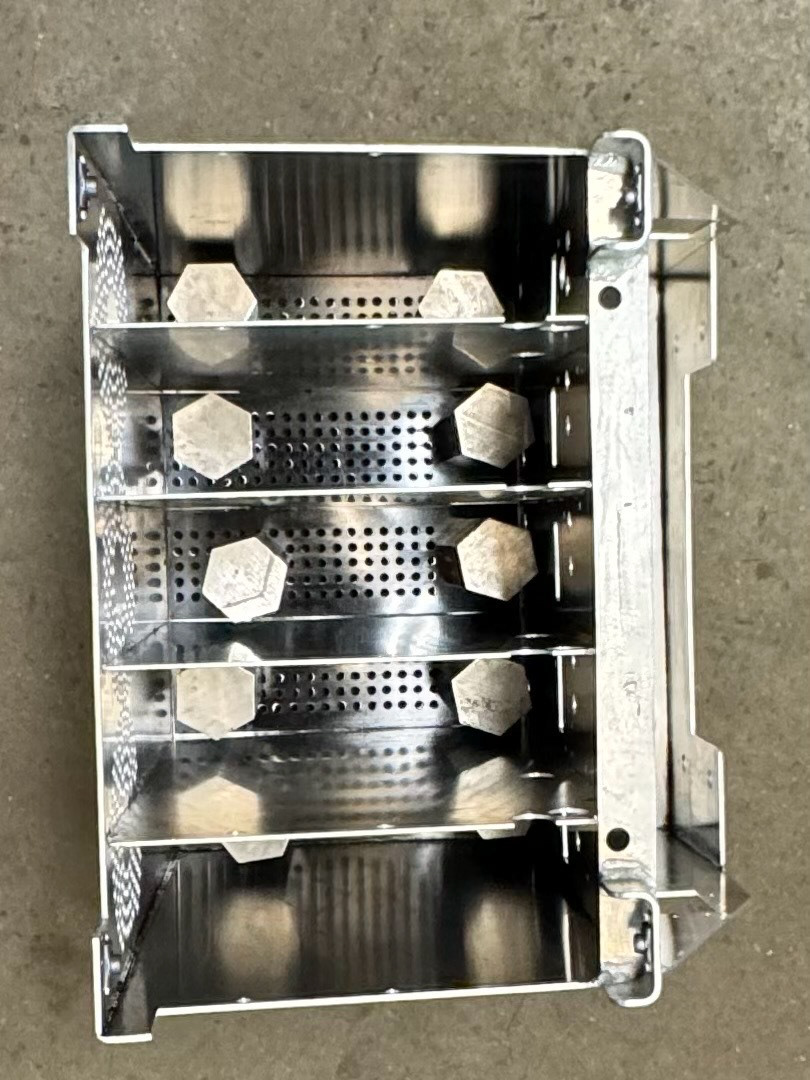
finished sheet metal box as picked up from manufacturer
transporting the container back from the manufacturer
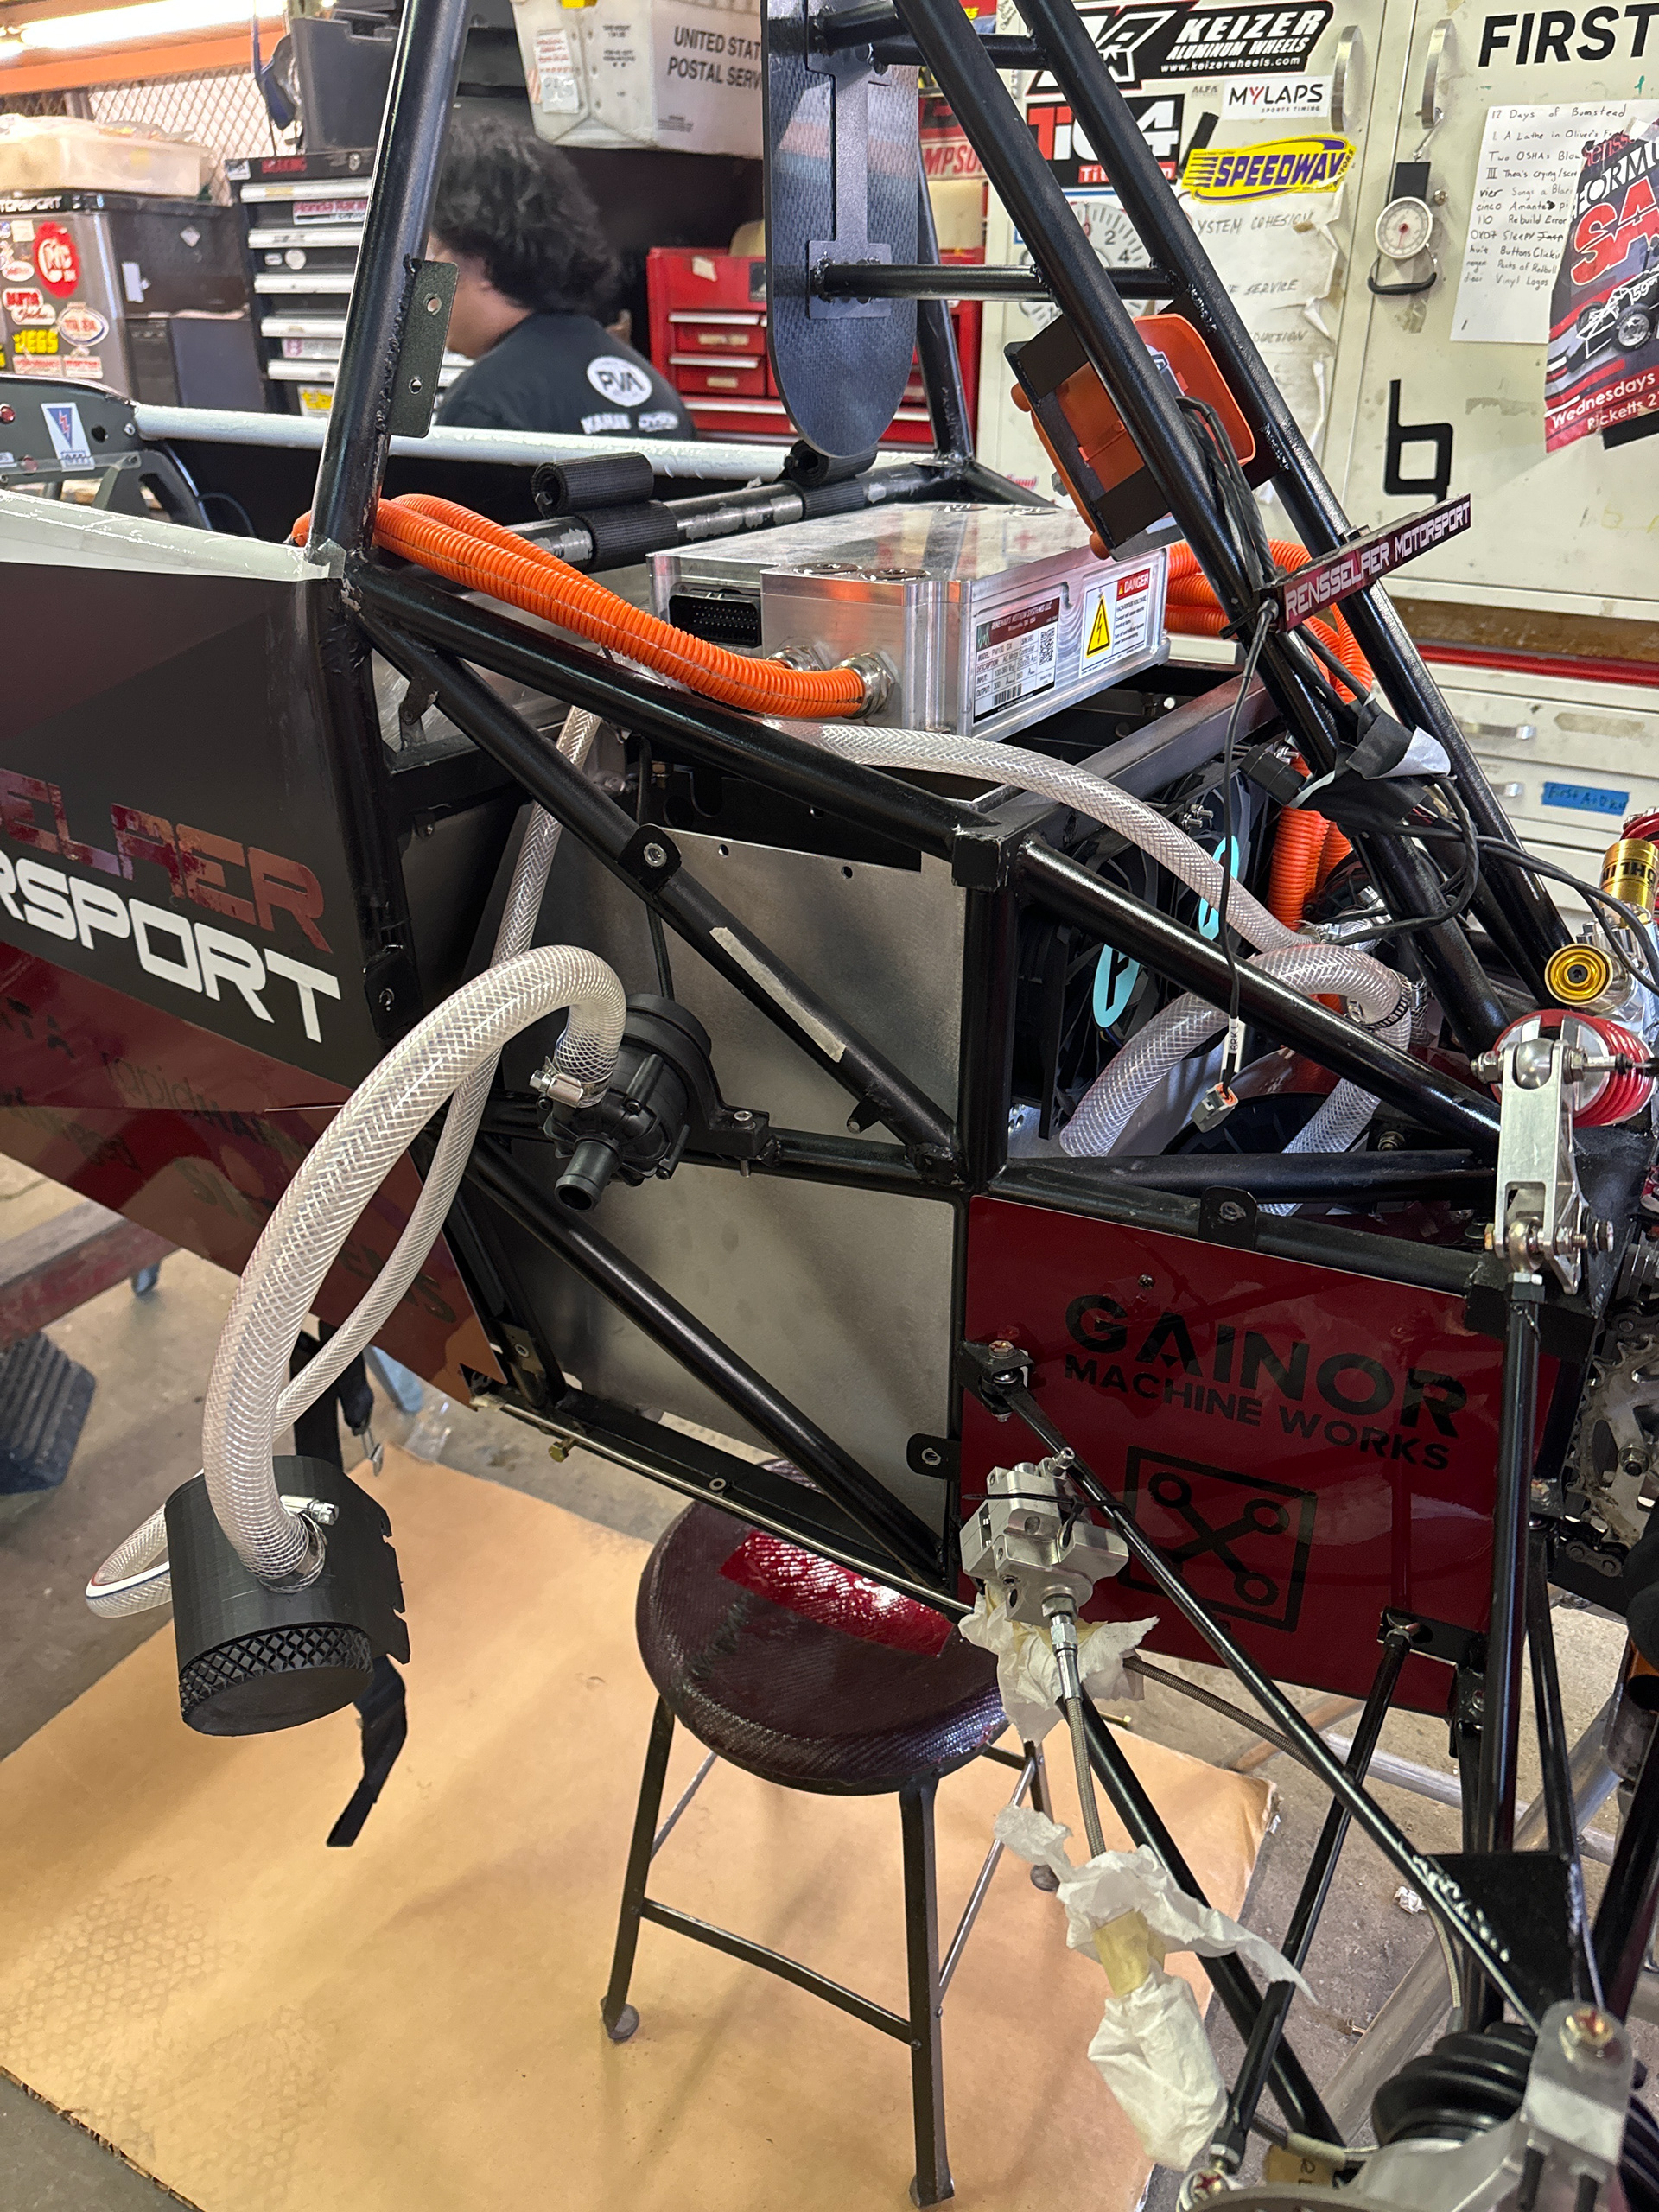
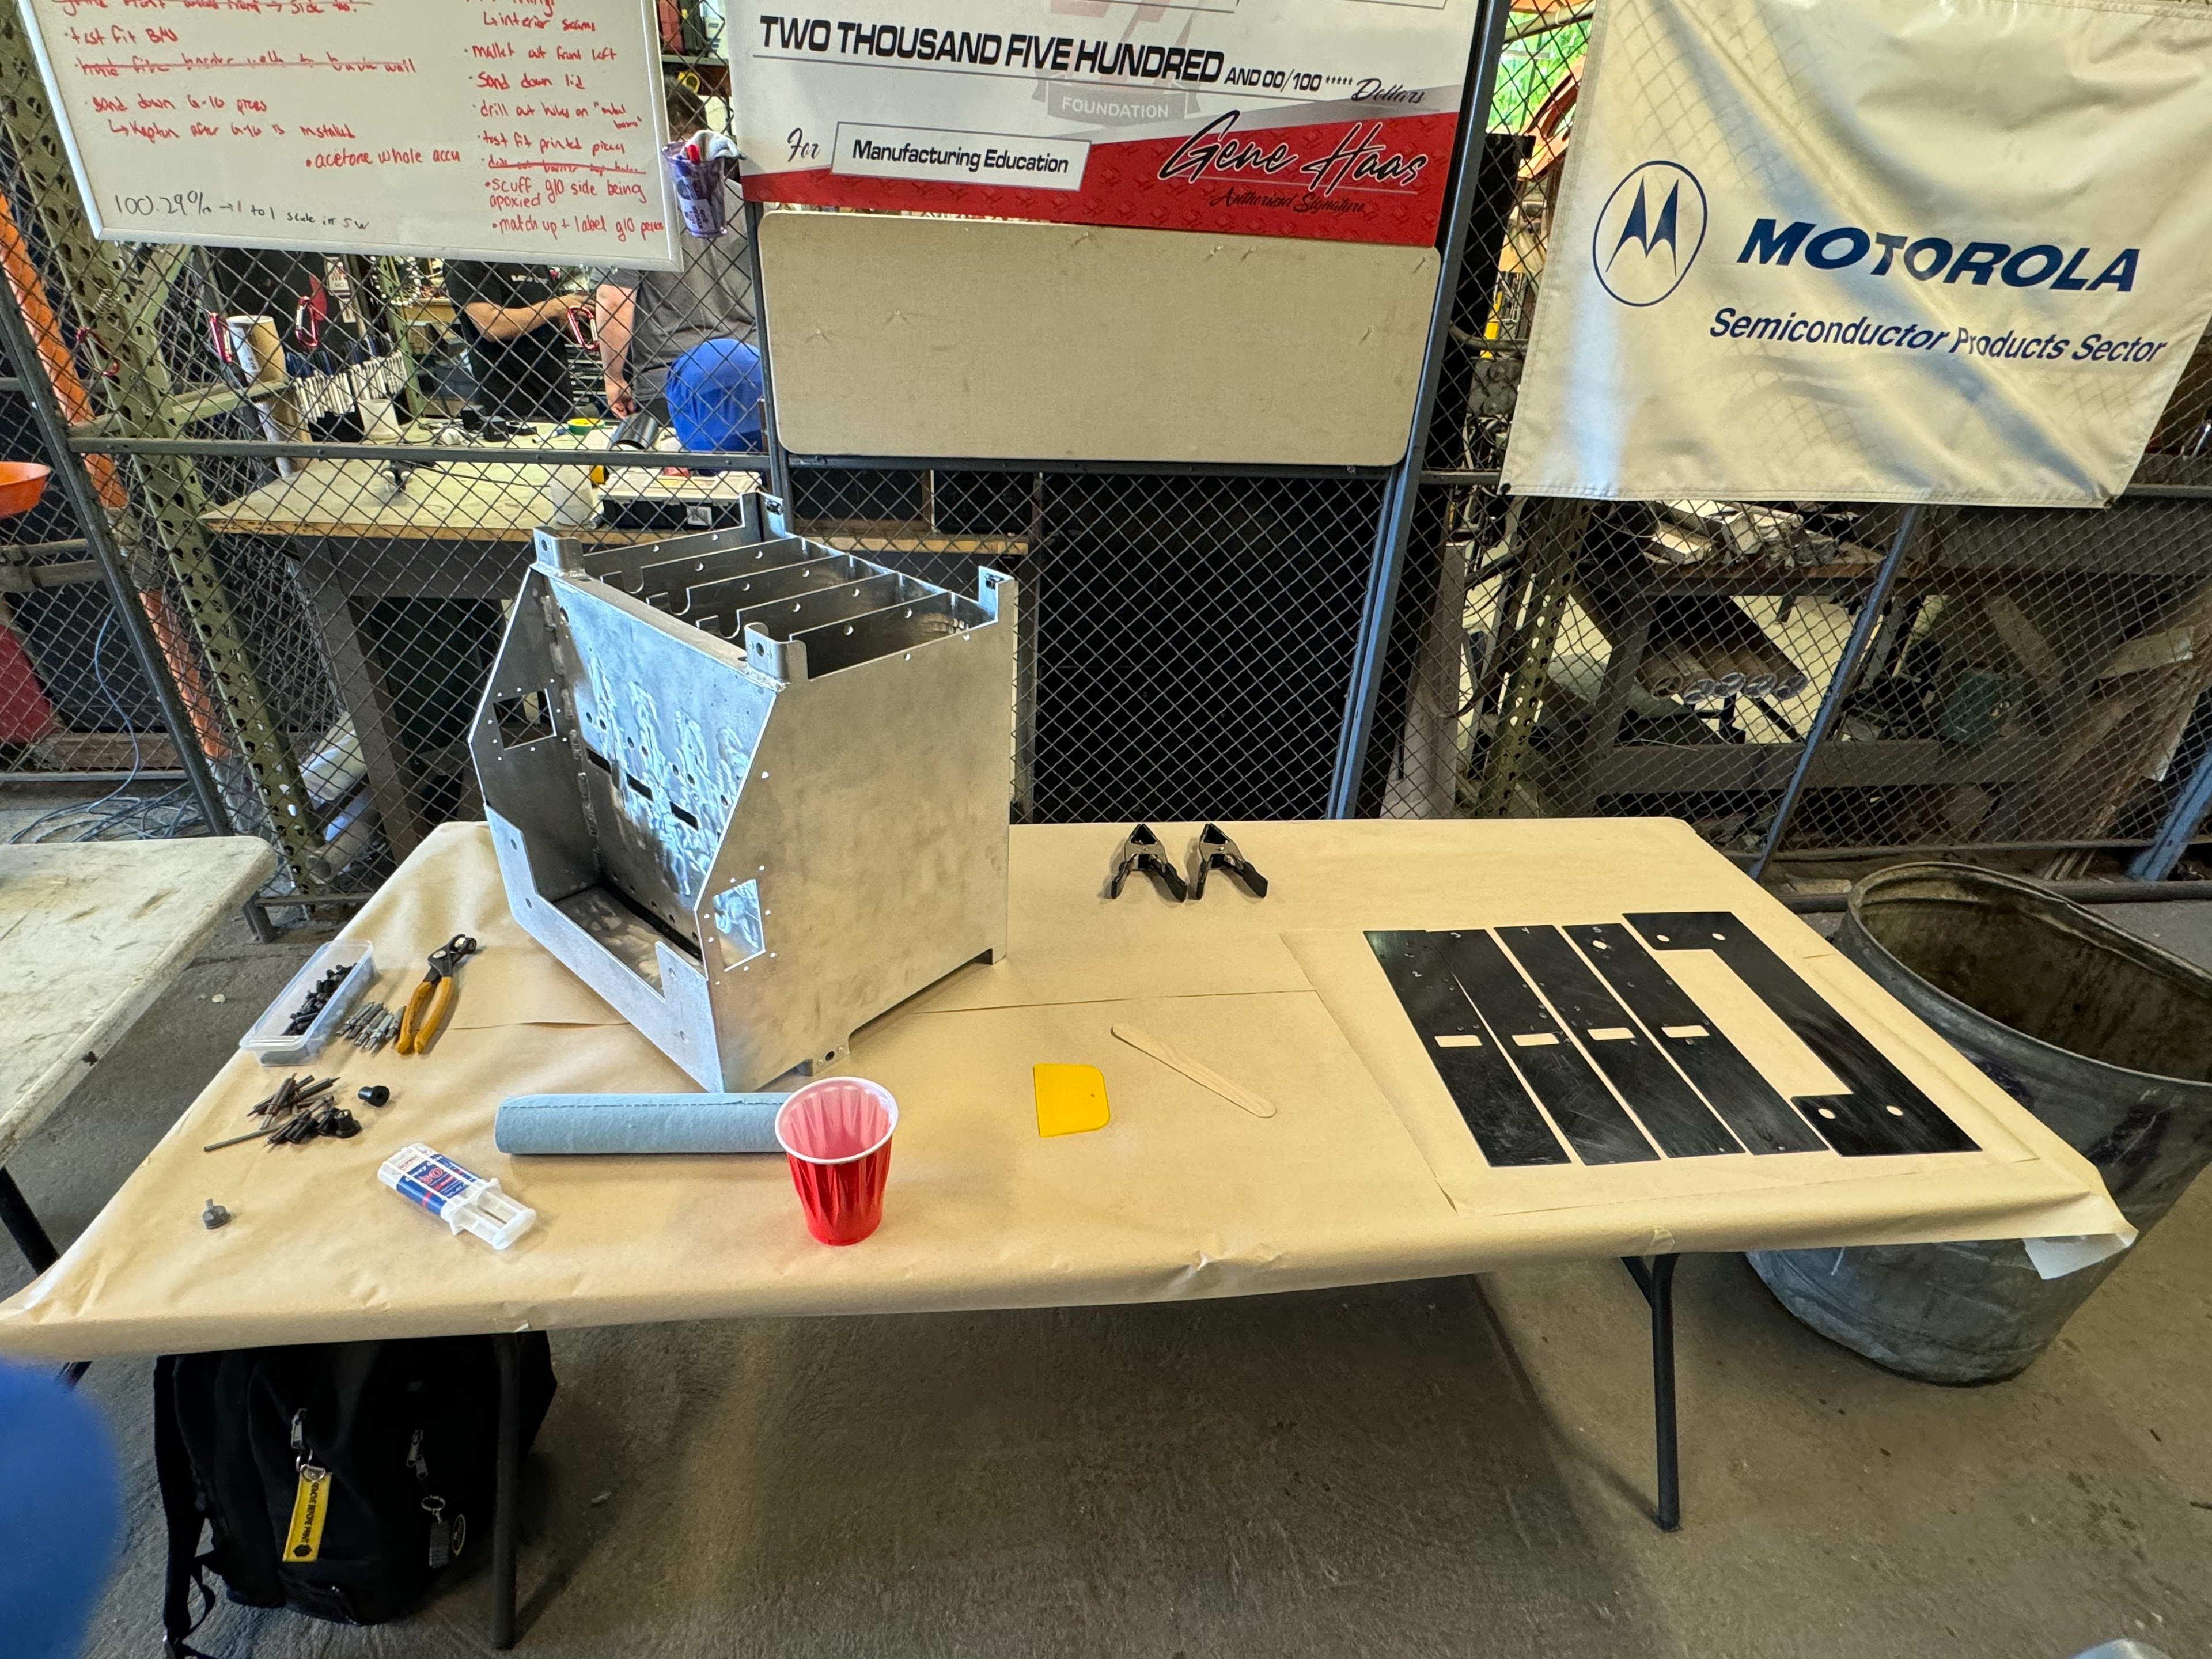
test fitting in the chassis for the first time

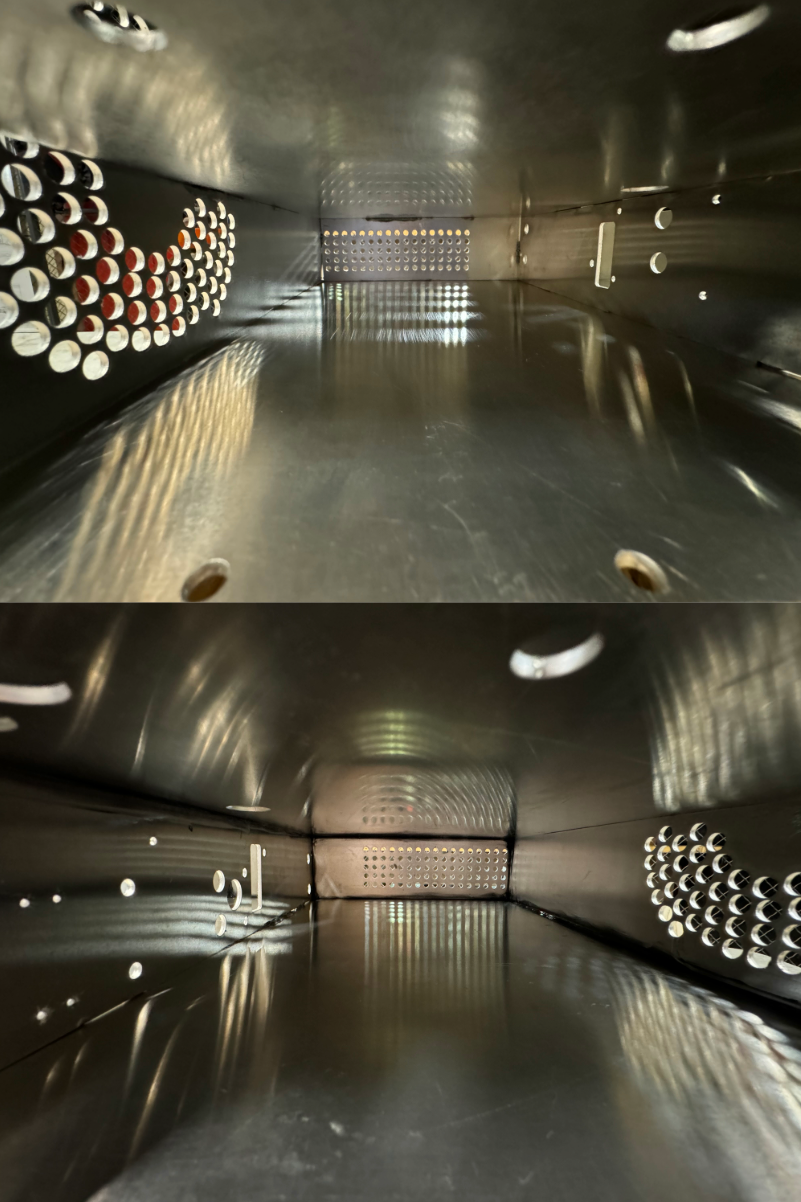
the front of the container after grinding welds flush
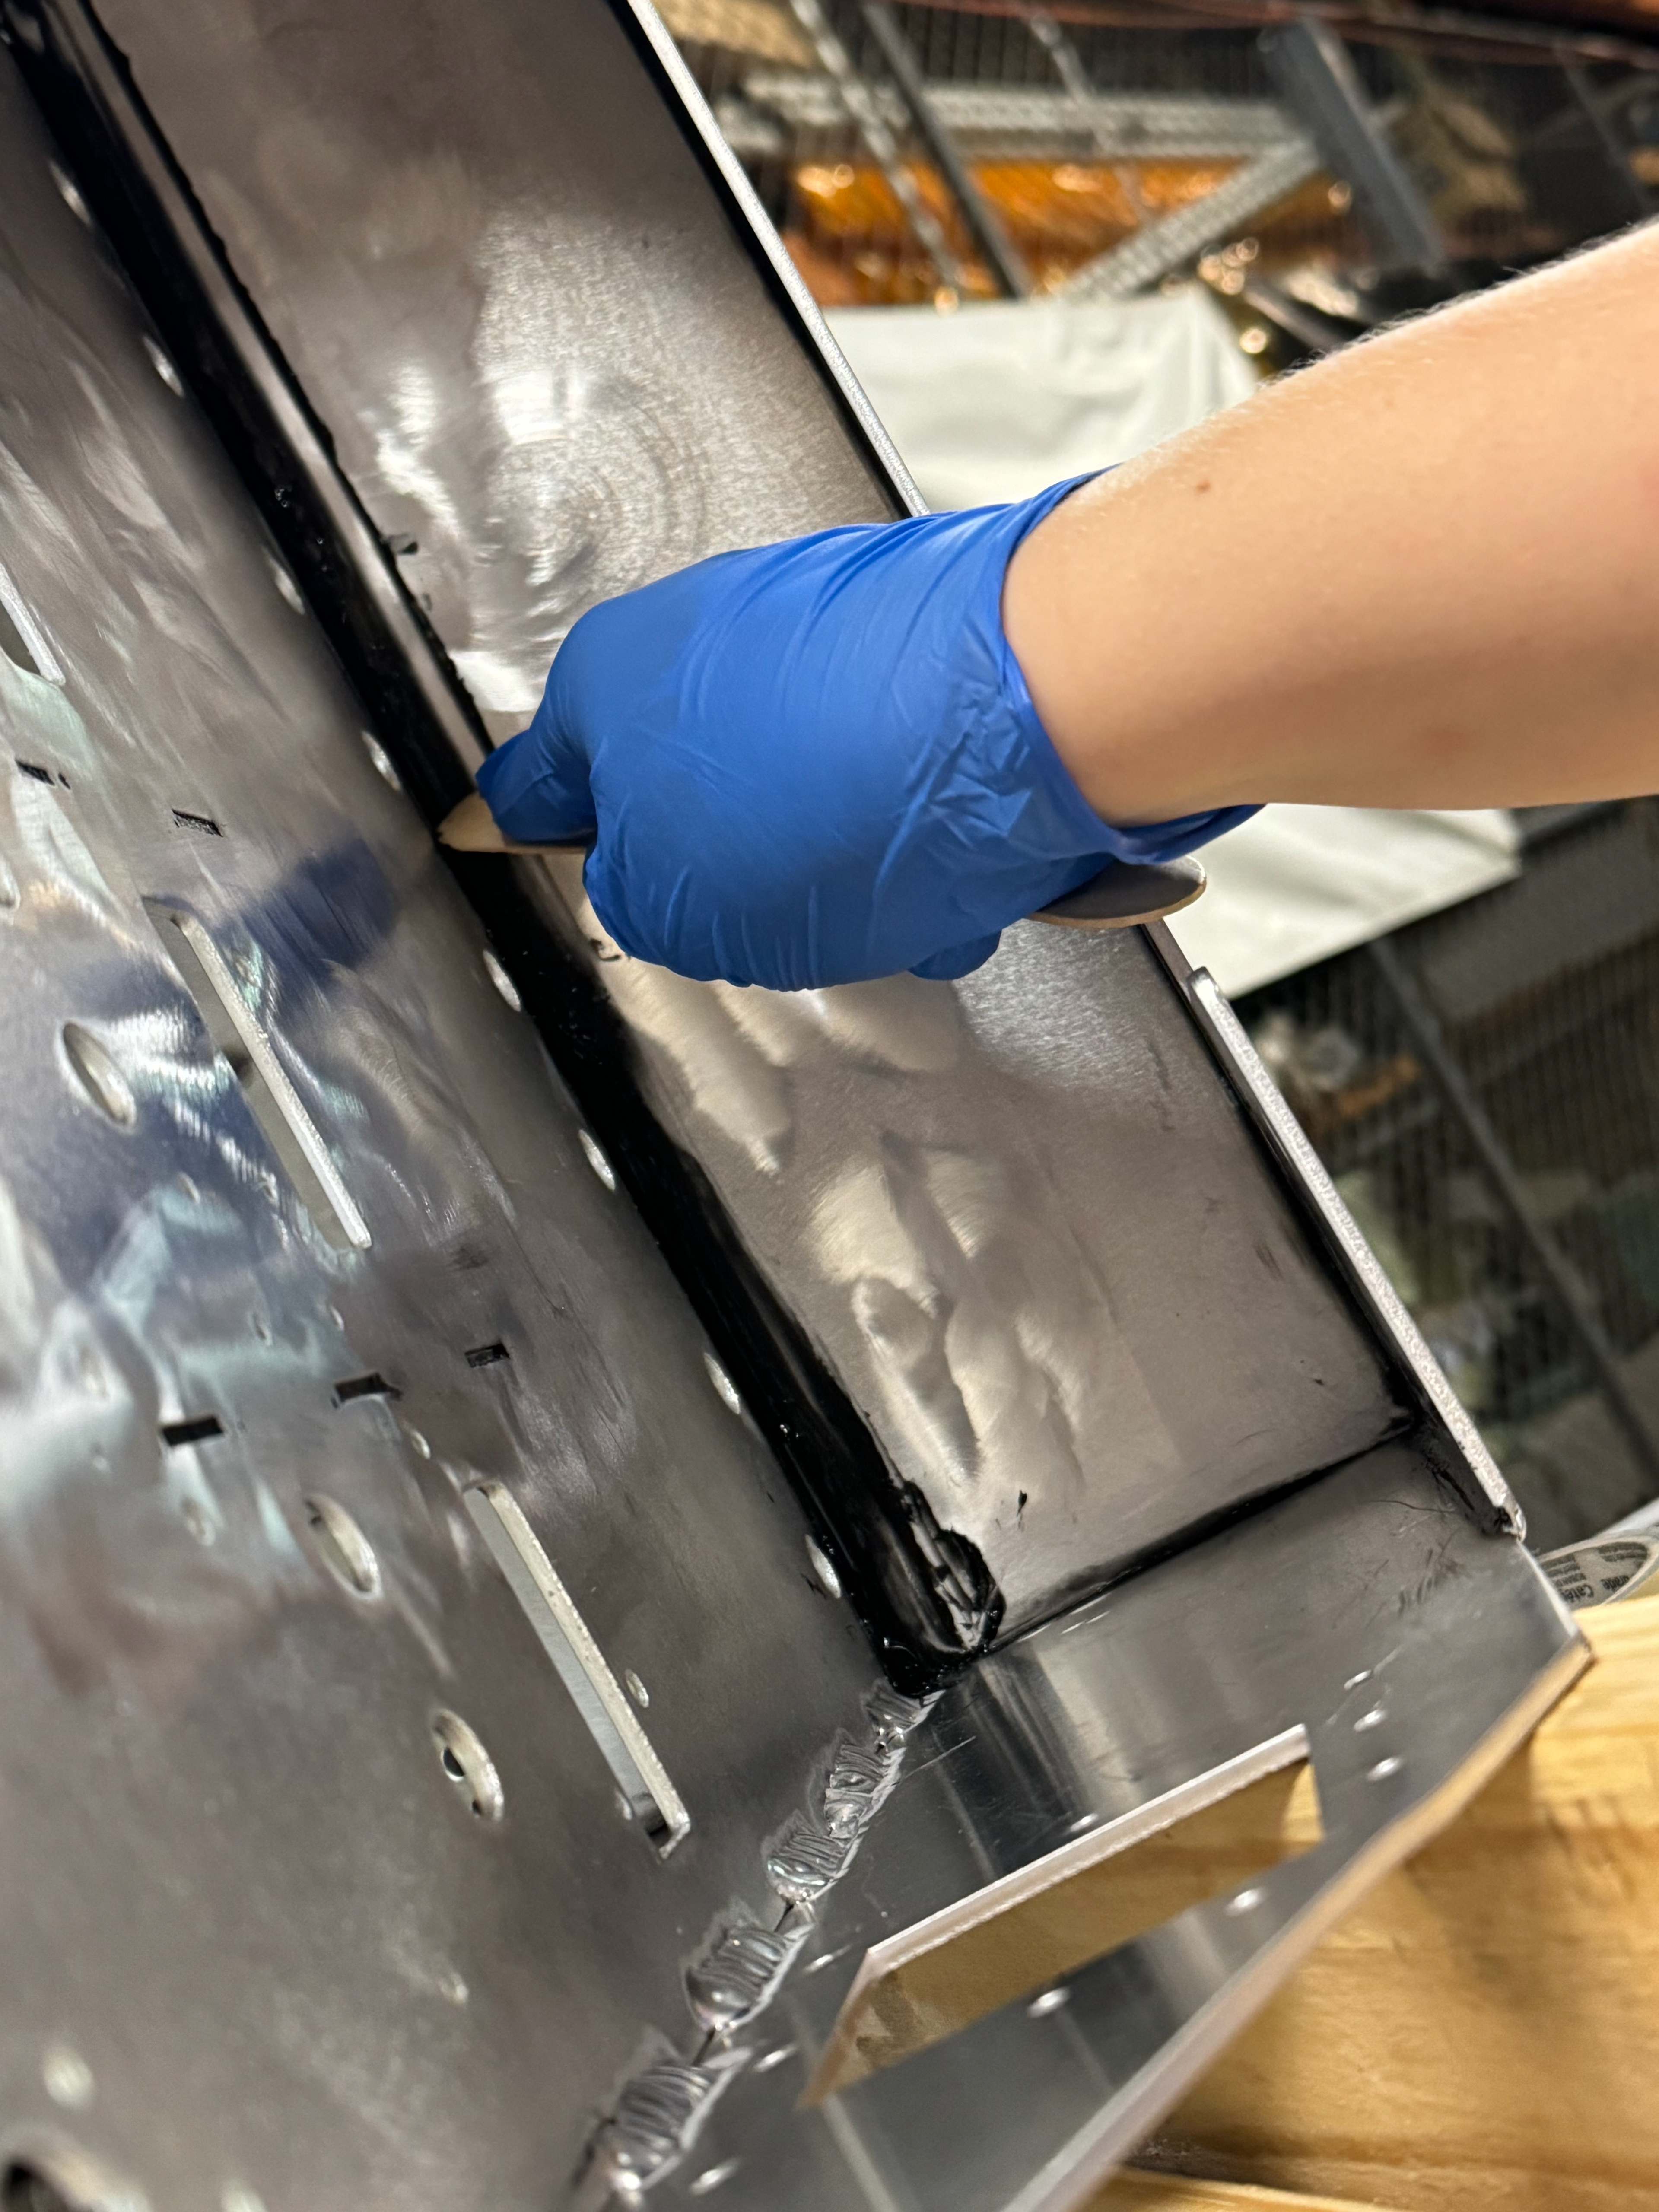
sealing the joins with RTV
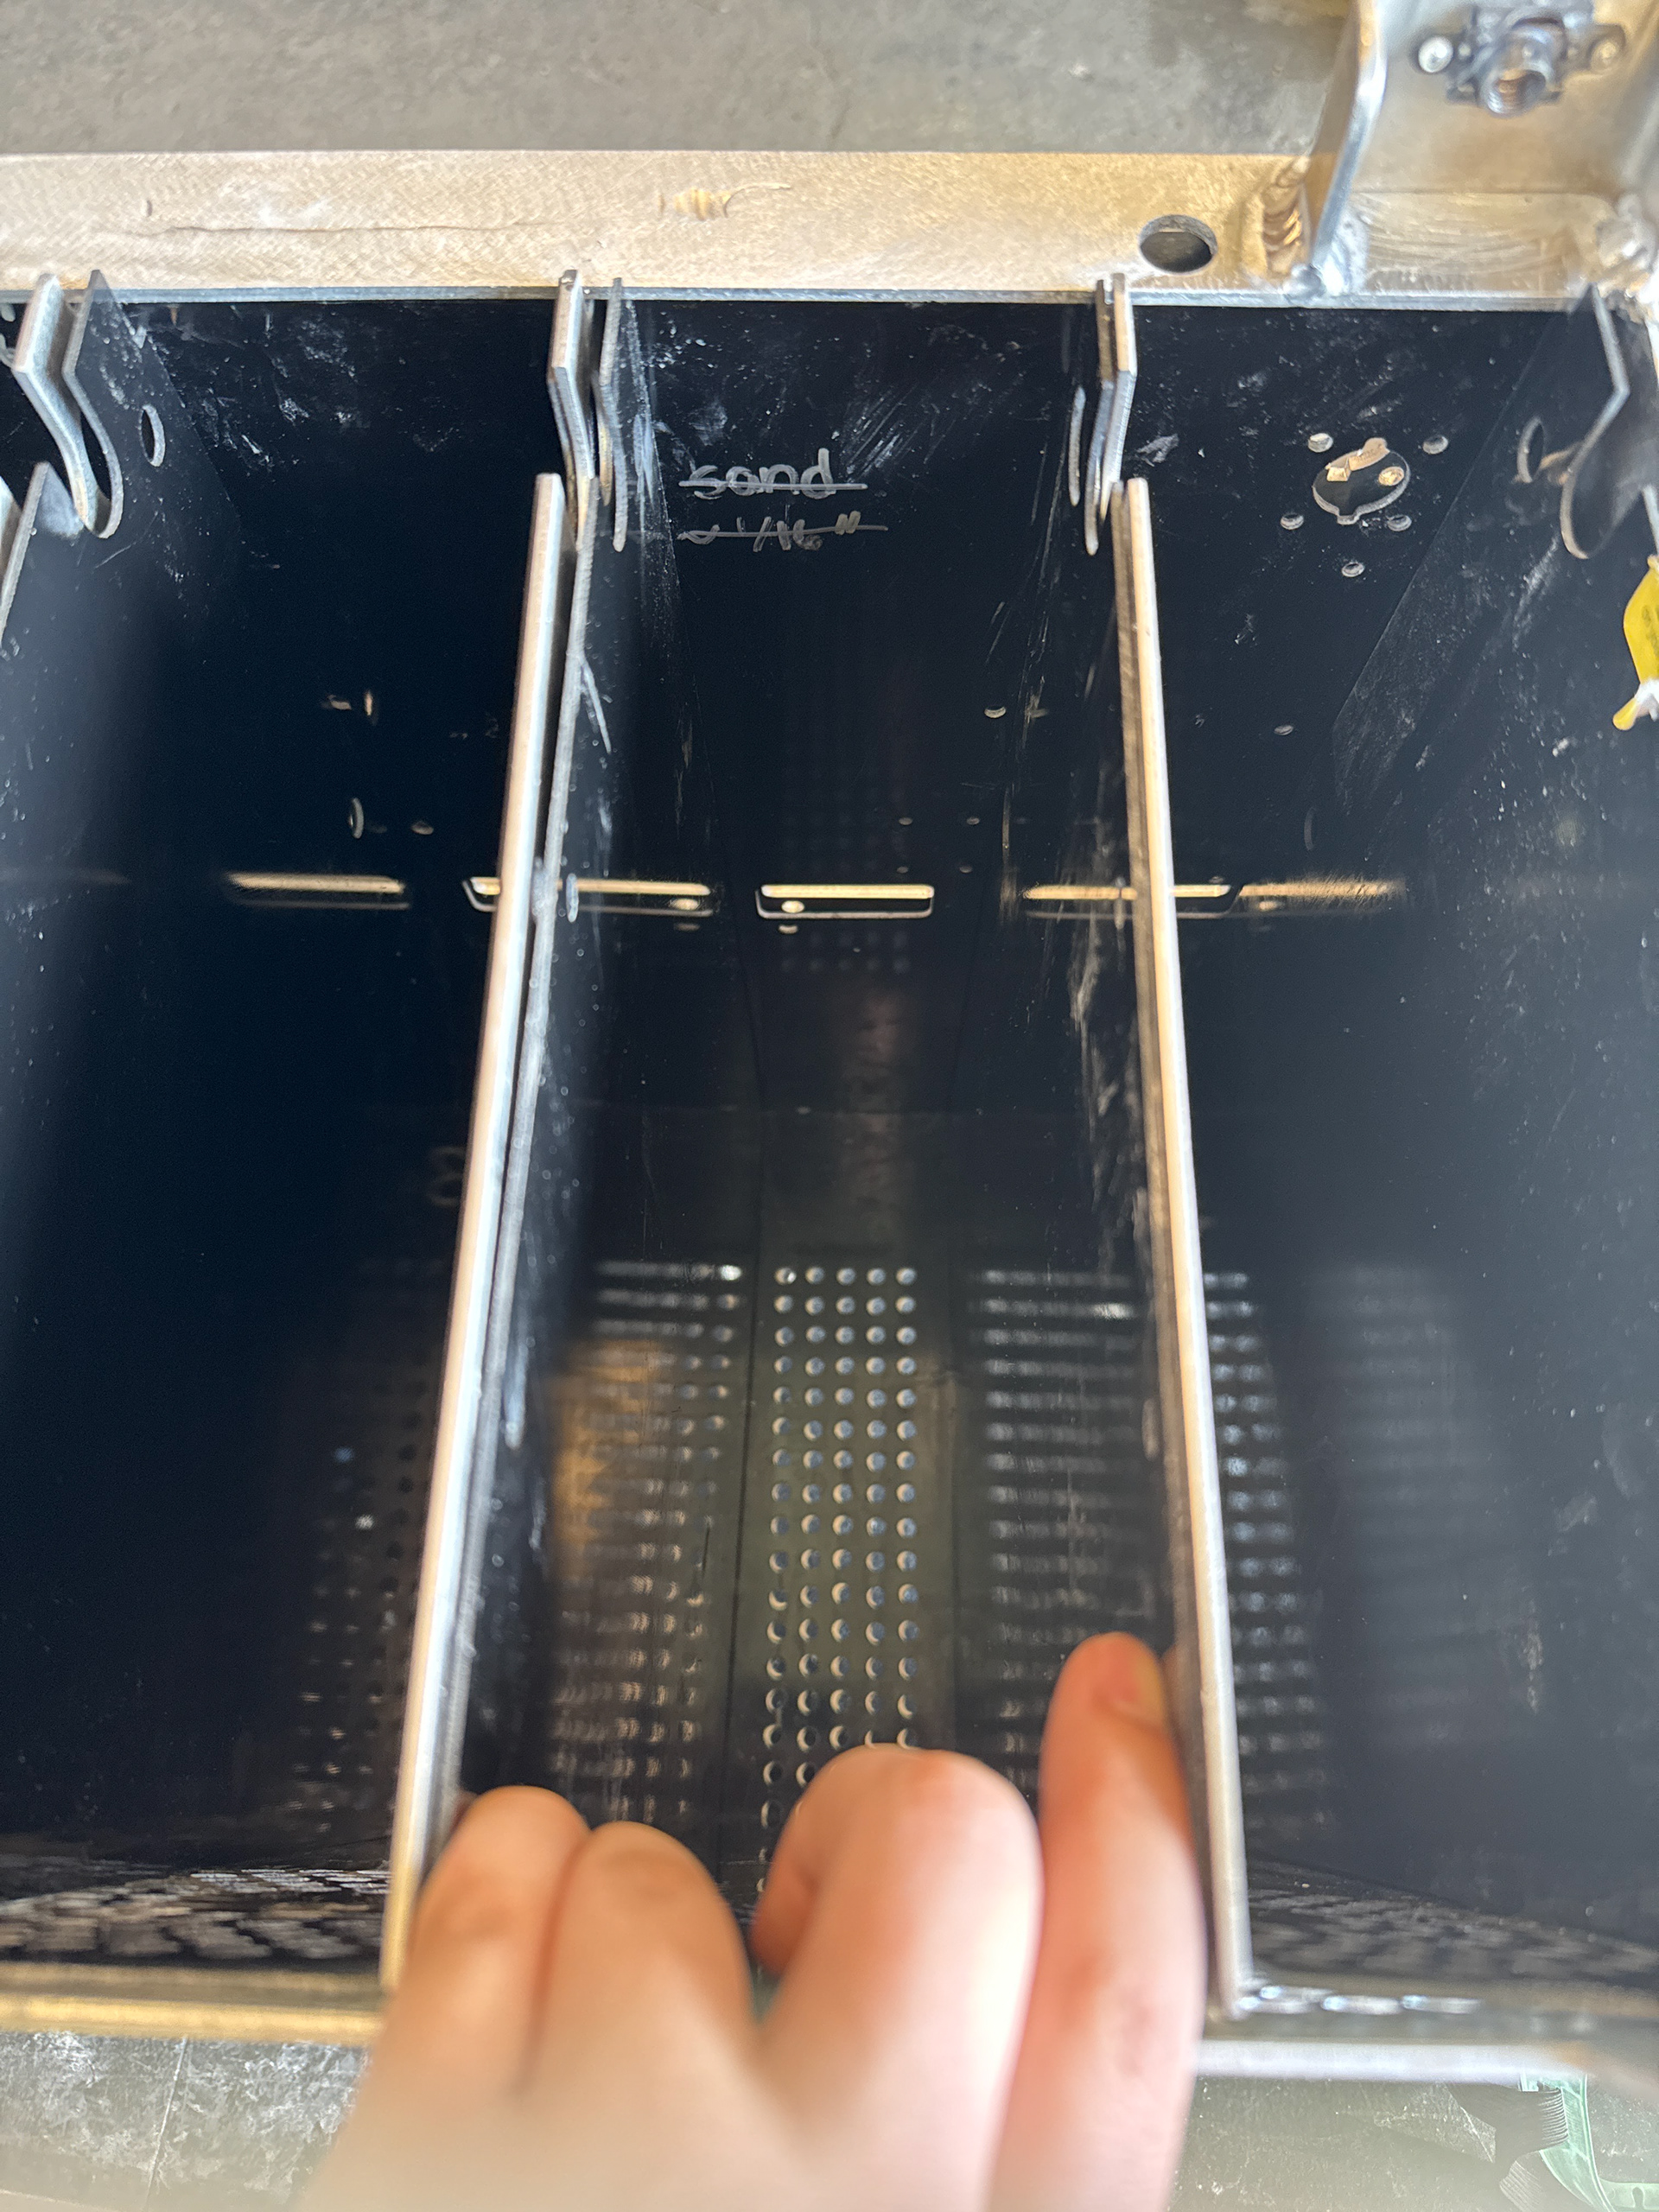
the inside of a segment bay before and after sealing seams
test fitting G10 insulation pieces
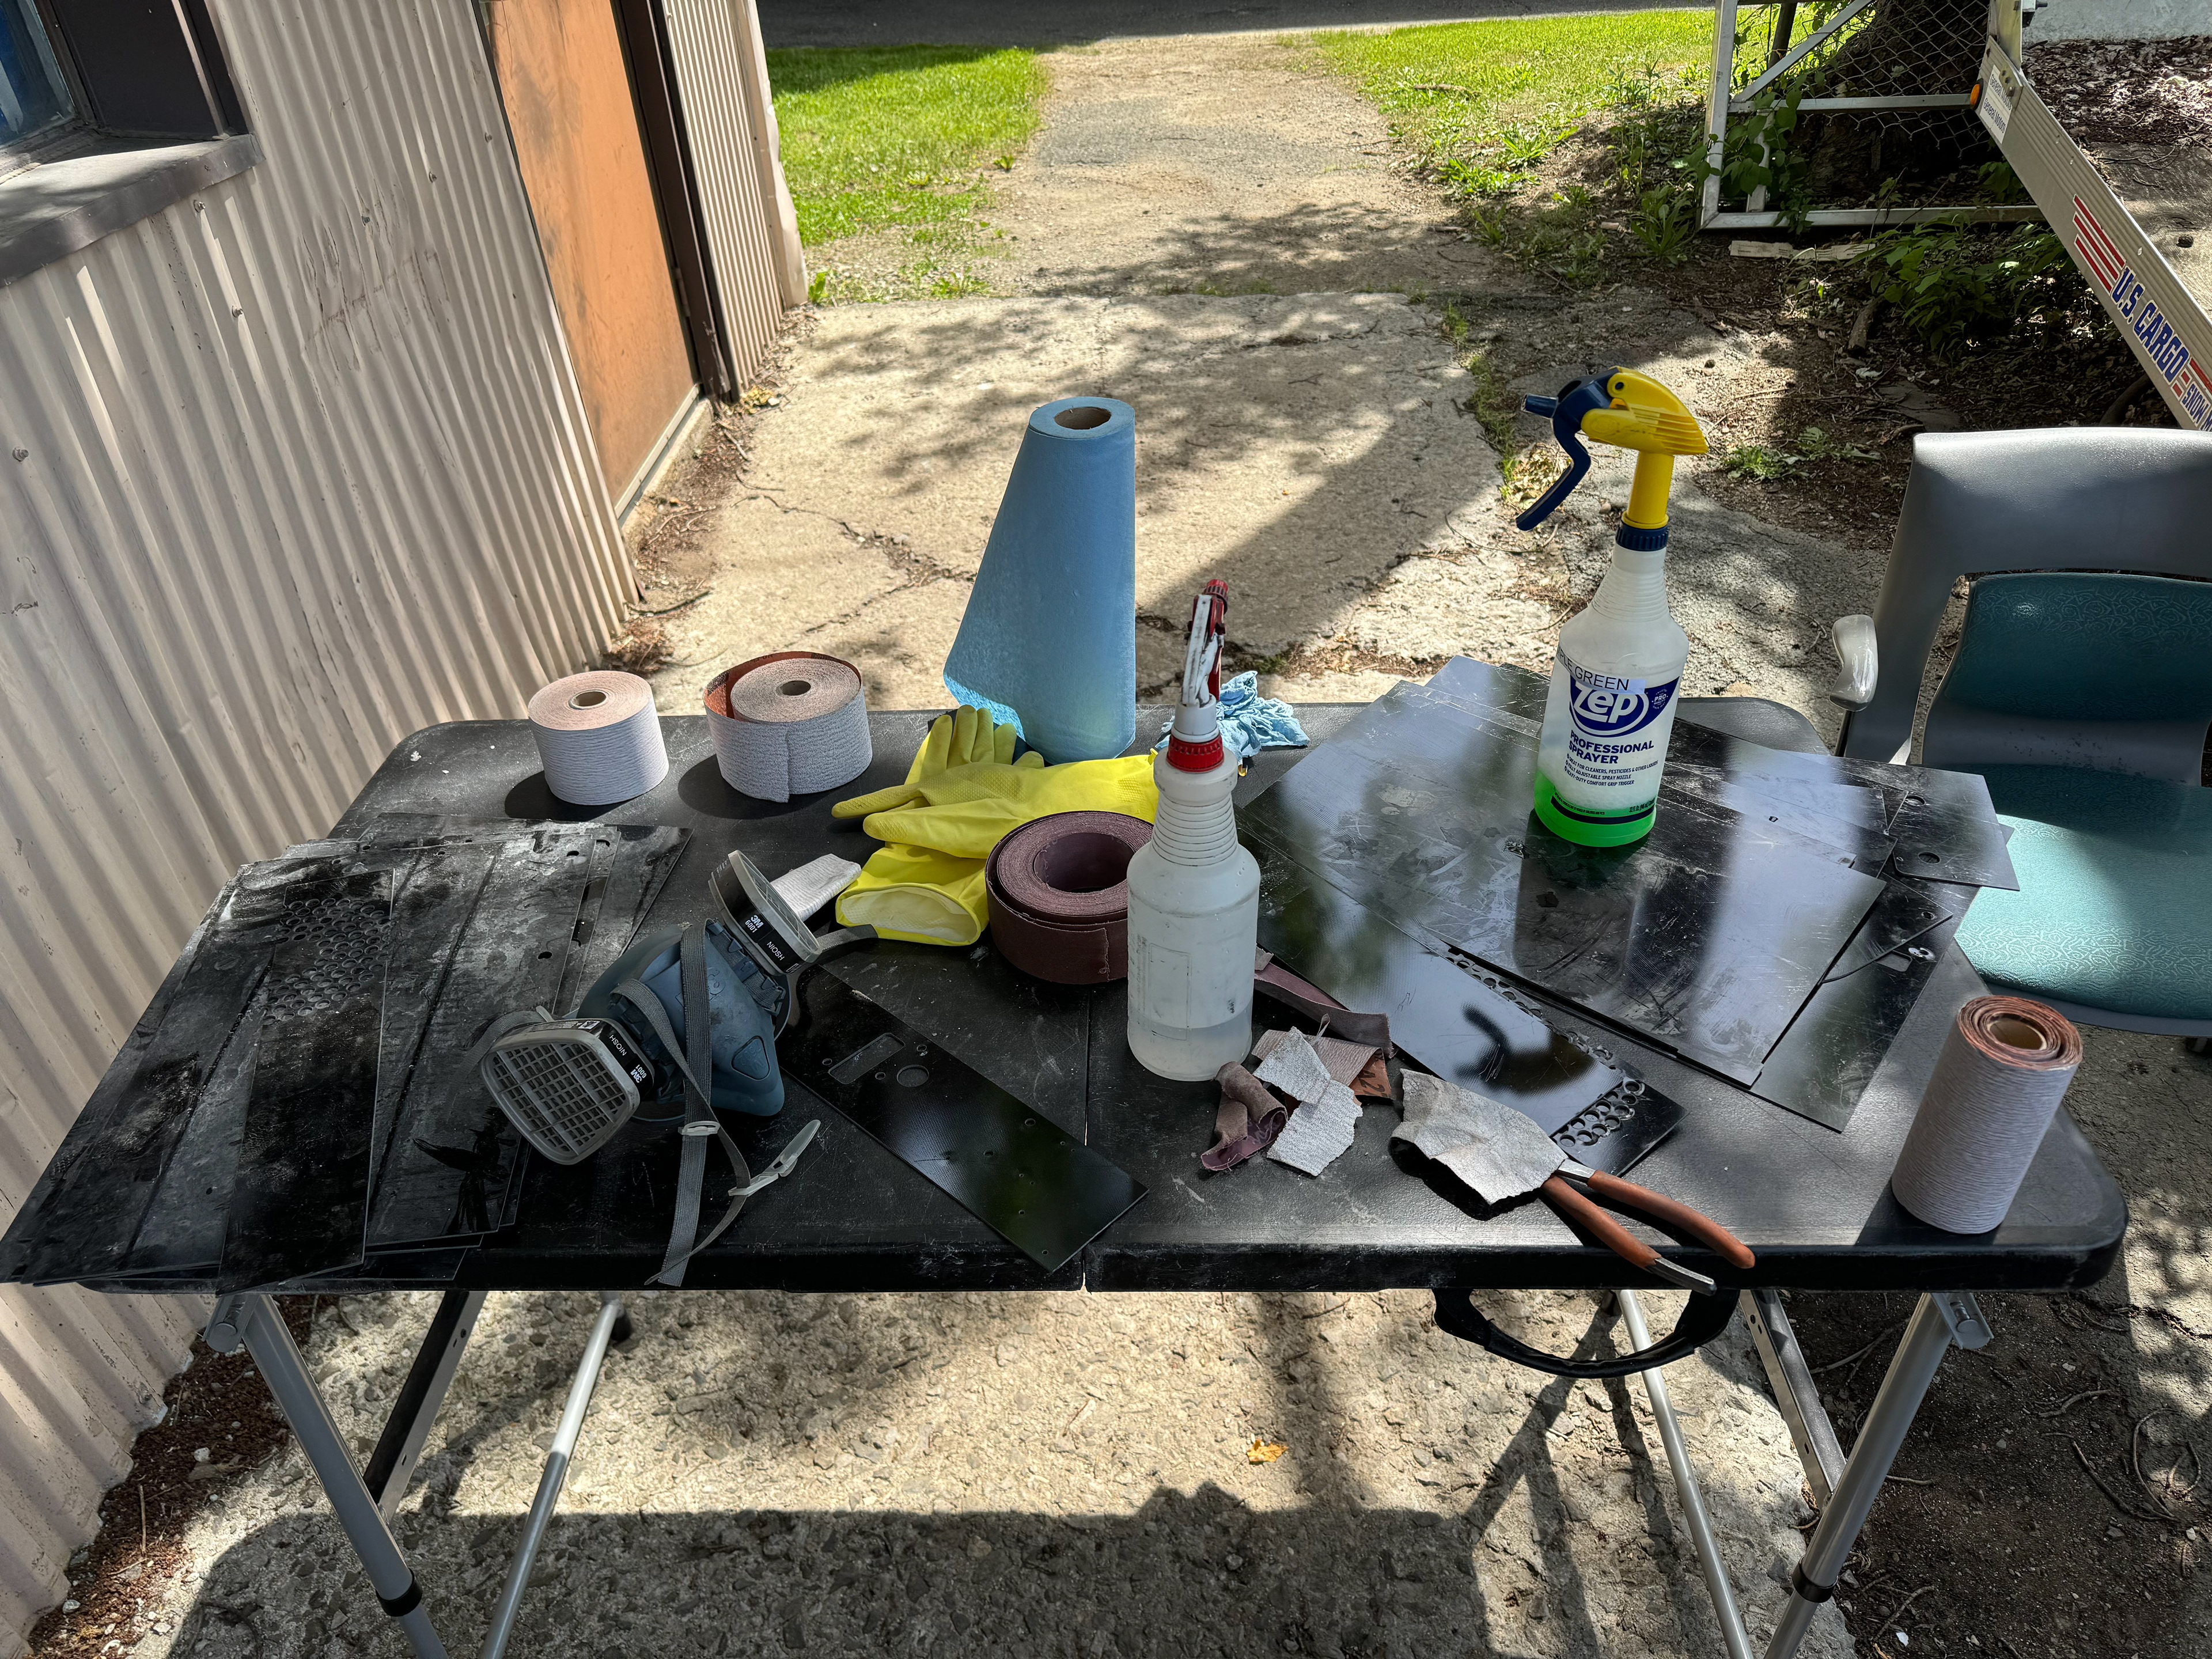
sanding station for G10
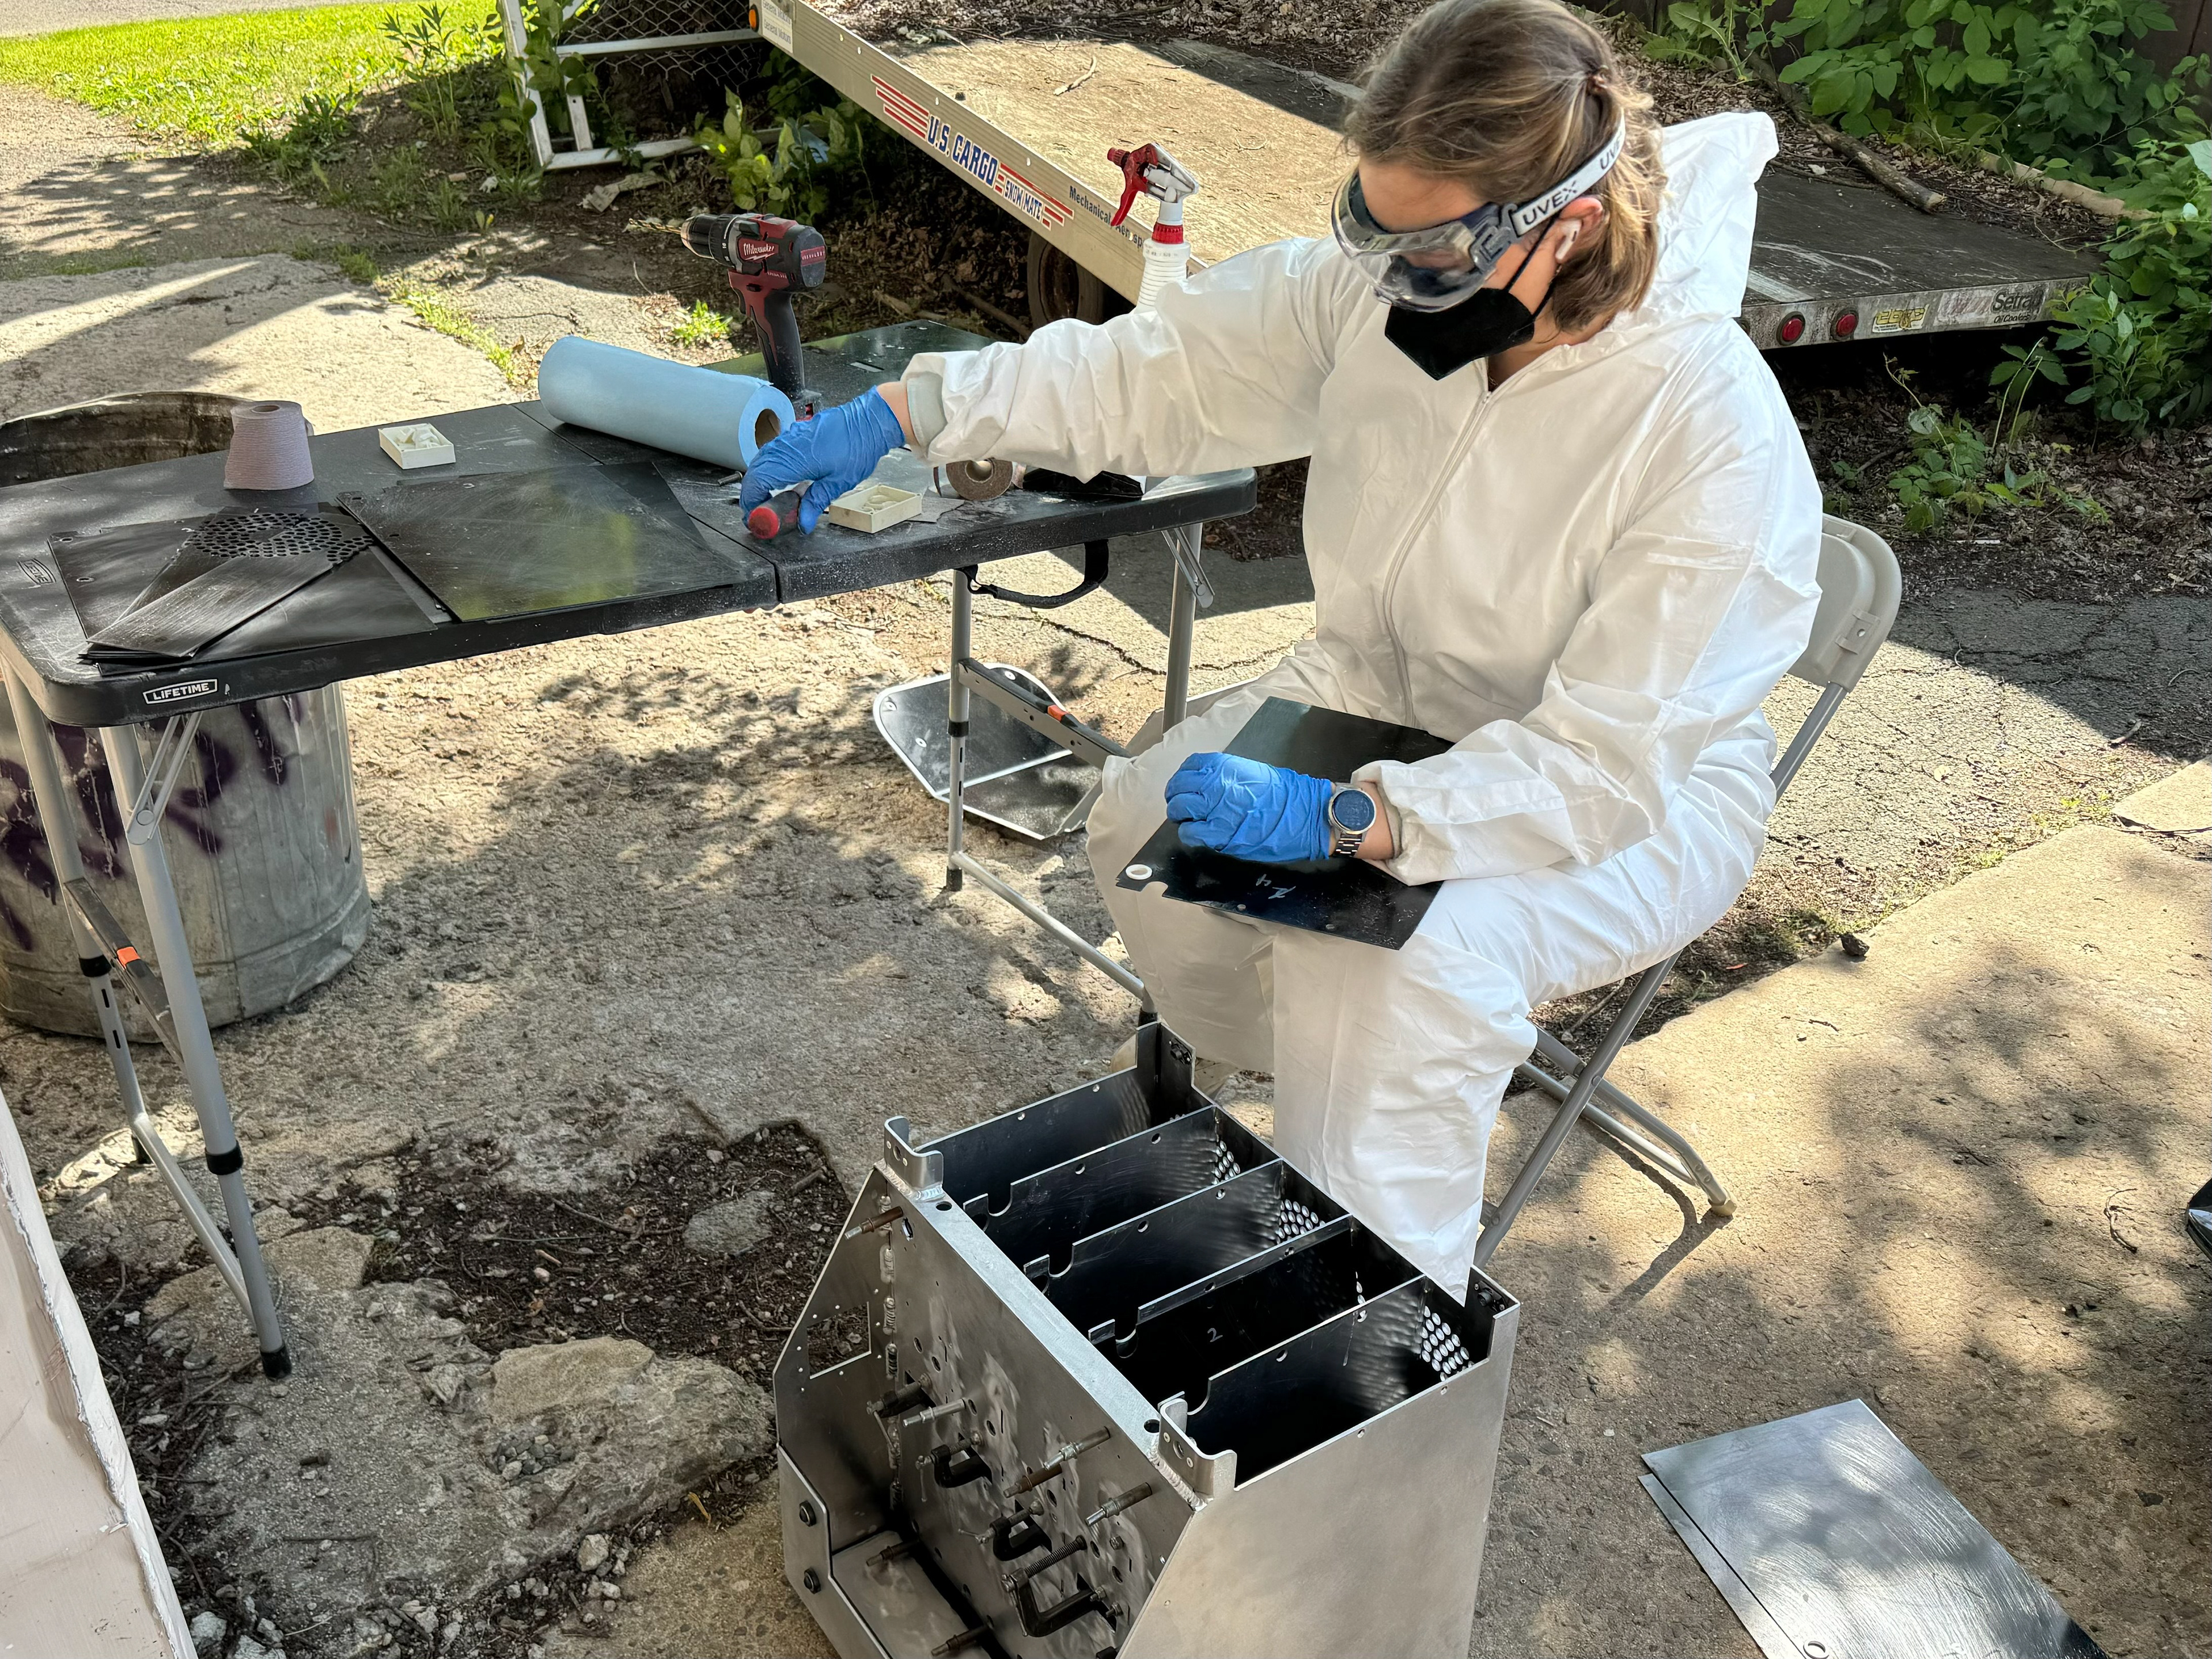
sanding the G10 pieces to fit with proper PPE
setting up glueing station
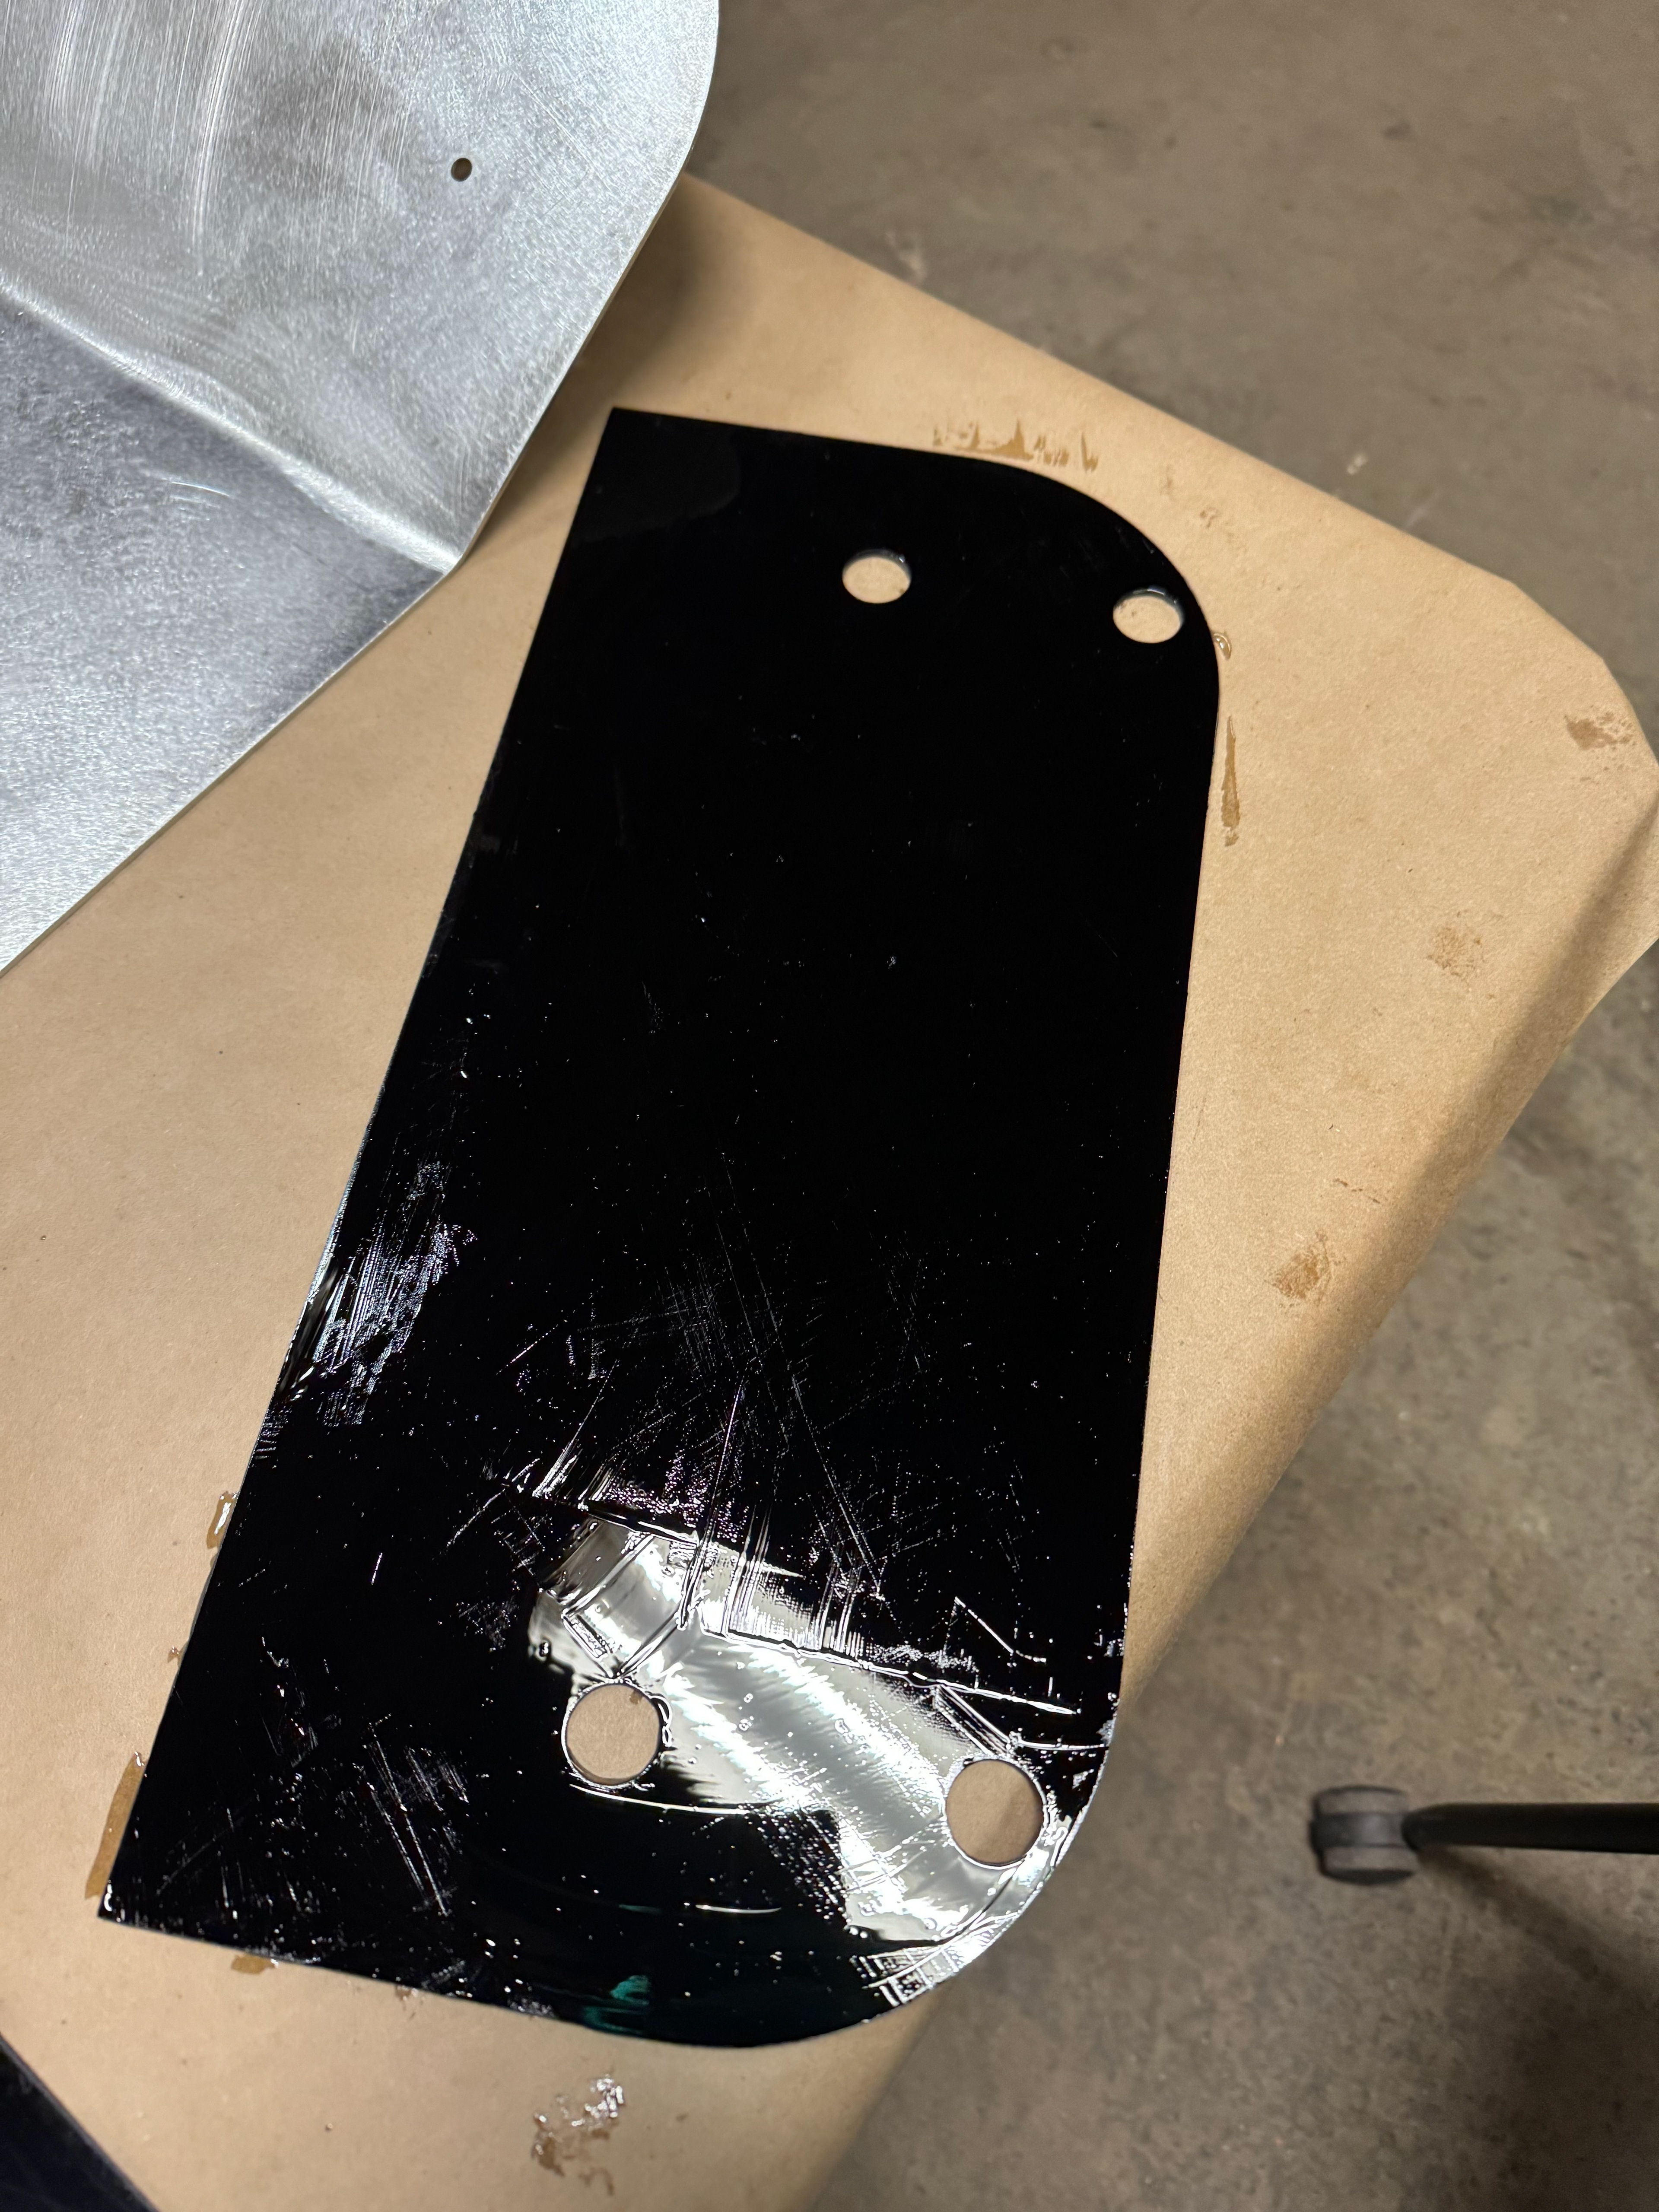
applying an even expocy coat to G10 pieces
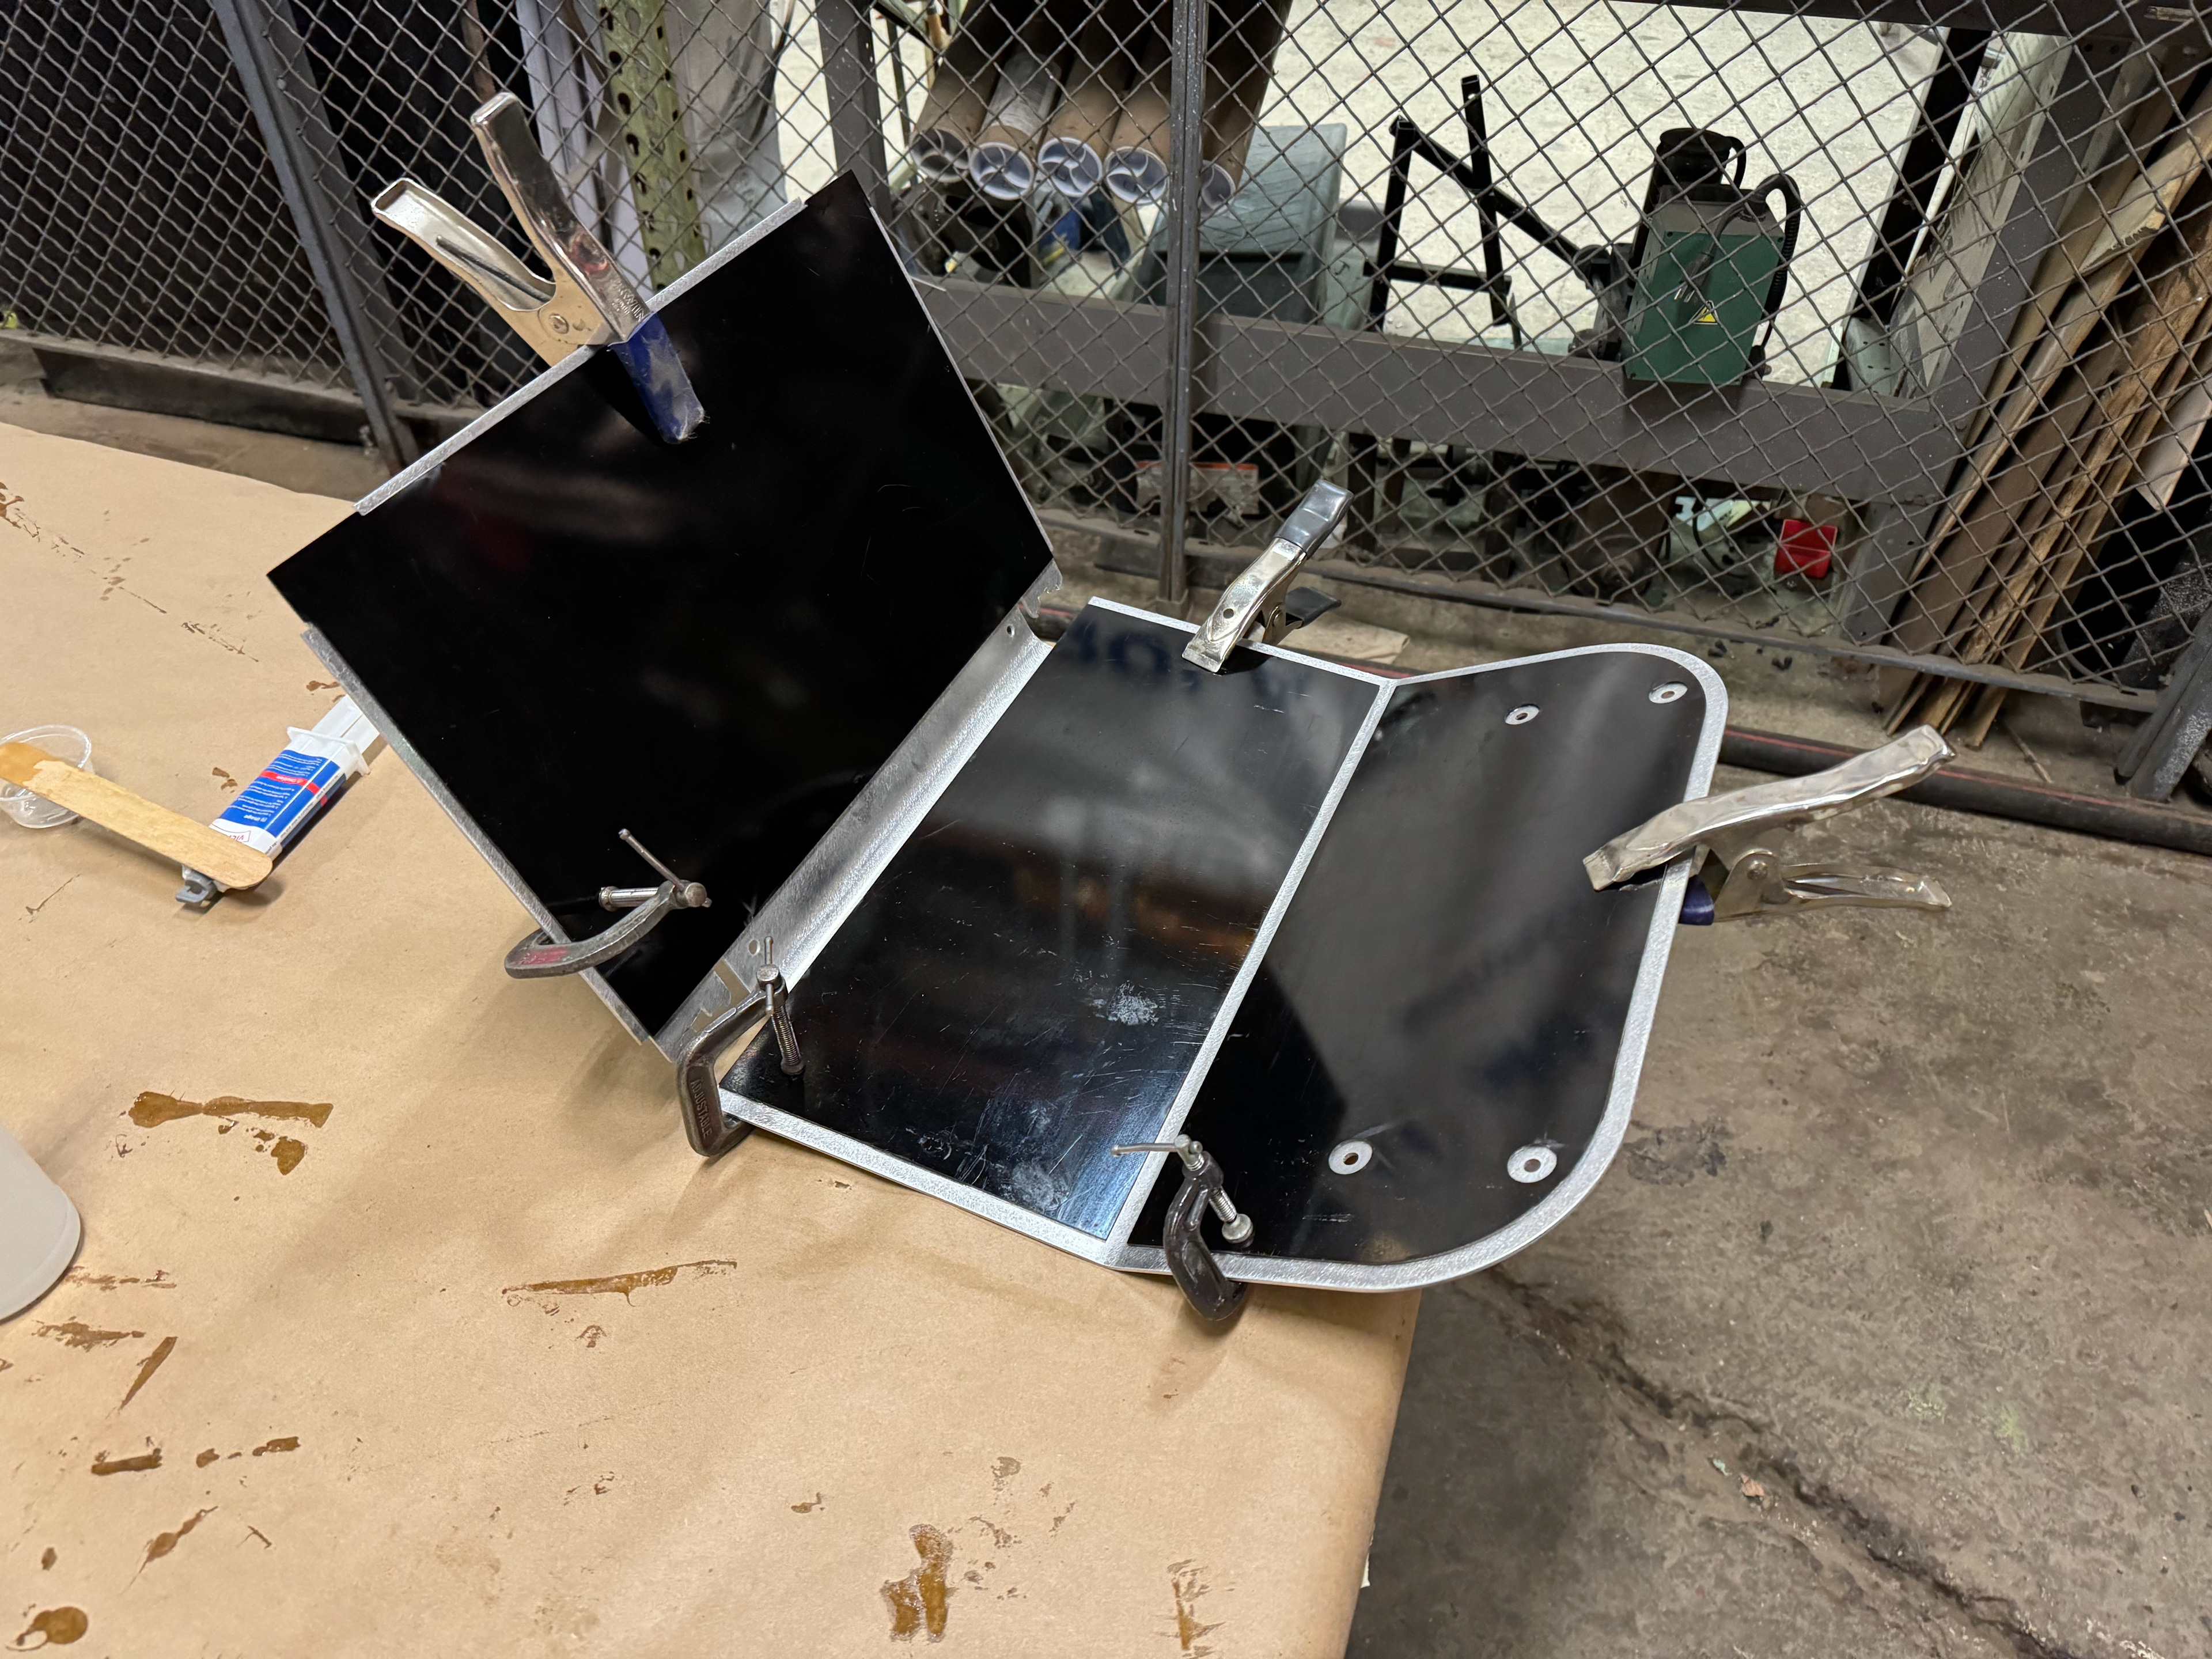
clamping G10 pieces to lid
using weights to hold flor pieces while curing
using clicos and clamps to hold segment pieces wjhile curing
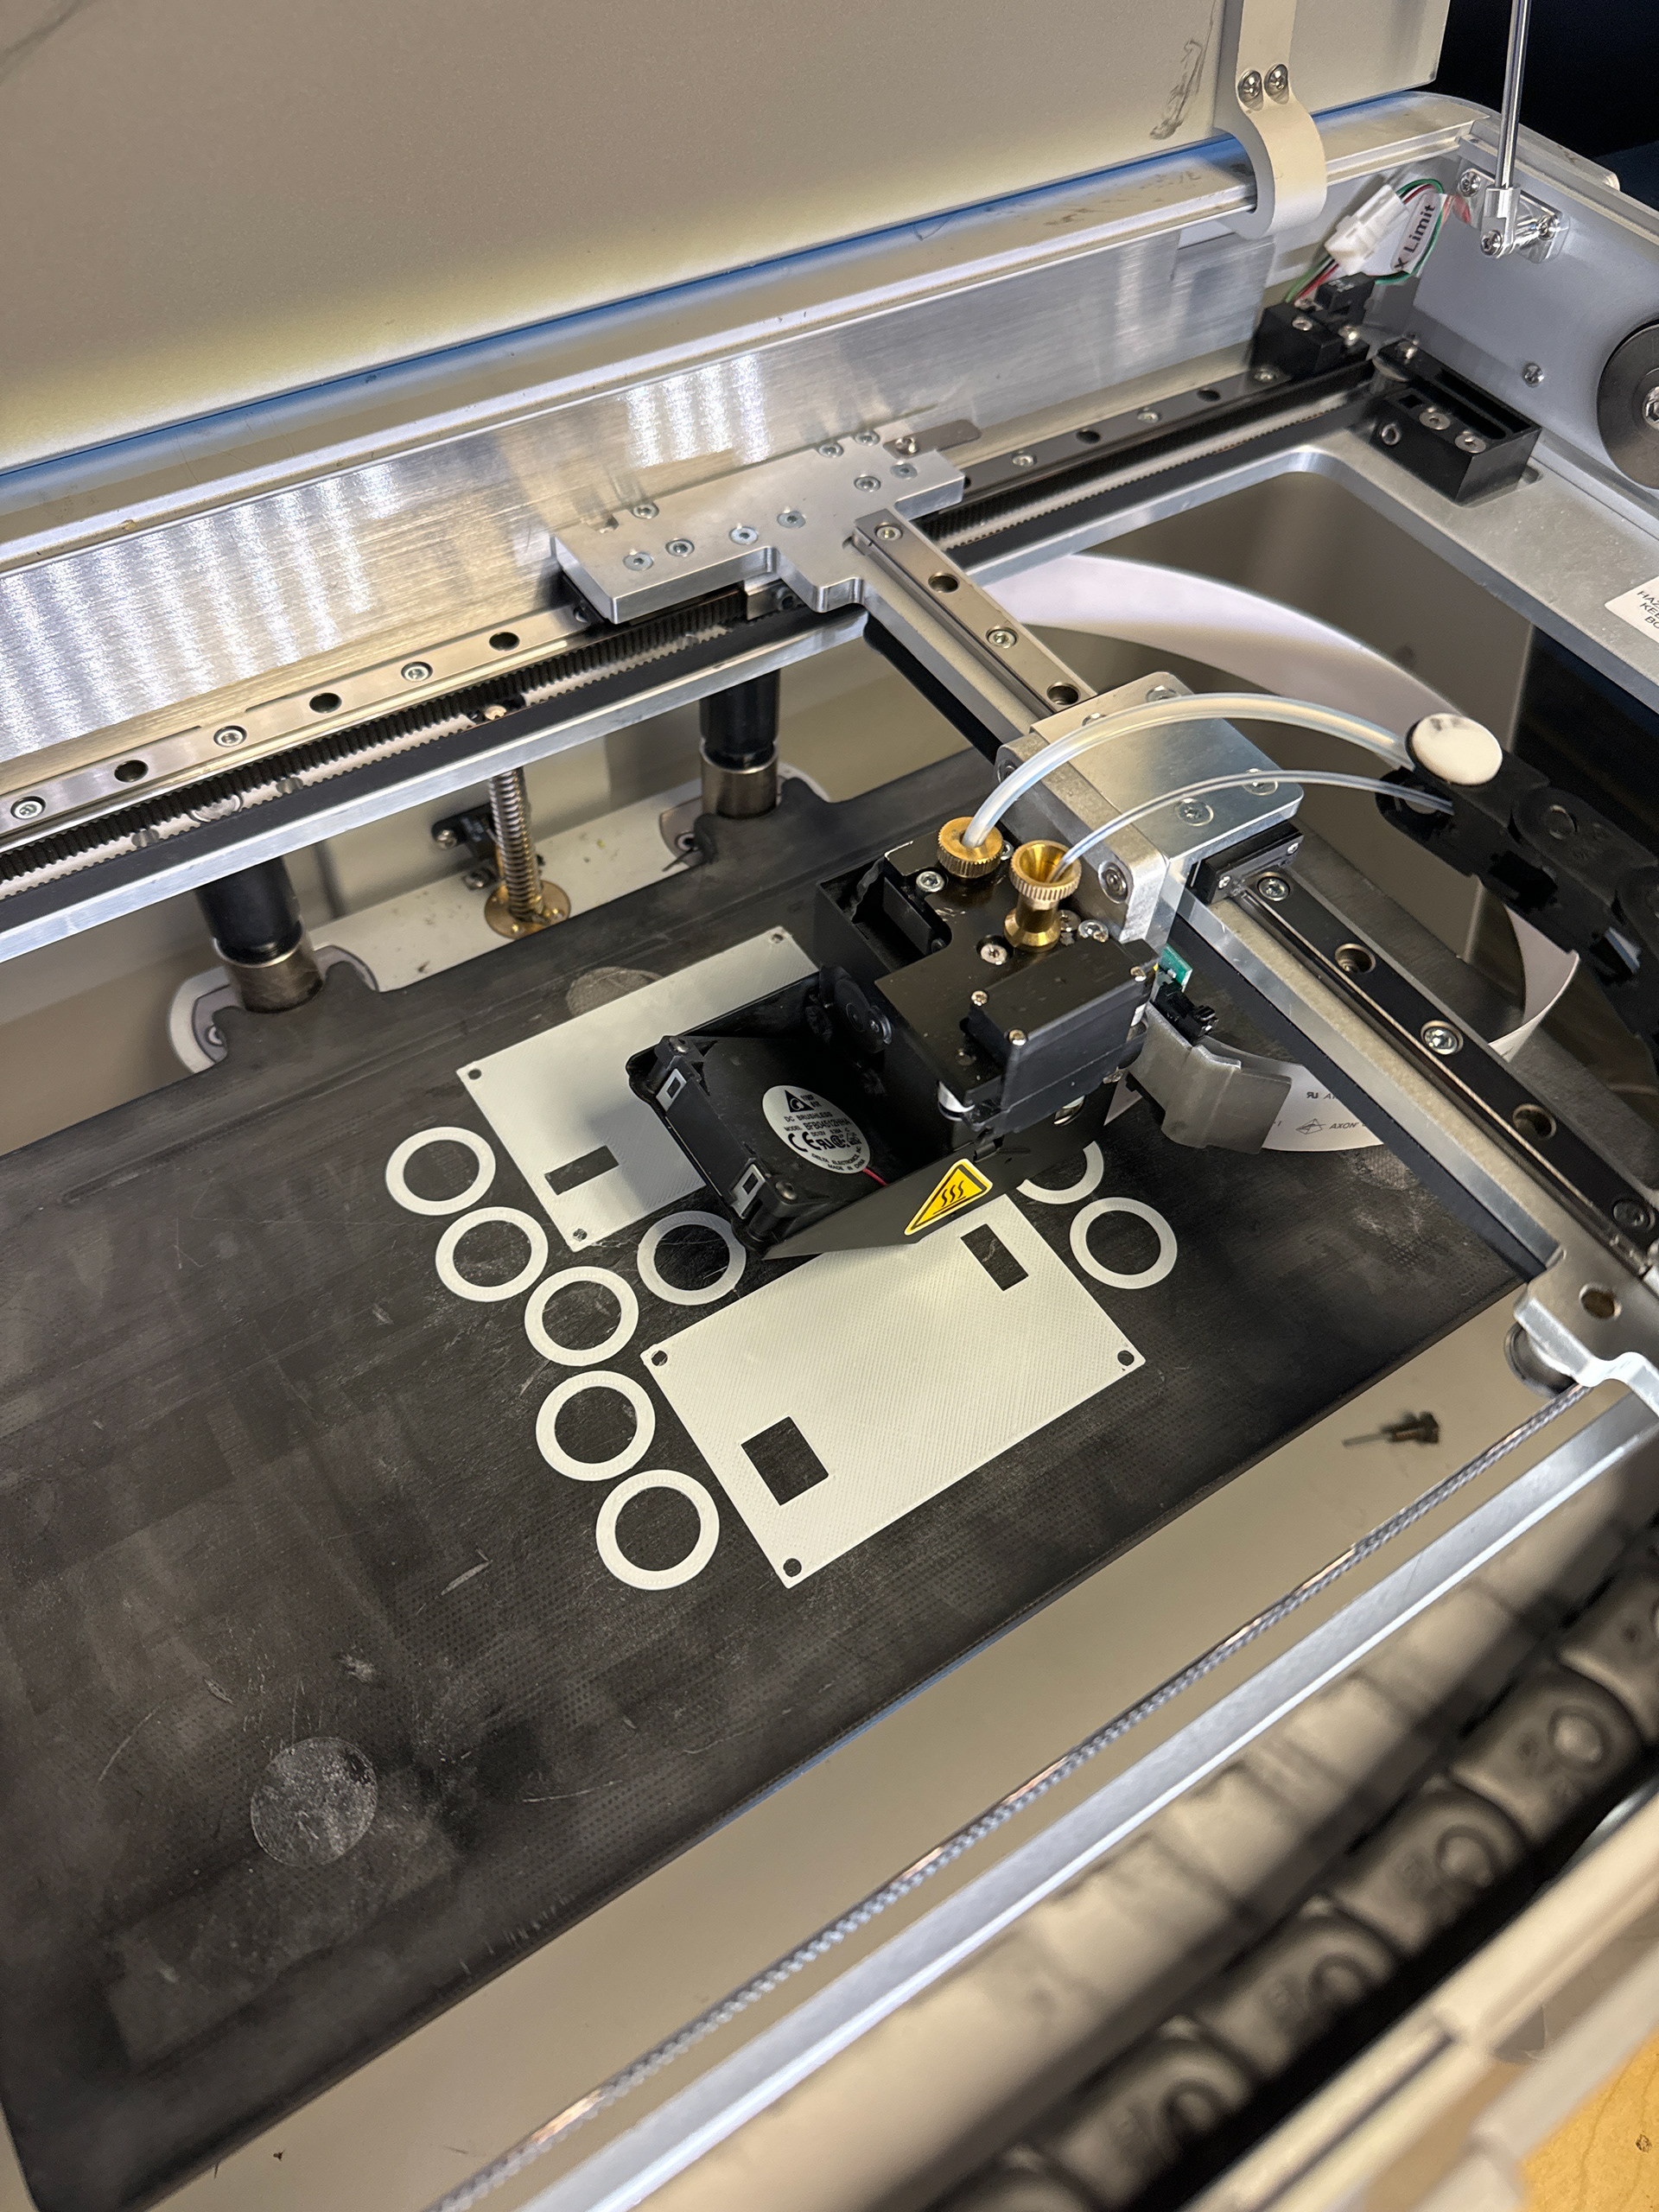
printing component boxes
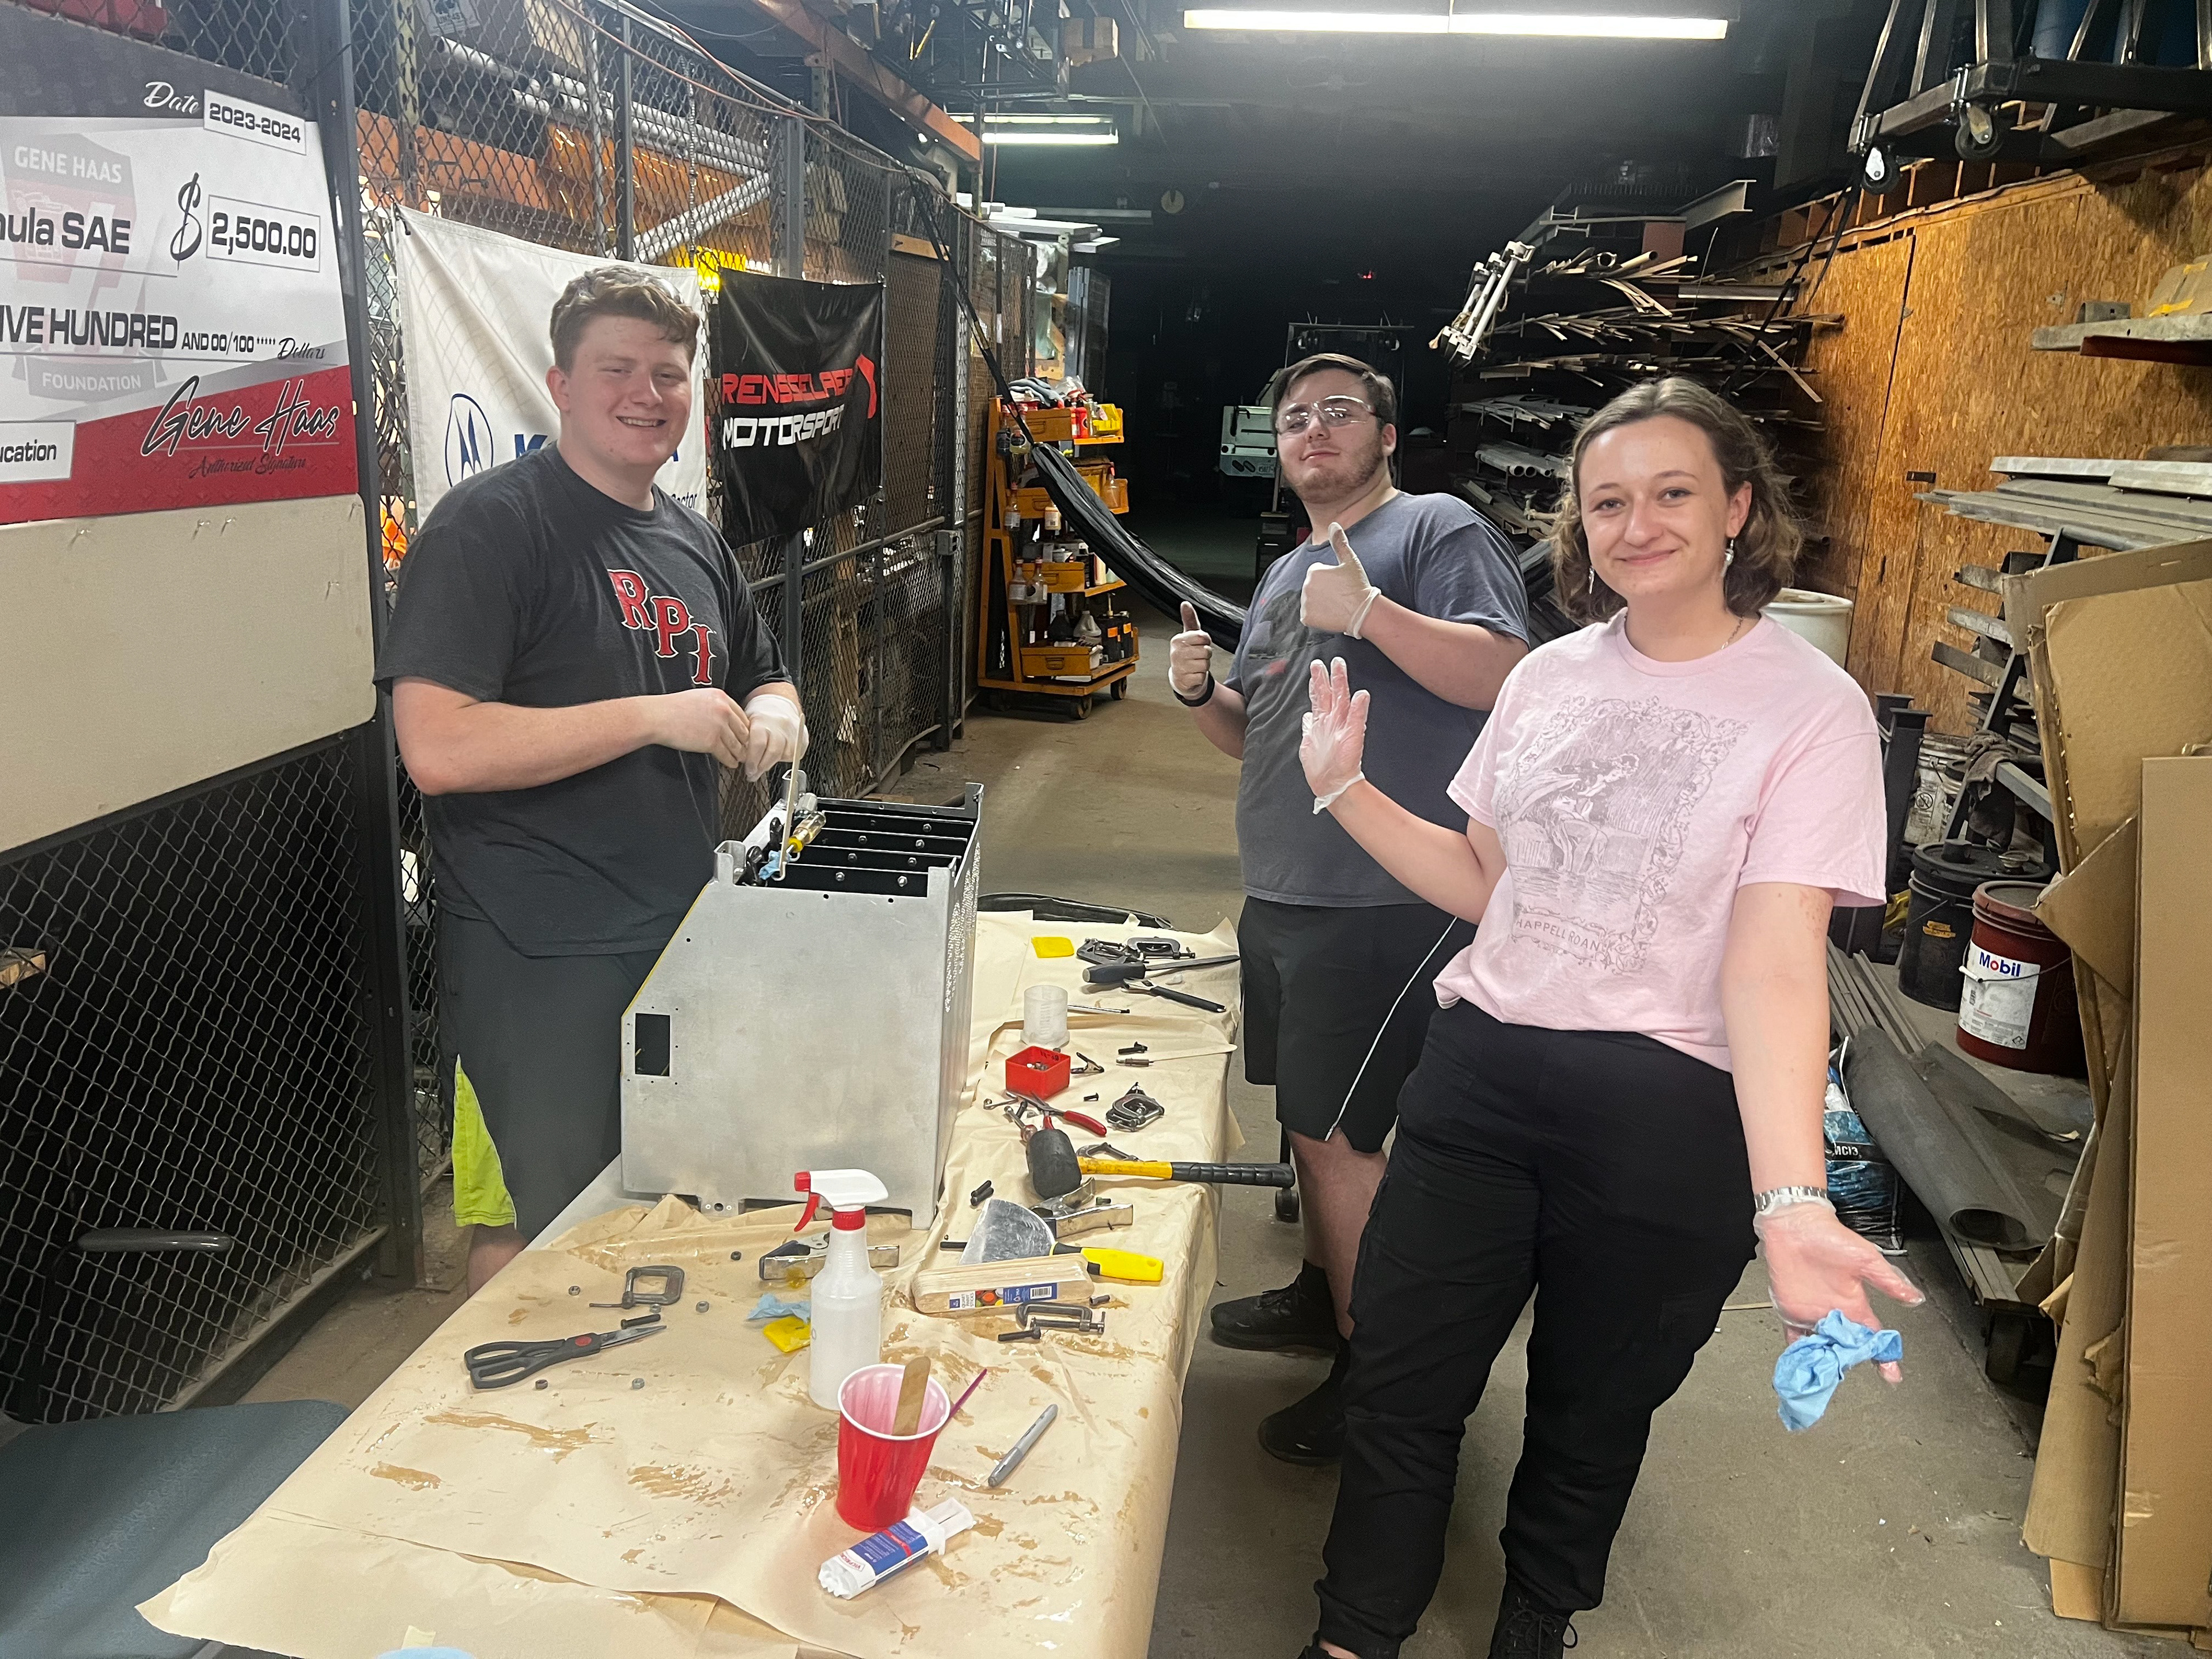
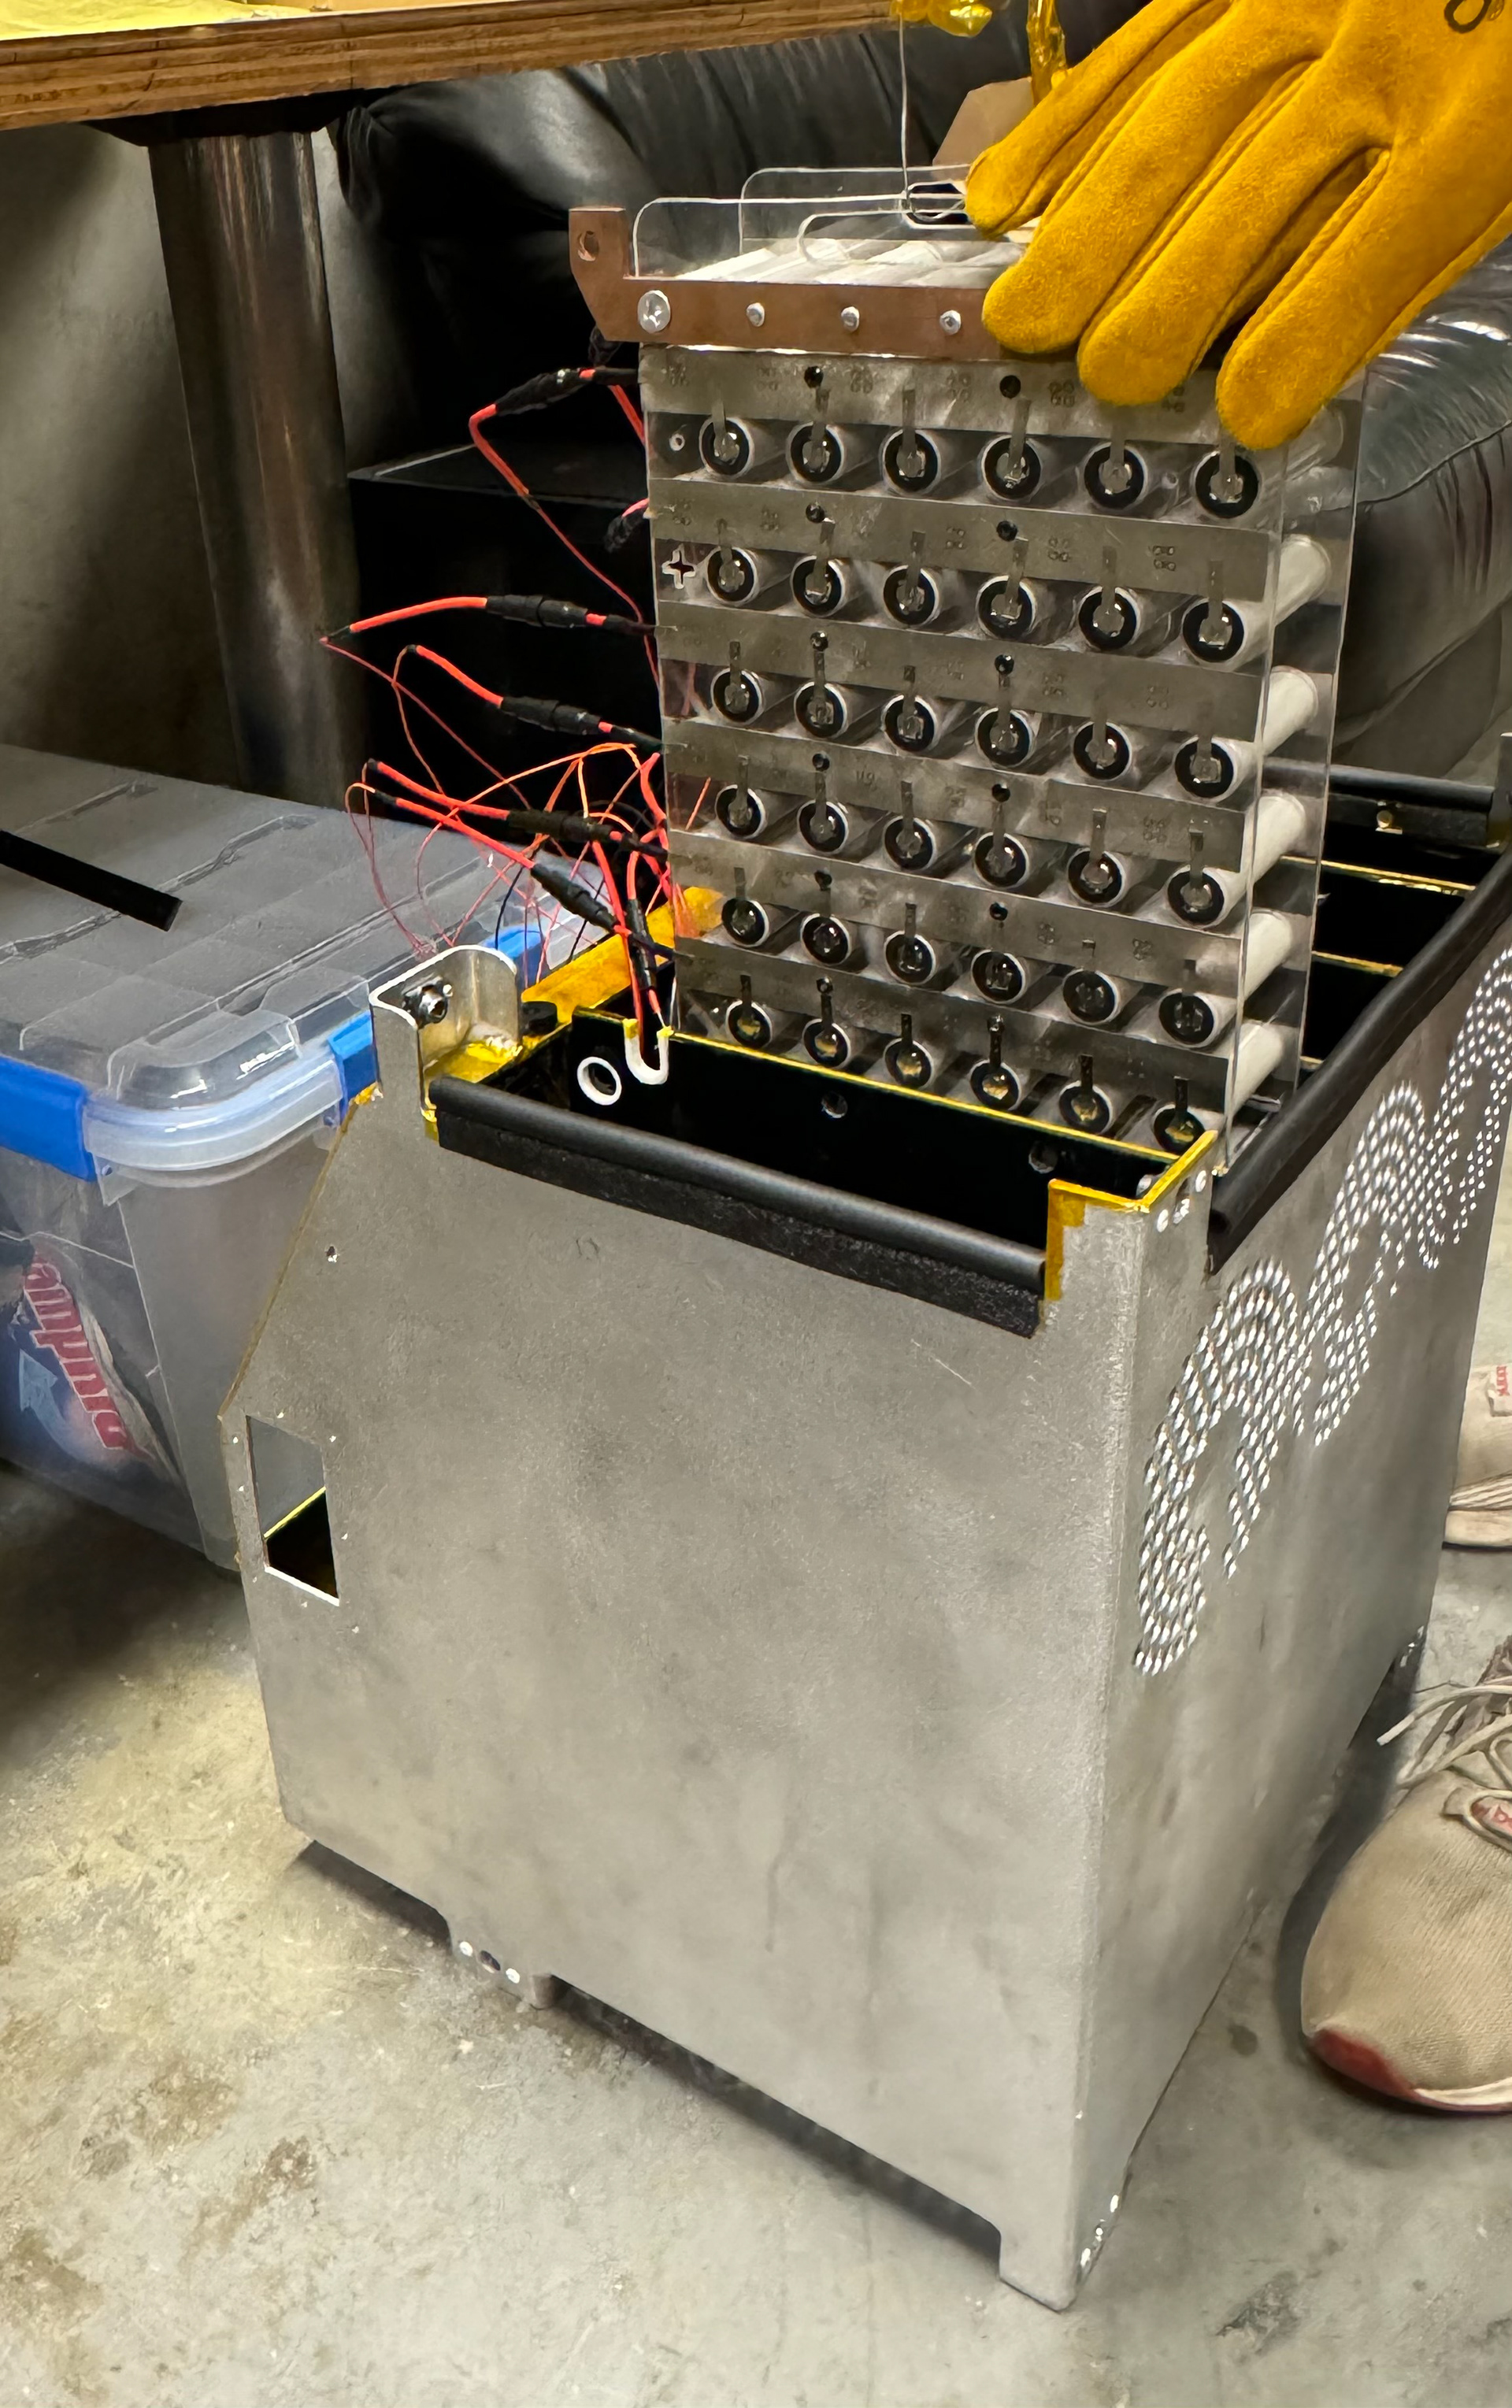
epoxy-ing segment pieces with teammates
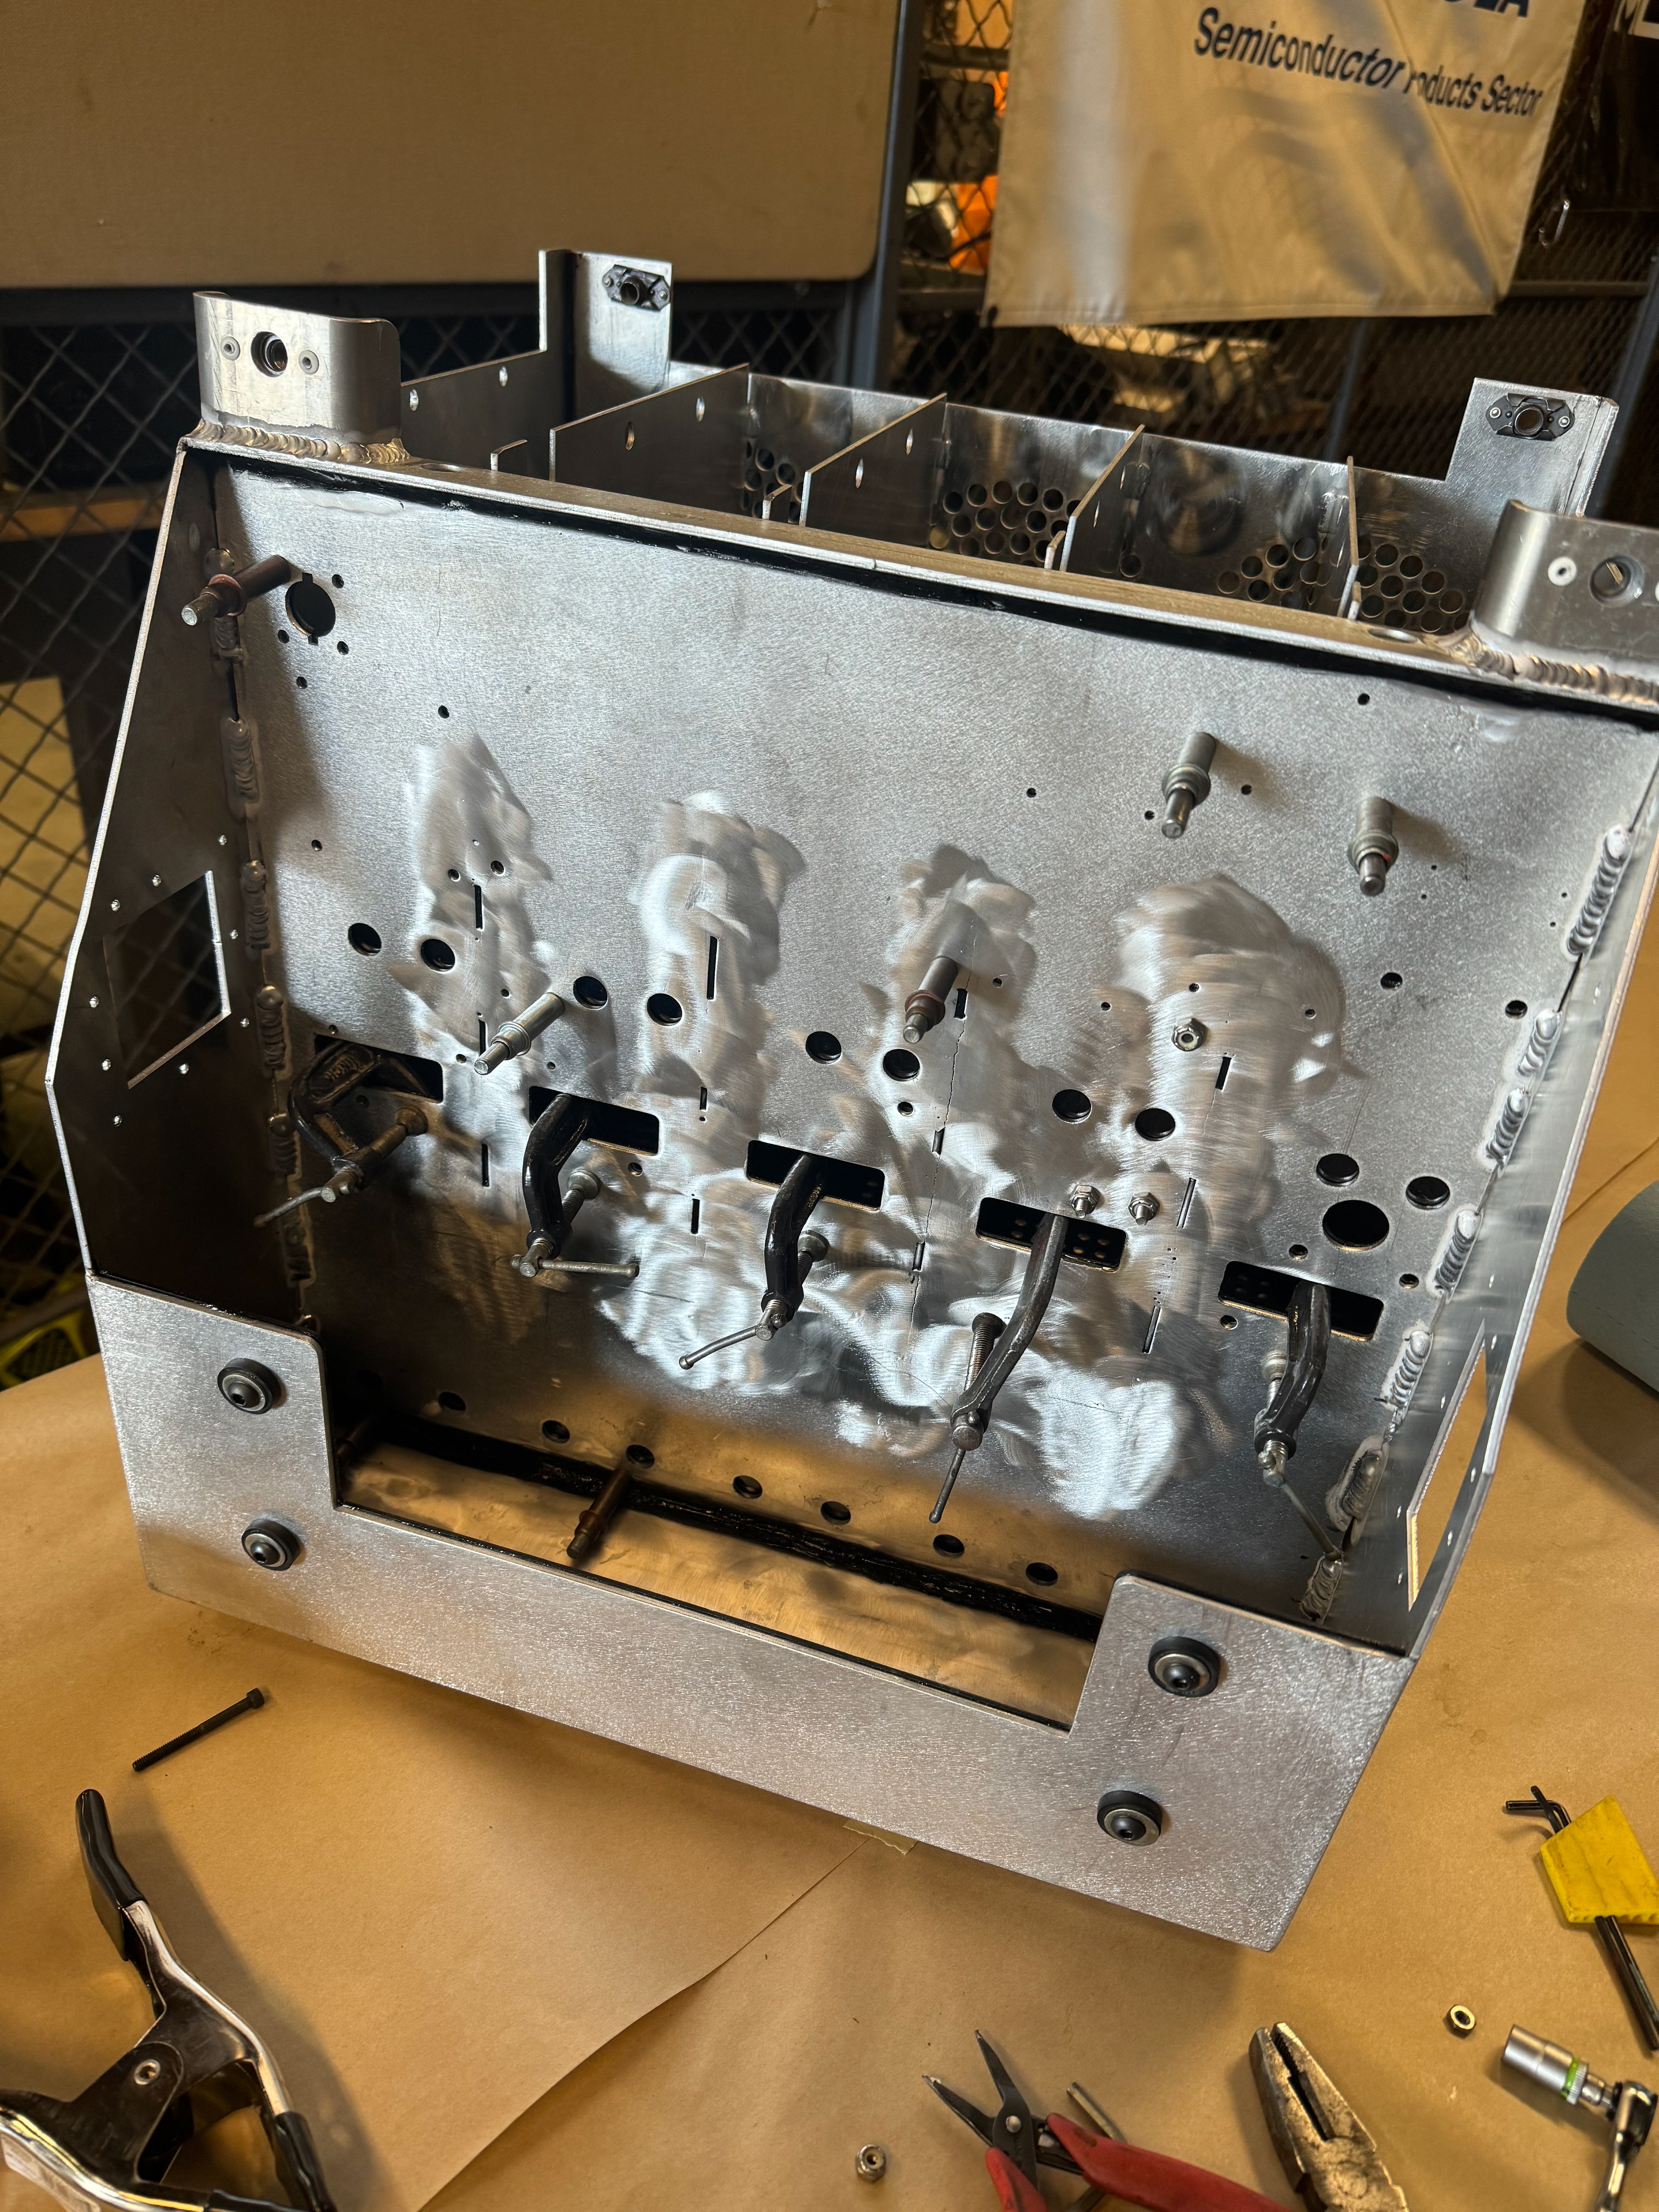
clamping the front component divider
holding the segment pieces during cure
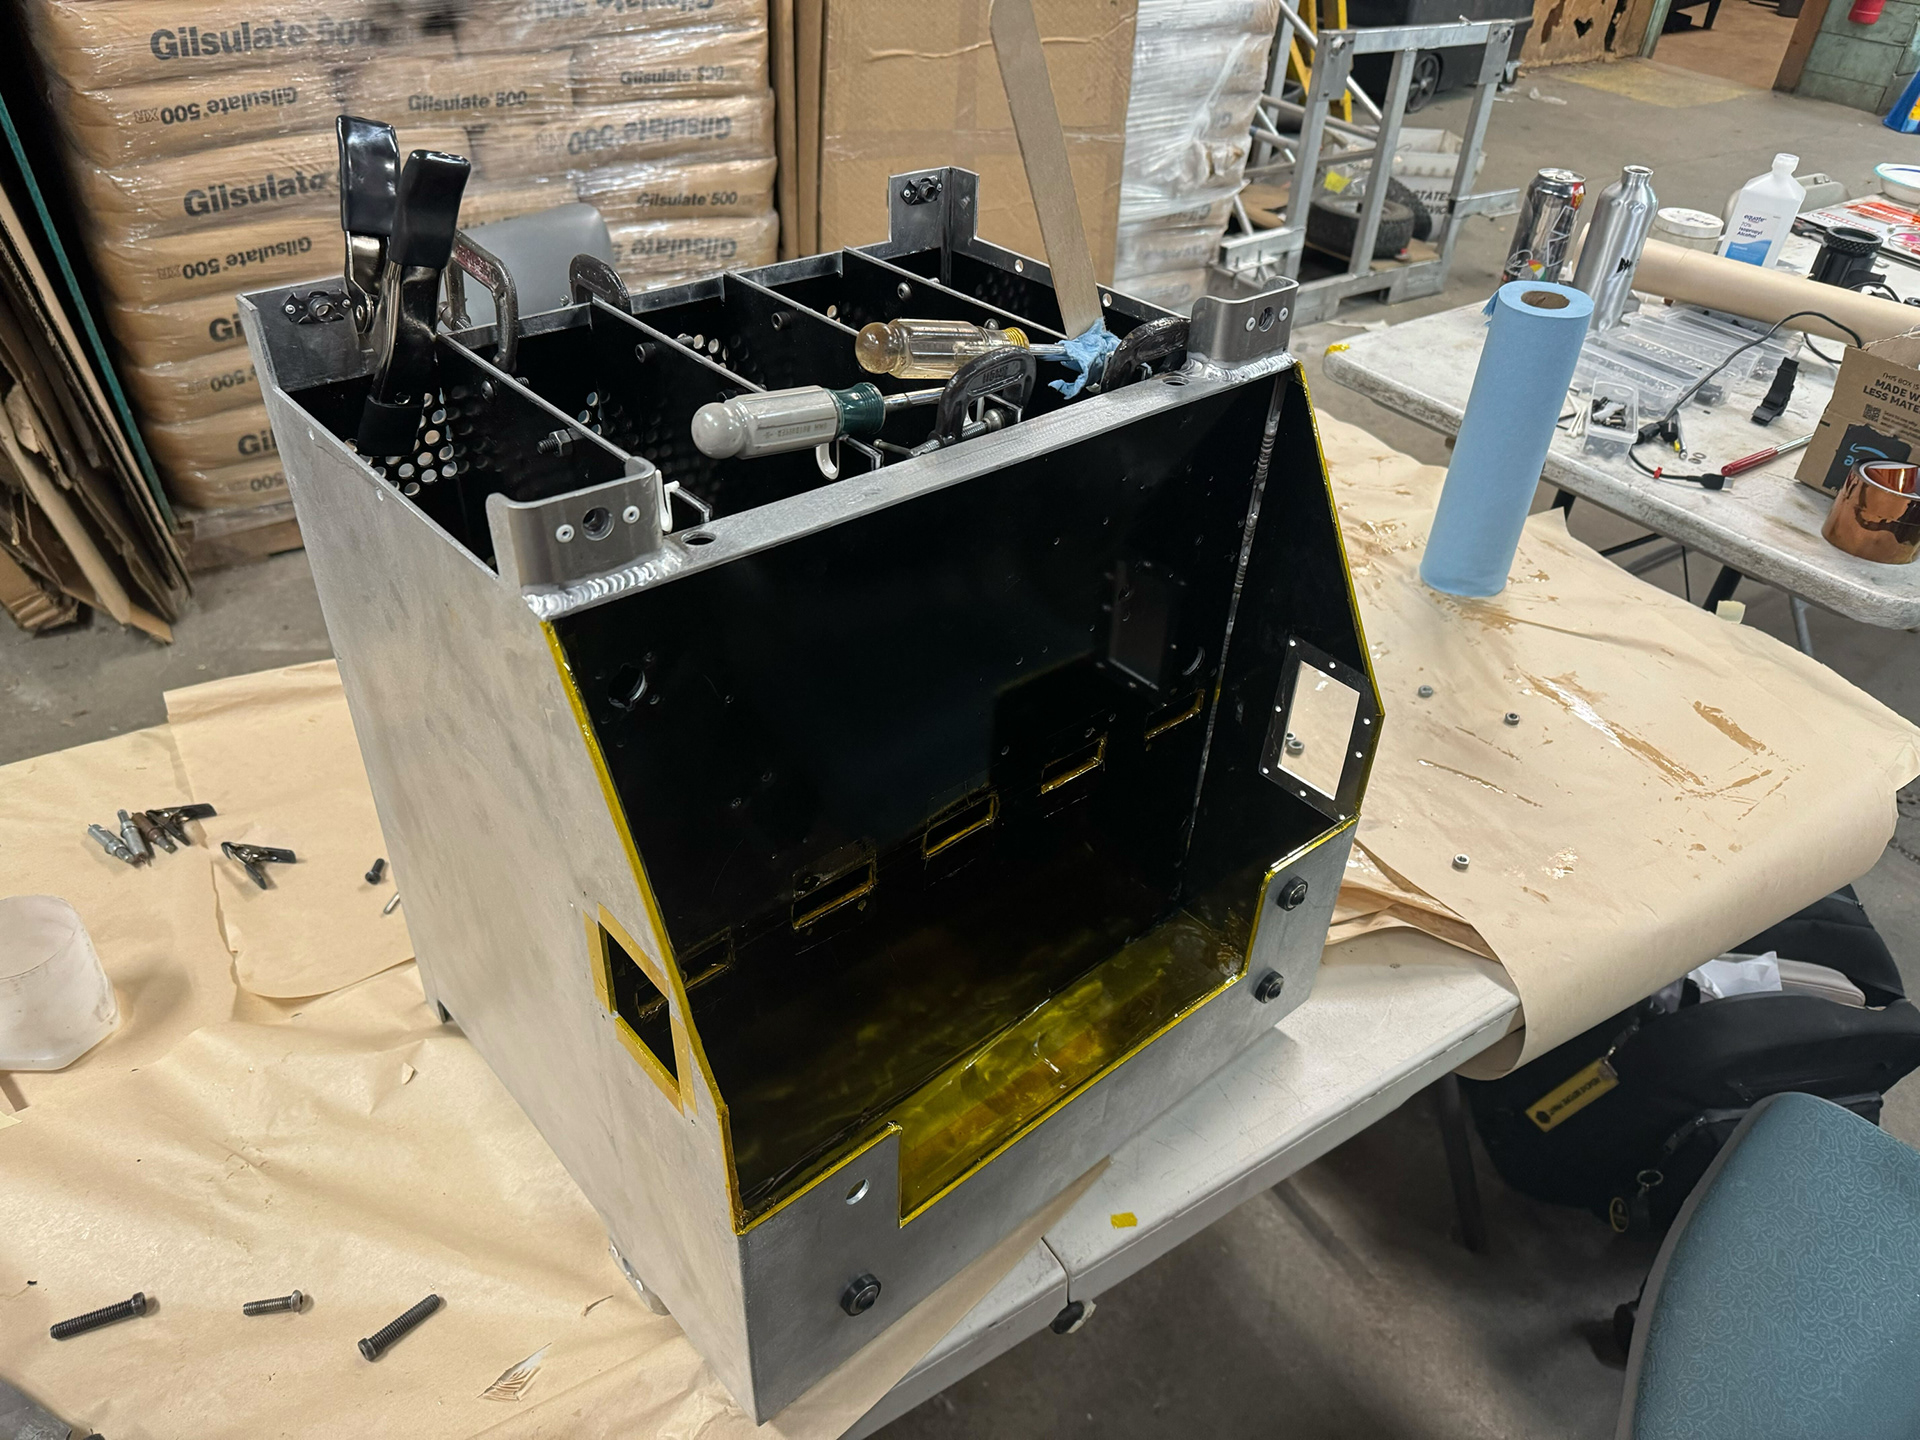
applying kapton tape to remaining exposed metal
fitting lid and weatherstriping
apply HV safety stickers